Django 配置搜索引擎 haystack 与 搜索页面无法返回数据问题
1、Django安装 haystack + whoosh + jieba
haystack是django的开源搜索框架,该框架支持Solr,Elasticsearch,Whoosh, 搜索引擎量。 Whoosh是一个搜索引擎使用,这是一个由纯Python实现的全文搜索引擎,没有二进制文件等,比较小巧,配置比较简单,性能略低。 Jieba是由Whoosh自带的是英文分词,对中文的分词支持不是太好,故用jieba替换whoosh的分词组件。
pip install django-haystack
pip install whoosh
pip install jieba
2、创建项目app,配置settings.py文件
# 全文检索框架haystack的配置
HAYSTACK_CONNECTIONS = {
    "default": {
        # 指定使用的搜索引擎
        'ENGINE': 'haystack.backends.whoosh_backend.WhooshEngine',
        # 'ENGINE': 'haystack.backends.whoosh_cn_backend.WhooshEngine',
        # 指定索引文件存放位置
        'PATH': os.path.join(BASE_DIR, 'whoosh_index'),
        'INCLUDE_SPELLING': True,
    }
}
# 当添加、删除、修改数据时,自动生成索引
HAYSTACK_SIGNAL_PROCESSOR = "haystack.signals.RealtimeSignalProcessor"
# 每页显示条数
HAYSTACK_SEARCH_RESULTS_PER_PAGE = 6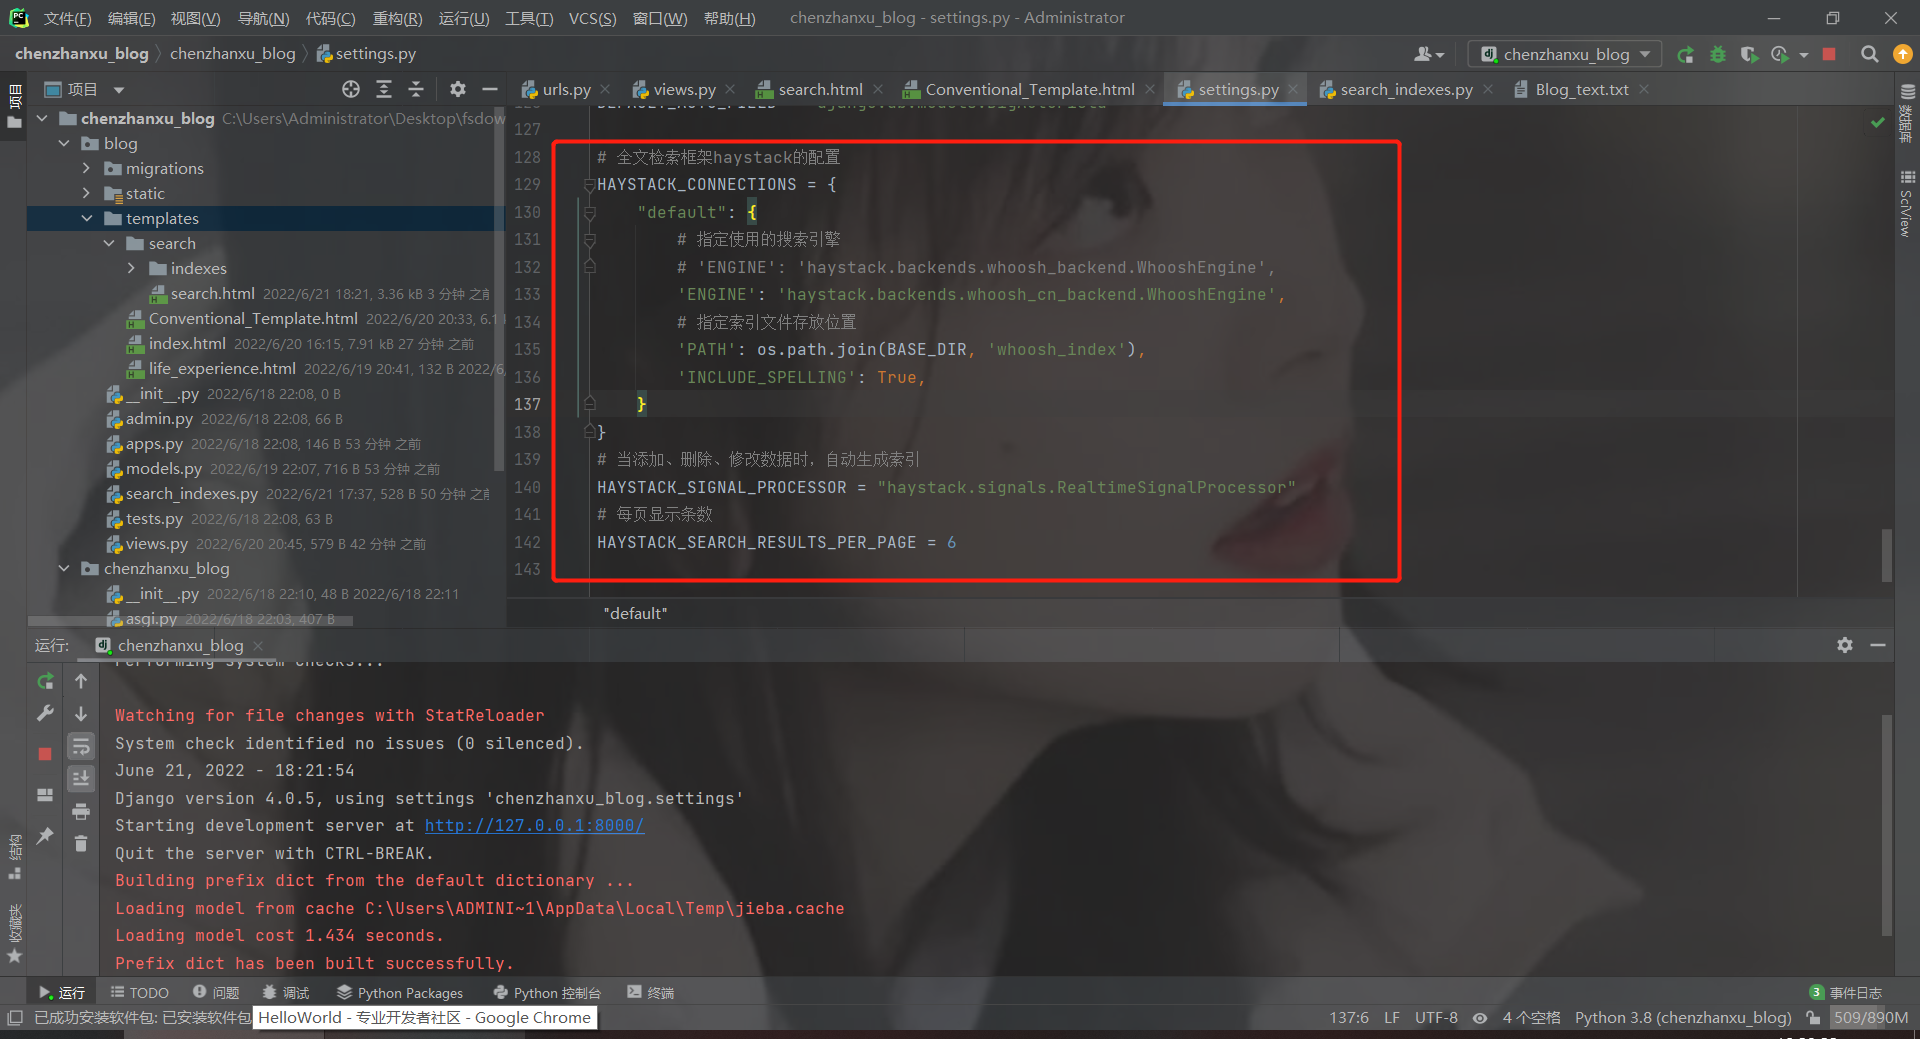
3、创建索引
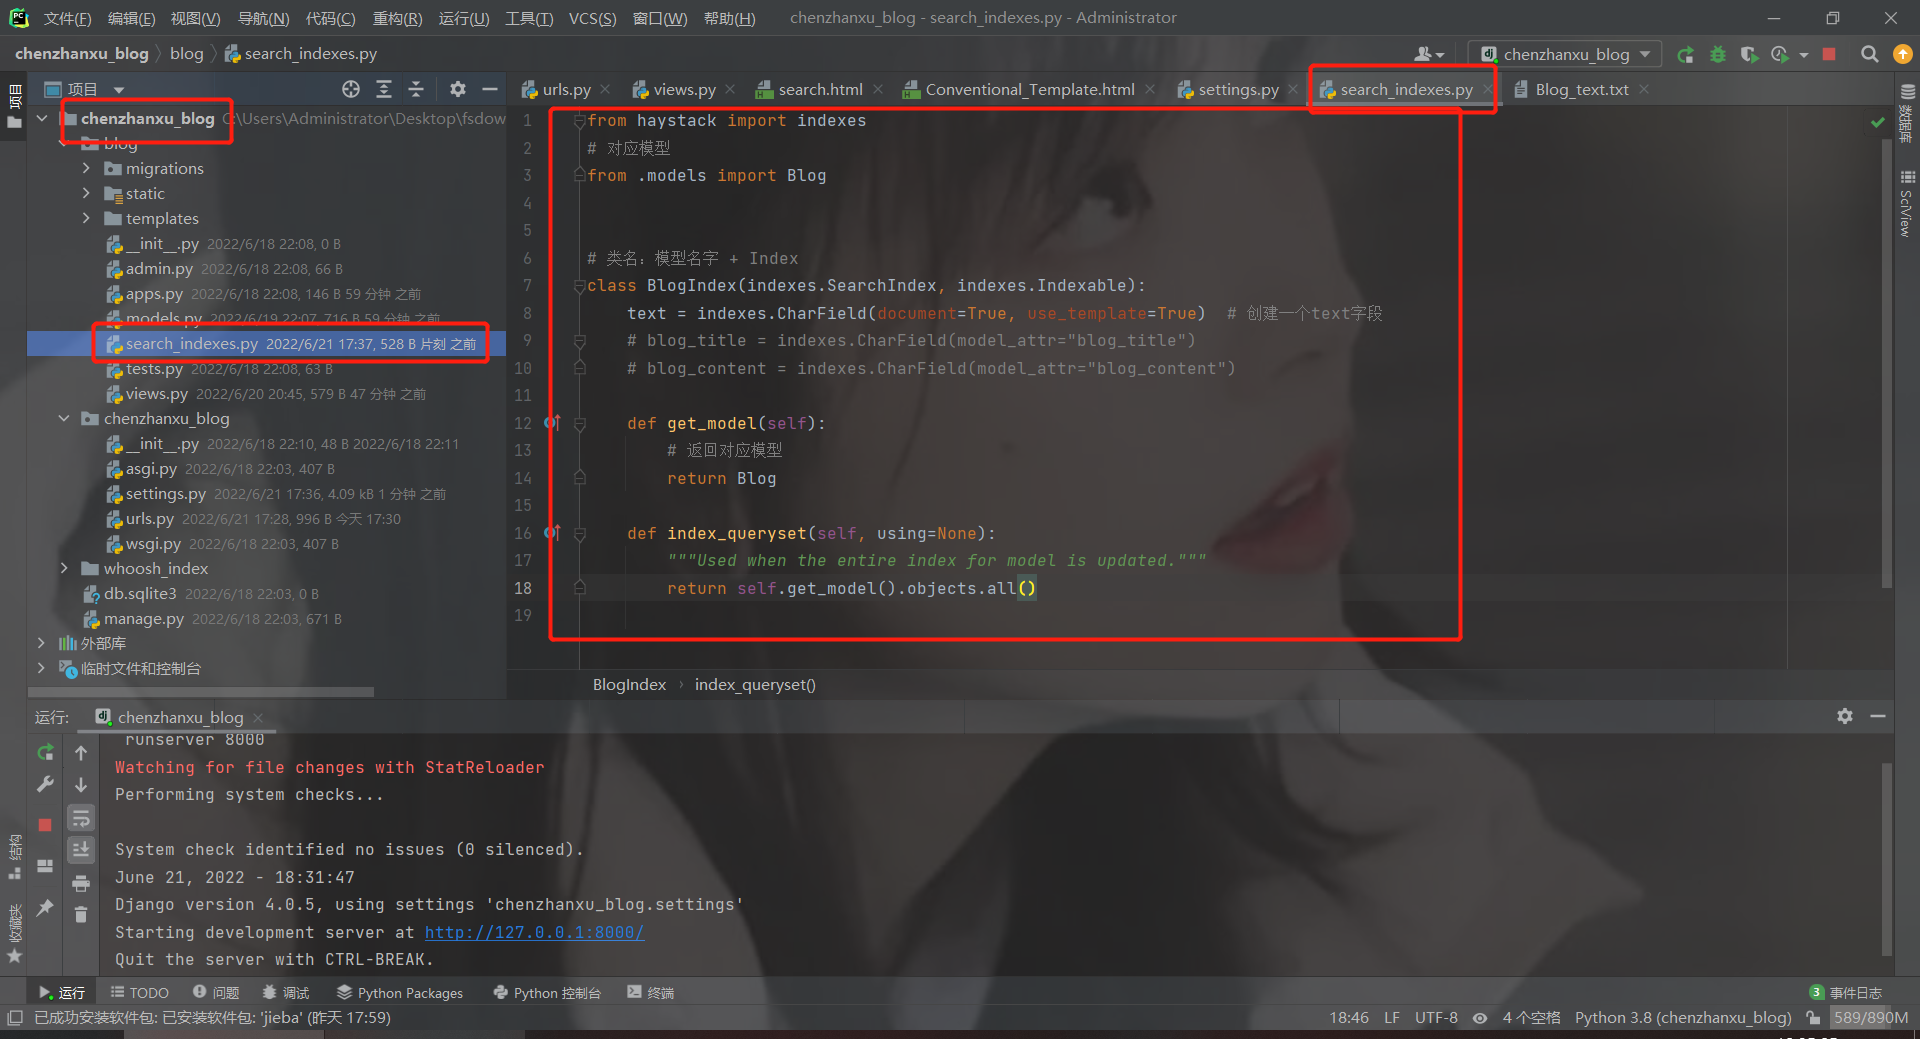
在项目目录下创建search_indexes.py文件,文件名不能修改。
from haystack import indexes
# 对应模型
from .models import Blog


# 类名:模型名字 + Index
class BlogIndex(indexes.SearchIndex, indexes.Indexable):
    text = indexes.CharField(document=True, use_template=True)  # 创建一个text字段
    # blog_title = indexes.CharField(model_attr="blog_title")
    # blog_content = indexes.CharField(model_attr="blog_content")

    def get_model(self):
        # 返回对应模型
        return Blog

    def index_queryset(self, using=None):
        """Used when the entire index for model is updated."""
        return self.get_model().objects.all()
4、创建数据模板路径
blog/templates/search/indexes/blog/Blog_text.txt(模型名字 + _text.txt)
模板的作用是让text字段包含的内容,后面有搜索模板会用到。
txt中的内容根据模型类中需要进行搜索的字段进行设置。如我的models.py下的:
 博客文章的标题和内容(blog_title、blog_content)就是我搜索的字段。

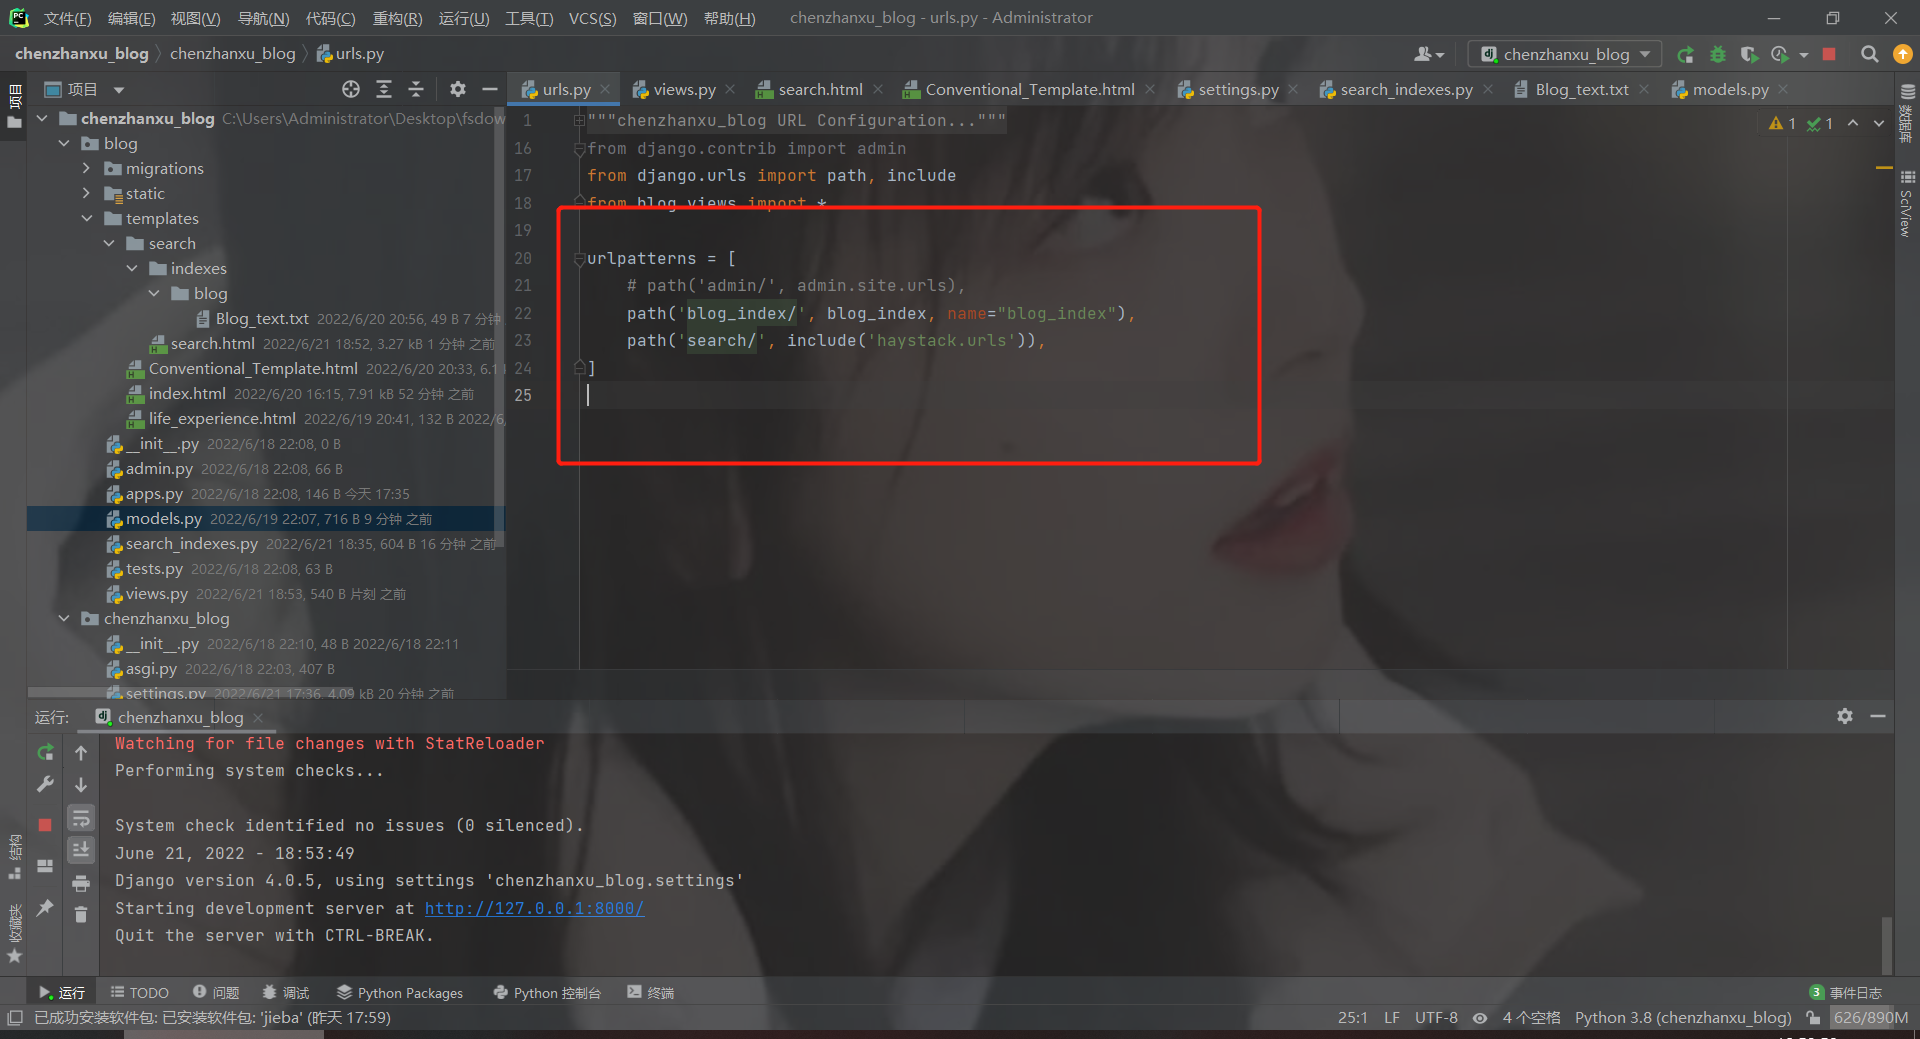
5、配置路由
from django.contrib import admin
from django.urls import path, include
from blog.views import *

urlpatterns = [
    # path('admin/', admin.site.urls),
    path('blog_index/', blog_index, name="blog_index"),
    path('search/', include('haystack.urls')),
]
6、创建search.html
在目录"templates/search/"下建立search.html作为检索结果返回的页面(可自己进行定制)
{% extends 'Conventional_Template.html' %}
{% load static %}

{% block title %}
    <title>搜索页面</title>
{% endblock %}

{% block section %}

    <section id="bricks">
        <div class="row masonry">
            <div style="display: flex;justify-content: center;align-items: center;">
                <h1>含关键字 -{{ query }}- 的博客文章</h1>
            </div>
            <!-- brick-wrapper -->
            <div class="bricks-wrapper">
                <div class="grid-sizer"></div>
                {% if query %}
                    {% for result in page.object_list %}
                        <article class="brick entry animate-this">
                            <div class="entry-thumb">
                                <a href="#" class="thumb-link">
                                    <img src="{% static 'images/thumbs/liberty.jpg' %}" alt="Liberty">
                                </a>
                            </div>
                            <div class="entry-text">
                                <div class="entry-header">
                                    <div class="entry-meta">
                                    <span class="cat-links">
                                        <a>标签</a>
                                    </span>
                                        <span class="cat-links">
                                        <a>标签</a>
                                    </span>
                                    </div>
                                    <h1 class="entry-title"><a href="#">{{ result.object.blog_title }}</a></h1>
                                </div>
                                <div class="entry-excerpt">
                                    {% autoescape off %}
                                        {{ result.object.blog_content|striptags|truncatechars:150 }}
                                    {% endautoescape %}
                                </div>
                            </div>
                        </article>
                    {% endfor %}
                {% endif %}
            </div> <!-- end brick-wrapper -->
        </div> <!-- end row -->

        <!-- 分页功能 -->
        <div class="row">
            <nav class="pagination">
                {% if page.has_previous %}
                    <span class="page-numbers prev">
                        <a href="?q={{ query }}&page={{ page.previous_page_number }}">Prev</a>
                    </span>
                {% else %}
                {% endif %}

                {% for pindex in paginator.page_range %}
                    {% if pindex == page.number %}
                        <a href="?q={{ query }}&page={{ pindex }}" class="page-numbers">{{ pindex }}</a>
                    {% else %}
                        <a href="?q={{ query }}&page={{ pindex }}" class="page-numbers">{{ pindex }}</a>
                    {% endif %}
                {% endfor %}

                {% if page.has_next %}
                    <a href="?q={{ query }}&page={{ page.next_page_number }}" class="page-numbers next">Next</a>
                {% else %}
                {% endif %}
            </nav>
        </div>
    </section>

{% endblock %}
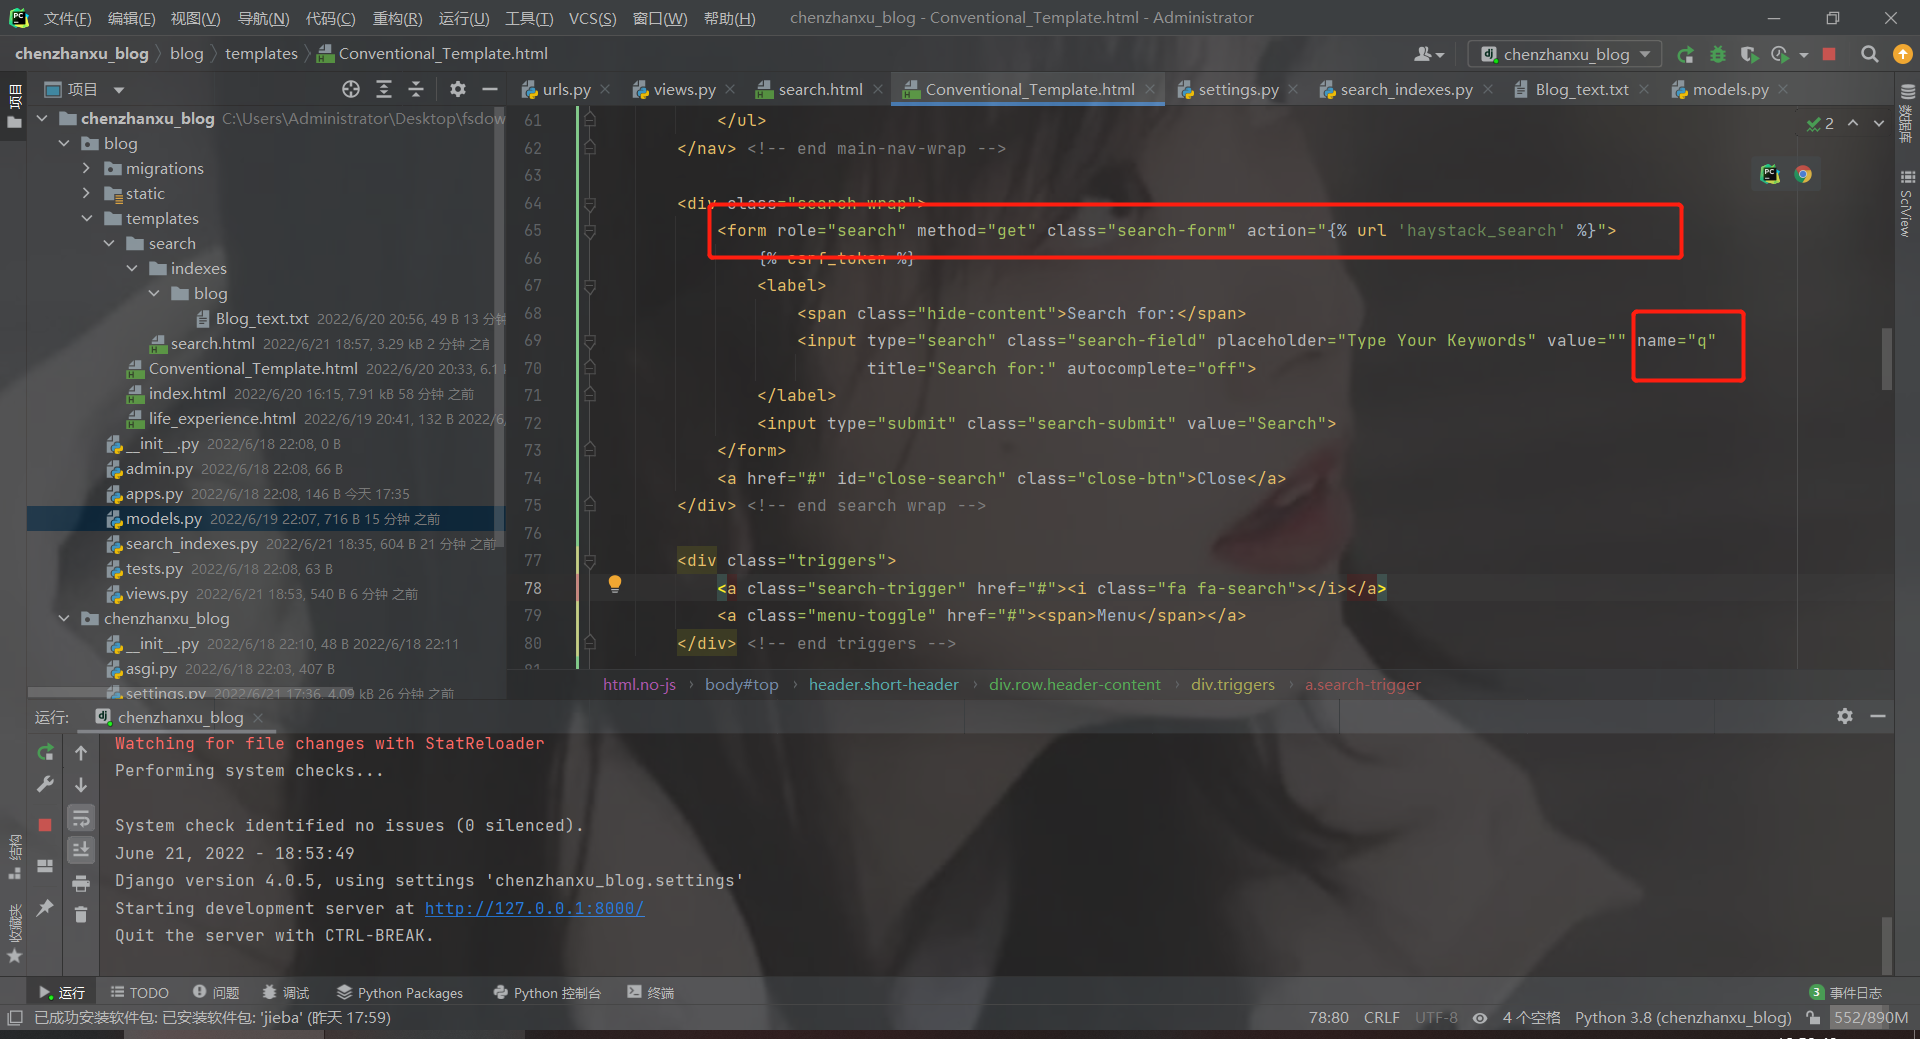
要注意修改路由路径,name="q"是固定的。
7、创建ChineseAnalyzer.py文件
chenzhanxu_blog\Lib\site-packages\haystack\backends (虚拟环境中-找到haystack下的backends 然后创建ChineseAnalyzer.py文件)
import jieba
from whoosh.analysis import Tokenizer, Token


class ChineseTokenizer(Tokenizer):
    def __call__(self, value, positions=False, chars=False,
                 keeporiginal=False, removestops=True,
                 start_pos=0, start_char=0, mode='', **kwargs):
        t = Token(positions, chars, removestops=removestops, mode=mode,
                  **kwargs)
        seglist = jieba.cut(value, cut_all=True)
        for w in seglist:
            t.original = t.text = w
            t.boost = 1.0
            if positions:
                t.pos = start_pos + value.find(w)
            if chars:
                t.startchar = start_char + value.find(w)
                t.endchar = start_char + value.find(w) + len(w)
            yield t


def ChineseAnalyzer():
    return ChineseTokenizer()
8、复制whoosh_backend.py文件,改名为whoosh_cn_backend.py
chenzhanxu_blog\Lib\site-packages\haystack\backends (虚拟环境中-找到haystack下的backends目录下的whoosh_backend.py,然后复制(复制的文件名末尾有个空格,记得删除)到当前目录下改名whoosh_cn_backend.py) 记得在whoosh_cn_backend.py文件中添加ChineseAnalyzer.py文件。
from haystack.backends.ChineseAnalyzer
import ChineseAnalyzer
然后查找whoosh_cn_backend.py文件中schema_fields[field_class.index_fieldname] = TEXT()。
#schema_fields[field_class.index_fieldname] = TEXT(
#     stored=True,
#     analyzer=field_class.analyzer or StemmingAnalyzer(),
#     field_boost=field_class.boost,
#     sortable=True,
# )
schema_fields[field_class.index_fieldname] = TEXT(
    stored=True, analyzer=ChineseAnalyzer(),
    field_boost=field_class.boost,
    sortable=True,
)
9、生成索引
python manage.py rebuild_index
# (可选更新索引)python manage.py update_index如果在settings.py添加了HAYSTACK_SIGNAL_PROCESSOR = 'haystack.signals.RealtimeSignalProcessor'就不用手动更新索引,系统会自动更新。
生成成功后在根目录下会生成一个whoosh_index的文件夹。

配置 haystack 搜索引擎的问题
1、search.html搜索页面无法返回数据问题
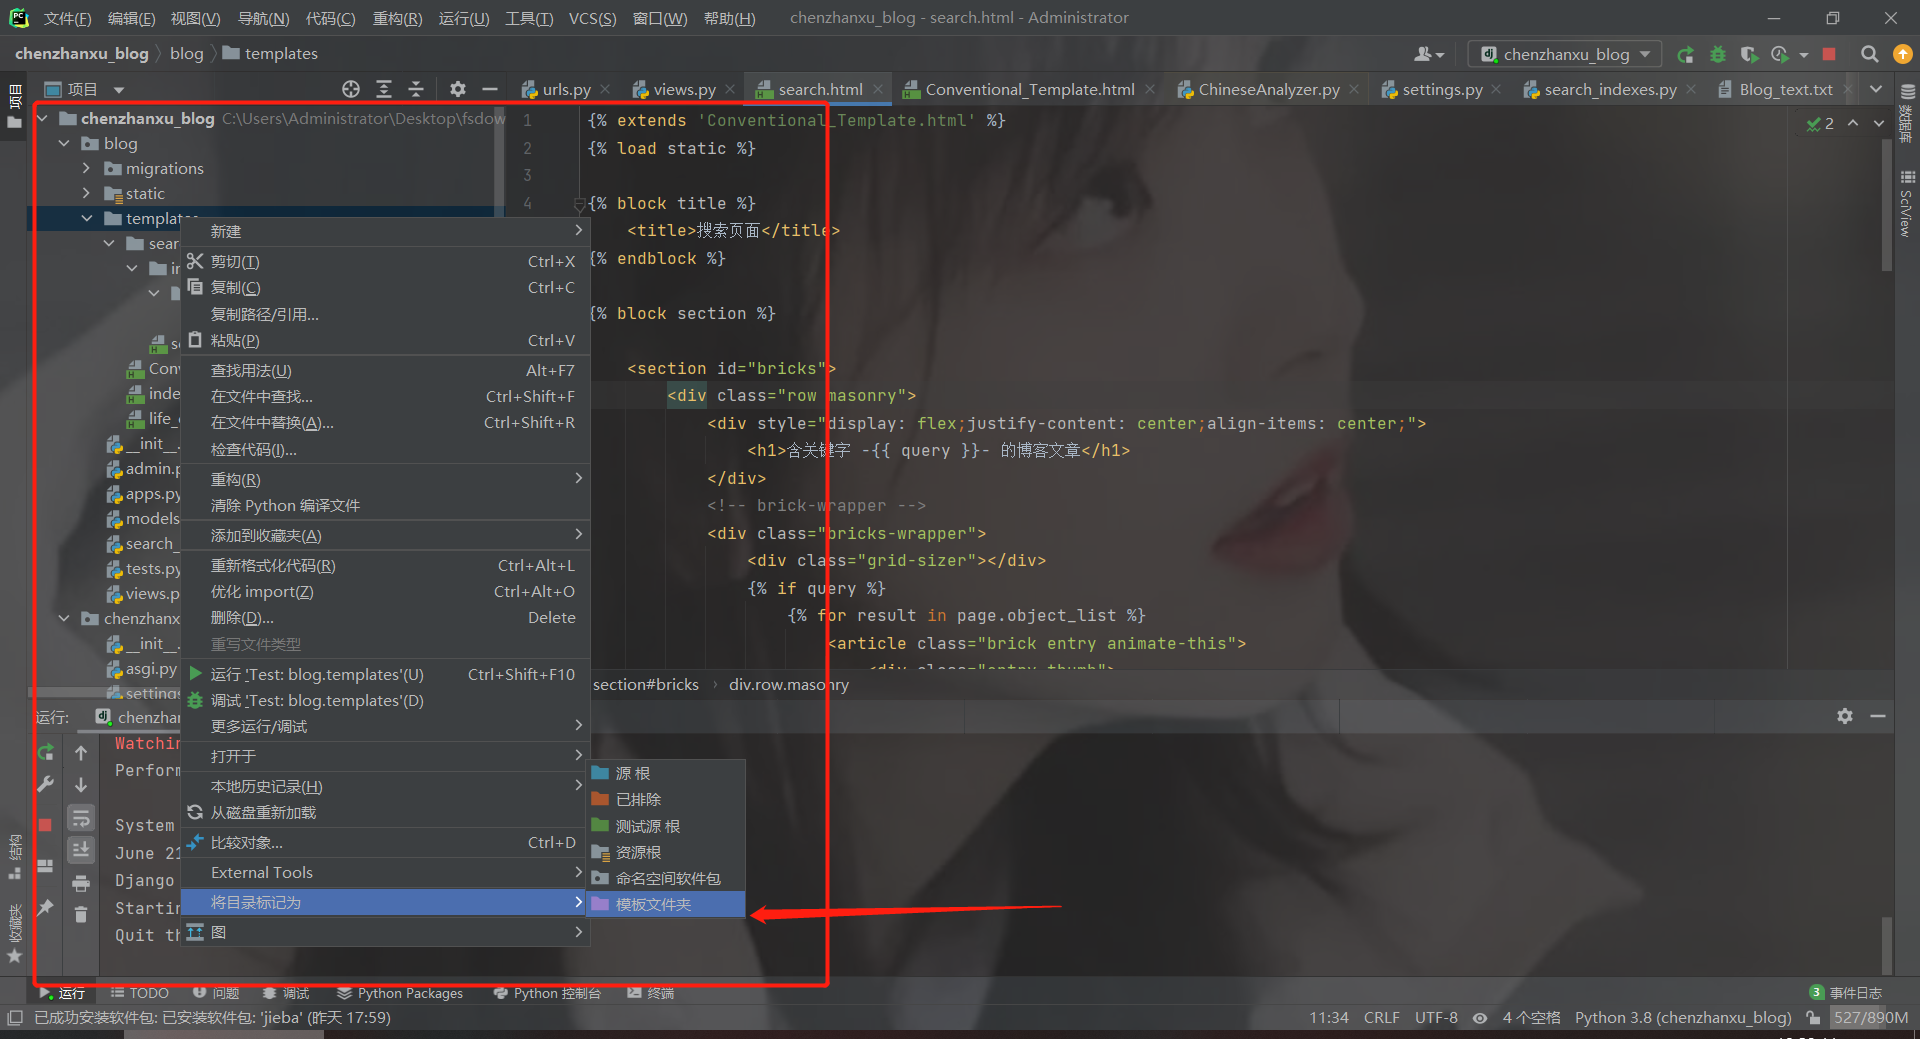
问题原因:可能是PyCharm创建Django是定义templates为模板文件,导致 haystack 无法自动找到templates文件夹,也就无法找到templates文件夹下的search.html模板,无法渲染成功。
解决方法:PyCharm创建Django项目时会把templates文件夹定义成为模板文件,要改成普通文件夹。
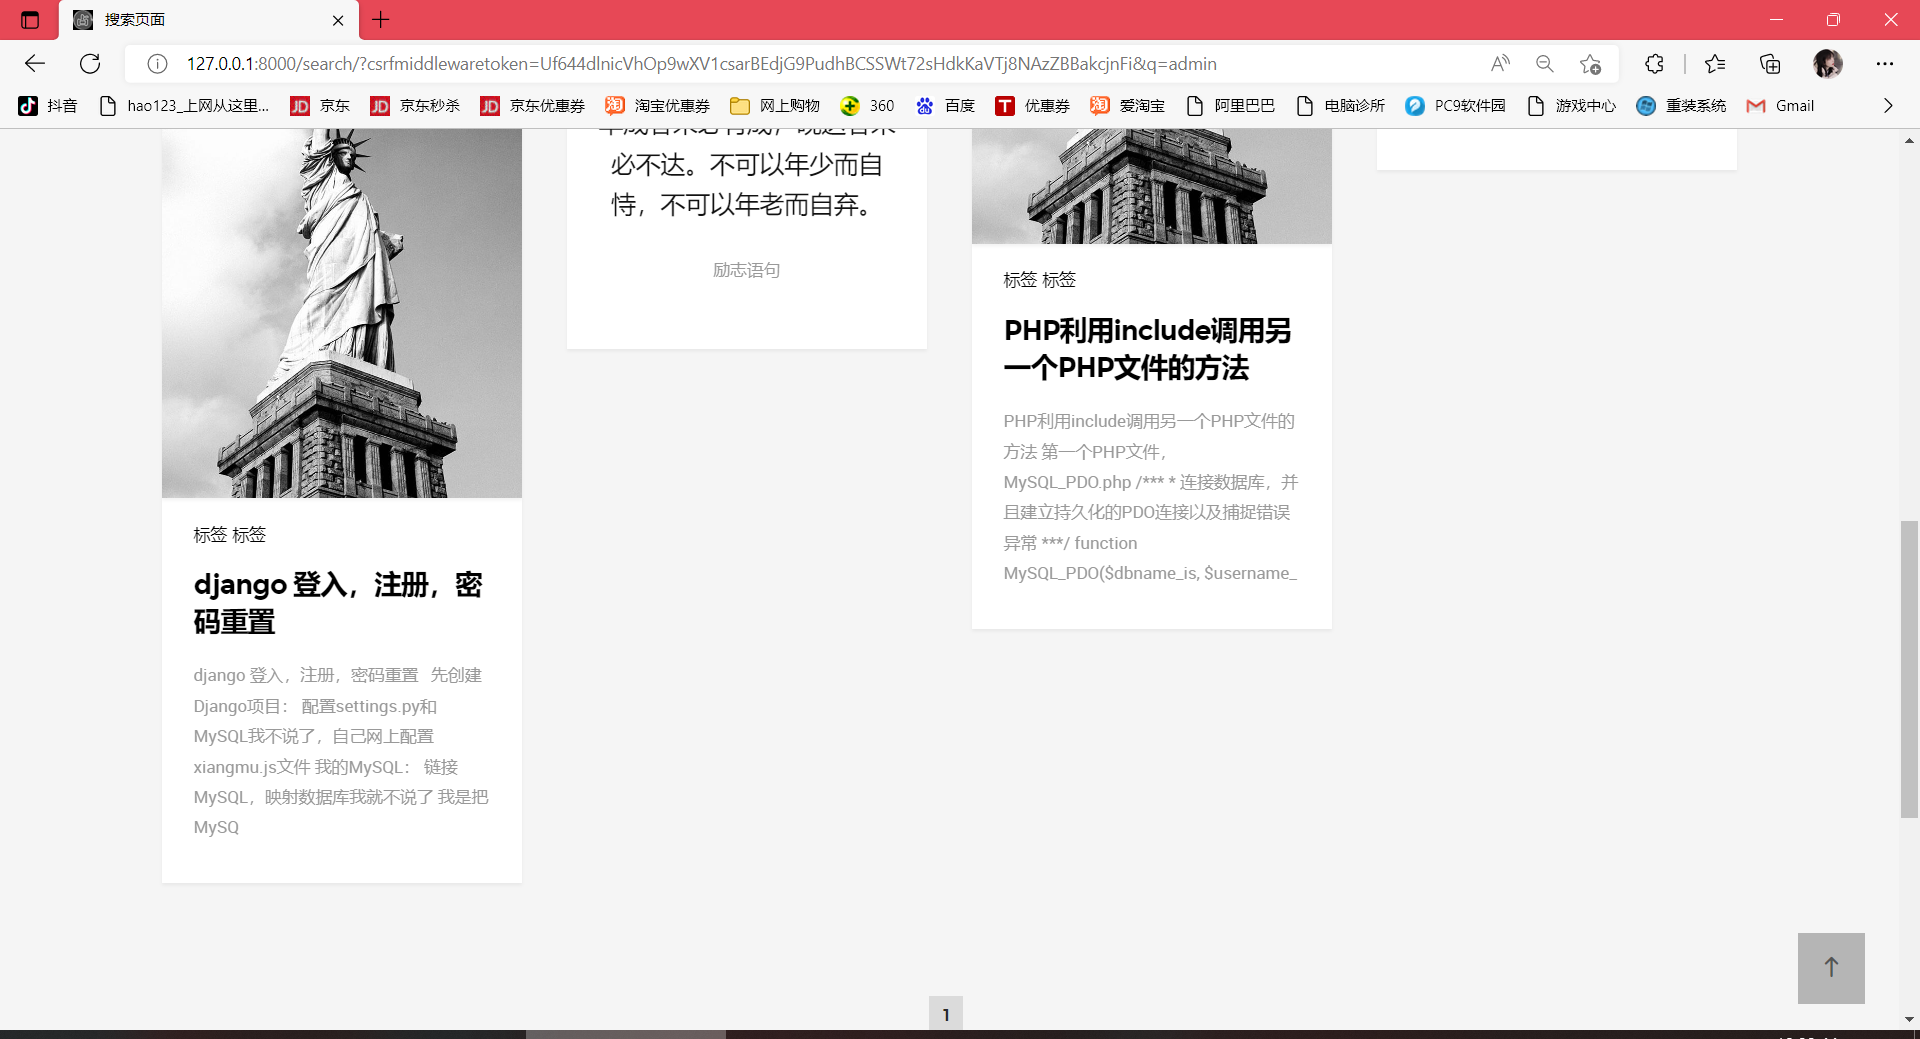
成品效果图

