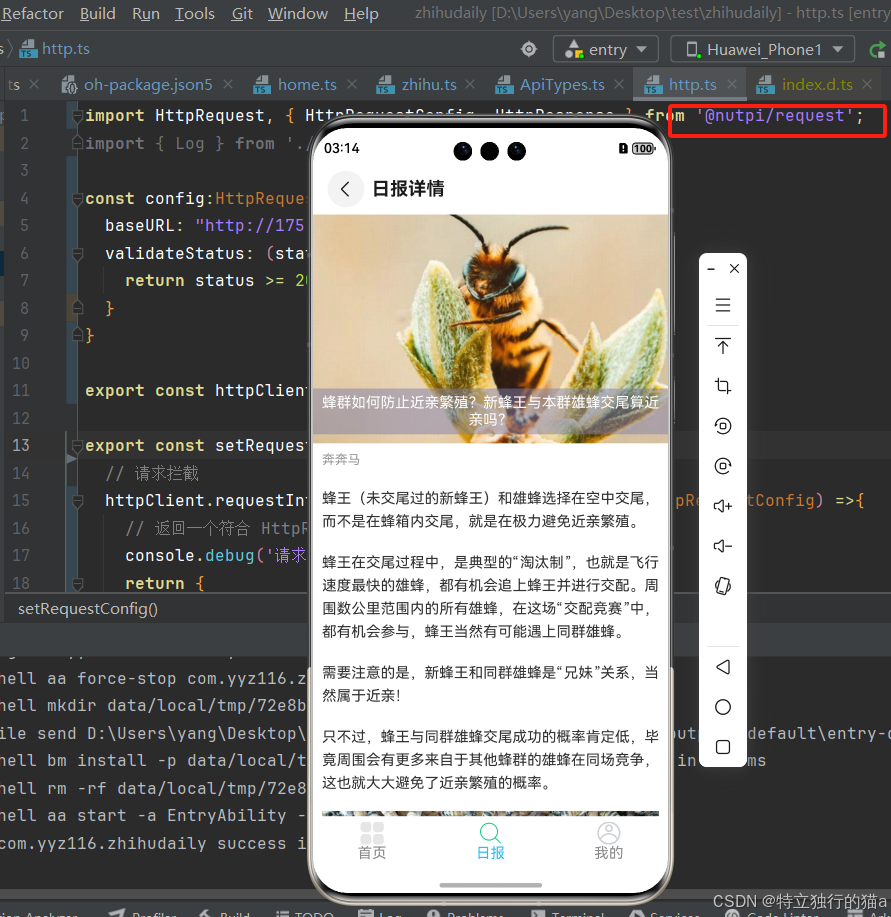
在进行HarmonyOS的应用开发中,我们常常需要进行网络通信。然而,原始的远场通信(RCP)使用方式较为繁琐,让人感到不够便捷。作为一位前期从事小程序开发的开发者,我深受小程序网络访问的简单性和便利性的吸引。因此,我决定在HarmonyOS中打造一个高效的网络组件,简化网络请求的使用方式。
原始使用方式的复杂性
首先,让我们看一下原始的RCP使用方式:
// 定义请求头
let headers: rcp.RequestHeaders = {
  'accept': 'application/json'
};

// 定义要修改的内容
let modifiedContent: UserInfo = {
  'userName': 'xxxxxx'
};

const securityConfig: rcp.SecurityConfiguration = {
  tlsOptions: {
    tlsVersion: 'TlsV1.3'
  }
};

// 创建通信会话对象
const session = rcp.createSession({ requestConfiguration: { security: securityConfig } });

// 定义请求对象
let req = new rcp.Request('http://example.com/fetch', 'PATCH', headers, modifiedContent);

// 发起请求
session.fetch(req).then((response) => {
  Logger.info(`Request succeeded, message is ${JSON.stringify(response)}`);
}).catch((err: BusinessError) => {
  Logger.error(`err: err code is ${err.code}, err message is ${JSON.stringify(err)}`);
});
从上面的代码来看,整个流程涉及多步骤的配置,包括请求头、请求体的定义,以及会话的创建。这样的流程虽然功能齐全,但对于开发者来说,无疑增加了工作量。
模块化封装后的优势
注:该封装库已上架鸿蒙三方库中心(https://ohpm.openharmony.cn/#/cn/home),
欢迎体验并提供宝贵意见! 详细使用demo参见知乎日报项目:

知乎日报开源地址:https://gitee.com/yyz116/zhihudaily
为了提升开发效率,我着手对RCP进行模块化封装。以下是封装后的核心代码:
import { rcp } from '@kit.RemoteCommunicationKit';
import { BusinessError } from '@kit.BasicServicesKit';


type AnyObject = Record<string | number | symbol, any>;
type HttpPromise<T> = Promise<HttpResponse<T>>;

export interface RequestTask {
  abort: () => void;
  offHeadersReceived: () => void;
  onHeadersReceived: () => void;
}

type Tasks = RequestTask;

export interface HttpRequestConfig<T = Tasks> {
  /** 请求基地址 */
  baseURL?: string;
  /** 请求服务器接口地址 */
  url?: string;

  /** 请求查询参数,自动拼接为查询字符串 */
  params?: AnyObject;
  /** 请求体参数 */
  data?: AnyObject;

  /** 文件对应的 key */
  name?: string;
  /** HTTP 请求中其他额外的 form data */
  formData?: AnyObject;
  /** 要上传或下载的文件资源的路径。 */
  filePath?: string;
  /** 请求头信息 */
  header?: AnyObject;
  /** 请求方式 */
  method?: "GET" | "POST" | "PUT" | "DELETE" | "CONNECT" | "HEAD" | "OPTIONS" | "TRACE" | "UPLOAD" | "DOWNLOAD" | (string & NonNullable<unknown>);
  /** 如果设为 json,会尝试对返回的数据做一次 JSON.parse */
  dataType?: string;
  /** 设置响应的数据类型 */
  responseType?: "text" | "arraybuffer";
  /** 自定义参数 */
  custom?: AnyObject;
  /** 超时时间 */
  timeout?: number;
  /** DNS解析时优先使用ipv4*/
  firstIpv4?: boolean;
  /** 验证 ssl 证书  */
  sslVerify?: boolean;
  /** 跨域请求时是否携带凭证(cookies) */
  withCredentials?: boolean;

  /** 返回当前请求的task, options。请勿在此处修改options。 */
  getTask?: (task: T, options: HttpRequestConfig<T>) => void;
  /**  全局自定义验证器 */
  validateStatus?: (statusCode: number) => boolean | void;
}

export interface HttpResponse<T = any> {
  config?: HttpRequestConfig;
  statusCode: number;
  data: T;
  errMsg: string;
  cookies: Array<string>;
  header: AnyObject;
}

export interface HttpUploadResponse<T = any> {
  config: HttpRequestConfig;
  statusCode: number;
  data: T;
  errMsg: string;
}
export interface HttpDownloadResponse extends HttpResponse {
  tempFilePath: string;
}

export abstract class HttpRequestAbstract {
  session: rcp.Session;
  config: HttpRequestConfig;

  constructor(public conf: HttpRequestConfig) {
    this.config = {
      ...conf,
      validateStatus: conf.validateStatus || ((status) => status >= 200 && status < 300)
    };

    const sessionConfig: rcp.SessionConfiguration = {
      baseAddress: conf.baseURL,
      headers: conf.header,
      requestConfiguration: {
        security: {
          tlsOptions: {
            tlsVersion: 'TlsV1.3'
          }
        }
      }
    }
    this.session = rcp.createSession(sessionConfig);
  }

  request<T = any>(config: HttpRequestConfig<RequestTask>): HttpPromise<T> {
    return new Promise((resolve, reject) => {
      //const fullUrl = buildURL(buildFullPath(this.config.baseURL, config.url), config.params);
       const { method = "GET", url, header, data,params } = config;
       const fullUrl =`${this.config.baseURL}${url}`;

      const req = new rcp.Request(fullUrl, method, header, data);

      this.session.fetch(req).then((response) => {
        const responseData = response.toJSON();
        let resp = {
          config,
          data: responseData as T,
          statusCode: response.statusCode,
          errMsg: response.reasonPhrase,
          cookies:response.cookies?.map(cookie => `${cookie.name}=${cookie.value}`),
          header:response.headers
        };
        resolve(resp);
      }).catch((err: BusinessError) => {
        reject(err);
      });
    });
  }

  // GET 请求
  get<T = any>(url: string, config?: HttpRequestConfig<RequestTask>): HttpPromise<T> {
    return this.request({ ...config, url, method: 'GET' });
  }

  // POST 请求
  post<T = any>(url: string, data?: AnyObject, config?: HttpRequestConfig<RequestTask>): HttpPromise<T> {
    return this.request({ ...config, url, data, method: 'POST' });
  }

  // PUT 请求
  put<T = any>(url: string, data?: AnyObject, config?: HttpRequestConfig<RequestTask>): HttpPromise<T> {
    return this.request({ ...config, url, data, method: 'PUT' });
  }

  // DELETE 请求
  delete<T = any>(url: string, data?: AnyObject, config?: HttpRequestConfig<RequestTask>): HttpPromise<T> {
    return this.request({ ...config, url, data, method: 'DELETE' });
  }

  // 其他 HTTP 请求方法可以类似实现,如 head、options、trace 等
  // 上传
  upload<T = any>(url: string, config?: HttpRequestConfig<RequestTask>): Promise<HttpUploadResponse>{
    return new Promise((resolve, reject) => {
      let fileDir = config.filePath; // 请根据自身业务定义此路径
      let uploadFromFile : rcp.UploadFromFile = {
        fileOrPath : fileDir
      }
      this.session.uploadFromFile(url, uploadFromFile).then((response) => {
        console.info(`Succeeded in getting the response ${response}`);
        let resp = {
          config,
          data: response.toJSON() as T,
          statusCode: response.statusCode,
          errMsg: response.reasonPhrase
        };
        resolve(resp)
      }).catch((err: BusinessError) => {
        console.error(`err: err code is ${err.code}, err message is ${JSON.stringify(err)}`);
        reject(err)
      });
    })
  }
  // 下载
  download(url: string, config?: HttpRequestConfig<RequestTask>): Promise<HttpDownloadResponse>{
    return new Promise((resolve, reject) => {
      let downloadToFile: rcp.DownloadToFile = {
        kind: 'folder',
        path: config.filePath //请根据自身业务选择合适的路径
      } as rcp.DownloadToFile
      this.session.downloadToFile(url, downloadToFile).then((response) => {
        console.info(`Succeeded in getting the response ${response}`);
        let resp = {
          config,
          data: response.toJSON(),
          statusCode: response.statusCode,
          errMsg: response.reasonPhrase,
          tempFilePath:config.filePath,
          header:response.headers,
          cookies:response.cookies?.map(cookie => `${cookie.name}=${cookie.value}`),
        };
        resolve(resp)
      }).catch((err: BusinessError) => {
        console.error(`DownloadToFile failed, the error message is ${JSON.stringify(err)}`);
        reject(err)
      });
    })
  }
}
通过这样的封装,我们将网络请求的逻辑进行了抽象,简化了外部调用的复杂性。开发者只需专注于请求的参数,而无需关心底层的实现。
封装后的简单使用
在封装完成后,发起网络请求的代码大幅度简化,例如: 先封装个http.ts工具
//utils/http.ts
import HttpRequest, { HttpRequestConfig, HttpResponse } from './core';

const config:HttpRequestConfig = {
  baseURL: "http://175.178.126.10:8000/",
  validateStatus: (status) => {
    return status >= 200 && status < 300;
  }
}

export const httpClient = new HttpRequest(config);

export const setRequestConfig = () => {
  // 请求拦截
  httpClient.requestInterceptor.onFulfilled = (config?: HttpRequestConfig) =>{
    // 返回一个符合 HttpRequestConfig 类型的对象
    console.debug('请求拦截')
    return {

    }
  }

  httpClient.responseInterceptor.onFulfilled = (response?: HttpResponse) =>{
    // 返回一个符合 HttpResponse 类型的对象
    console.debug('响应拦截')
    return {

    }as HttpResponse
  }
}
export default httpClient;
网络访问的API接口实现:
// homeapi.ts
import { BaseResponse,SwiperData,HotMovieReq,MovieRespData } from '../bean/ApiTypes';
import { httpClient,setRequestConfig } from '../../utils/http';

// 调用setRequestConfig函数进行请求配置
setRequestConfig();

const http = httpClient;

// 获取轮播图api接口
export const getSwiperList = (): Promise<BaseResponse<SwiperData>> => http.get('/swiperdata');

// 获取热门影视接口
export const getHotMovie = (req: HotMovieReq): Promise<BaseResponse<MovieRespData>> => http.post('/hotmovie', req);

// 获取知乎列表页api接口
export const getZhiHuNews = (date:string): Promise<BaseResponse<ZhiNewsRespData>> => http.get('/zhihunews/'+date);

// 获取知乎详情页api接口
export const getZhiHuDetail = (id:string): Promise<BaseResponse<ZhiDetailRespData>> => http.get('/zhihudetail/'+id);
这一改动使得接口调用变得极其简单,清晰易读,减少了出错的可能性。一行代码即可写完一个接口,清晰直观。以上的四行代码,写完了四个接口,极大提高了开发效率。
当然,接口的请求包和响应包格式需要定义,这必不可少。以下是bean/ApiTypes.ts的接口类型定义。
type AnyObject = Record<string | number | symbol, any>
export interface BaseResponse<T>{
  statusCode: number;
  errMsg:string;
  header?: AnyObject;
  data:T;
}

export interface ErrorResp {
  code: number;
  message: string;
  data: [];
}

// 轮播图响应数据
export interface SwiperItem{
  id:string;
  imageUrl:string;
  title:string;
  url:string;
  description:string;
}
export interface SwiperData {
  code: number;
  message: string;
  data: Array<SwiperItem>;
}

// 热门影视请求数据
export interface HotMovieReq {
  start: number;
  count: number;
  city:string;
}
// 热门影视响应数据
interface MovieItem{
  id:string;
  cover:string;
  title:string;
  gener:string;
  rate:number;
}
export interface MovieRespData {
  code: number;
  message: string;
  data: Array<MovieItem>;
  count: number;
  start: number;
  total: number;
  title: string;
}

//==============================知乎日报
export type ZhiNewsItem ={
  id:string;
  image:string;
  title:string;
  url:string;
  hint:string;
  date: string;
}
export interface ZhiNewsRespData {
  code: number;
  message: string;
  stories: Array<ZhiNewsItem>;
  top_stories: Array<ZhiNewsItem>;
  date: string;
}

type ZhiDetailItem={
  types:string;
  value:string;
}
export interface ZhiDetailRespData {
  code: number;
  message: string;
  content: Array<ZhiDetailItem>;
  title: string;
  author: string;
  bio: string;
  avatar: string;
  image: string;
  more: string;

}
总结
通过对HarmonyOS中远场通信RCP的模块化封装,我们不仅优化了网络请求的流程,还提升了代码的可读性和可维护性。希望这篇文章能够帮助你在HarmonyOS应用开发中更高效地使用网络组件,享受更便捷的开发体验。
作者:猫哥 blog.csdn.net/qq8864,转载请注明出处。
团队:坚果派 团队介绍:坚果派由坚果等人创建,团队拥有12个华为HDE带领热爱HarmonyOS/OpenHarmony的开发者,以及若干其他领域的三十余位万粉博主运营。专注于分享HarmonyOS/OpenHarmony、ArkUI-X、元服务、仓颉。团队成员聚集在北京,上海,南京,深圳,广州,宁夏等地,目前已开发鸿蒙原生应用,三方库60+,欢迎交流。
写在最后
最后,推荐下笔者的业余开源app影视项目“爱影家”,推荐分享给与我一样喜欢免费观影的朋友。 注:因涉及免费观影,该项目仅限于学习研究使用!请勿用于其他用途!
开源地址:爱影家app开源项目介绍及源码
其他资源
https://developer.huawei.com/consumer/cn/doc/harmonyos-guides-V13/remote-communication-interceptor-V13 https://developer.huawei.com/consumer/cn/doc/best-practices-V5/bpta-rcp-based-network-request-V5 https://developer.huawei.com/consumer/cn/doc/harmonyos-references-V2/errorcode-net-http-0000001544704013-V2#ZH-CN_TOPIC_0000001574128897__2300060-
https://blog.csdn.net/wu1004019946/article/details/139768393


