前言
Open JDK 是开源的JDK。通过对开源JDK的编译调试,我们可以深入了解JVM的运行原理。
以下是我的环境信息:
操作系统: Microsoft Windows 7 Professional x64 SP1
安装组件:
1、Windows Unix Toolkit> CYGWIN x64,放在E:\hub\cygwin64目录下
2、C/C++ Compiler > Visual Studio 2010 Professional (x86) - DVD (English),包括WindowsSDK 7.1 X64
3、Bootstrap JDK > Oracle jdk1.7.0_80 x64,放在E:\sdkUnity\java\jdk1.7.0_80目录下
4、freetype ,使用 Visual Studio 2010 编译 x64 的freetype.dll文件,放在E:\hub\freetype目录下
一、准备编译环境
1、安装CYGWIN
官网:http://www.cygwin.com/ 选择x64位,即setup-x86_64.exe下载
下载完后,开始安装
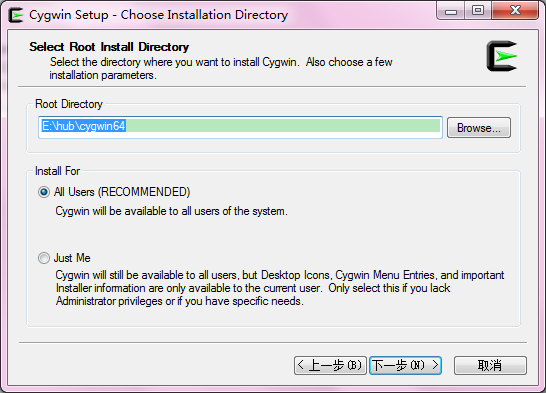
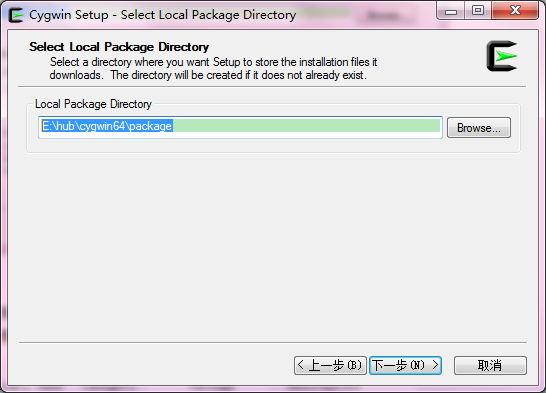
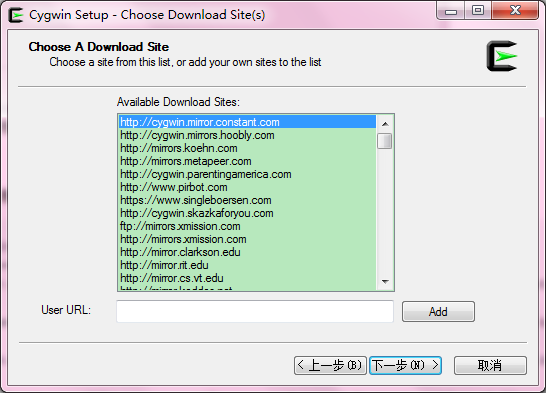
安装过程选择镜像:
接下来是定制需要安装的工具,在默认的基础上,我们加装如下工具:
Binary Name Category Package Description
================================================================
ar.exe Devel binutils The GNU assembler, linker and binary utilities
make.exe Devel make The GNU version of the 'make' utility built for CYGWIN
m4.exe Interpreters m4 GNU implementation of the traditional Unix macro processor
cpio.exe Utils cpio A program to manage archives of files
zip.exe Archive zip Package and compress (archive) files
unzip.exe Archive unzip Extract compressed files in a ZIP archive
free.exe System procps Display amount of free and used memory in the system
================================================================
(注: 此表来自OpenJDK8u的源代码根目录中的README-builds.html)
在输入框中建议Binary Name不带 exe搜索,按照建议的Category,对照Description选择正确的组件。如果没有,按Package搜索。
以下是当前CYGWIN最新版本的搜索:
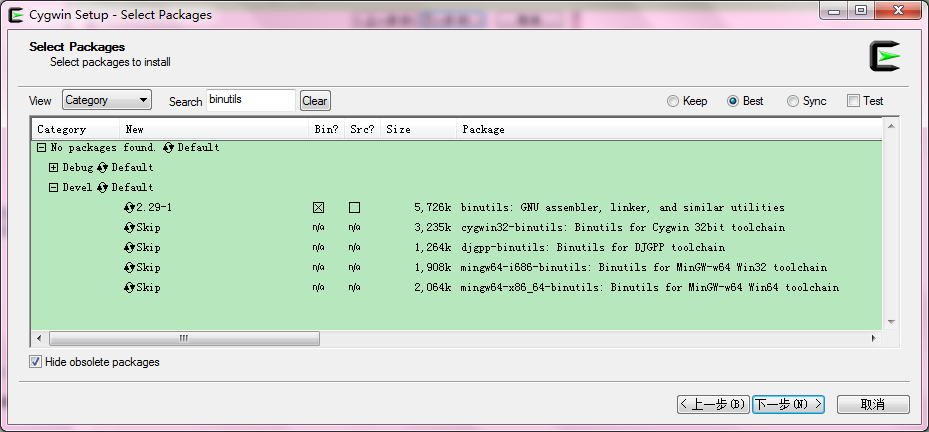
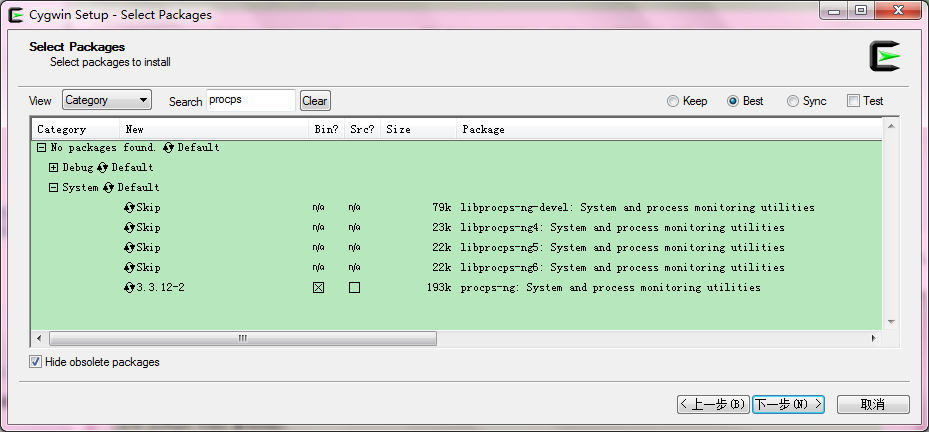
安装完,我们有一个图标在桌面:

2、安装VS2010
Visual Studio 2010 Professional (x86) - DVD (English)
ed2k://|file|en_visual_studio_2010_professional_x86_dvd_509727.iso|2351316992|D395B6381AC129209EE80D9BED4BA5F1|/
主要需要C++ x64位编译器模块,如下图:
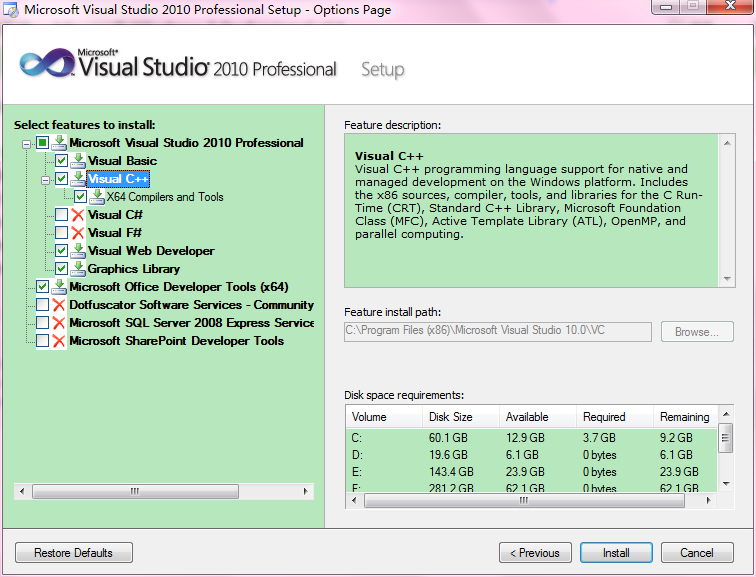
然后安装
WindowsSDK 7.1 X64(GRMSDKX_EN_DVD.iso)
http://www.microsoft.com/en-us/download/details.aspx?id=8442
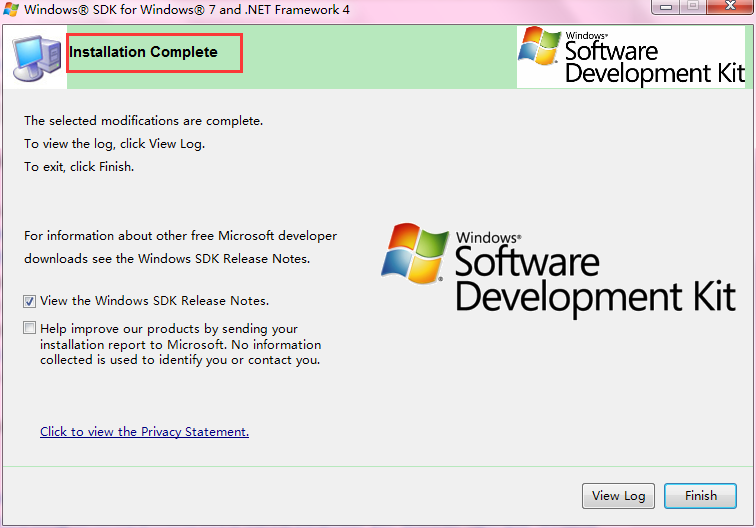
A problem occurred while installing selected Windows SDK components.
Installation of the "Microsoft Windows SDK for Windows 7" product has reported the following error: Please refer to Samples\Setup\HTML\ConfigDetails.htm document for further information.
Please attempt to resolve the problem and then start Windows SDK setup again. If you continue to have problems with this issue, please visit the SDK team support page at http://go.microsoft.com/fwlink/?LinkId=130245.
Click the View Log button to review the installation log.
To exit, click Finish.
解决办法: 卸载Visual C++ 2010 Redistributable
3、安装JDK7
在Oracle官网下载JDK7安装即可。
4、下载并安装(编译)feetype
由于OpenJDK中的swing与JConsole需要使用freetype的字体渲染功能,因此需要首先对其进行编译。
首先到下载freetype:https://www.freetype.org/
我们可以下载已经编译好的lib和dll直接使用,而不需要自己编译:
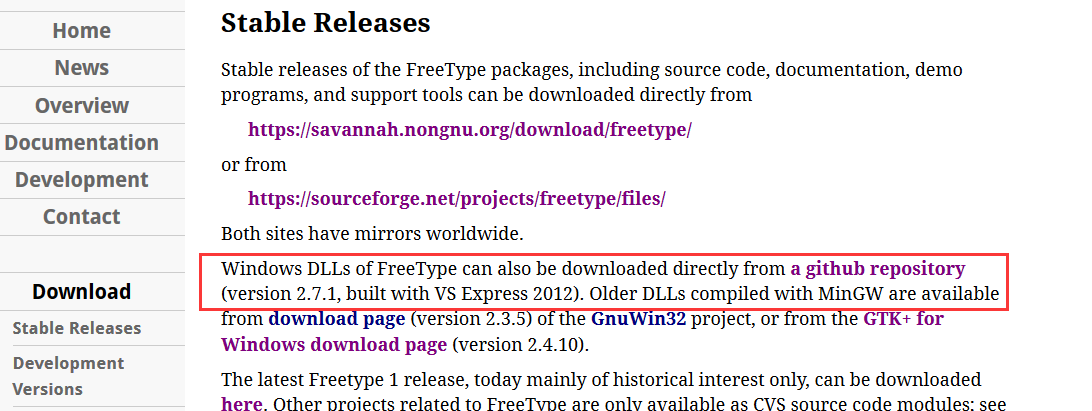
https://github.com/ubawurinna/freetype-windows-binaries
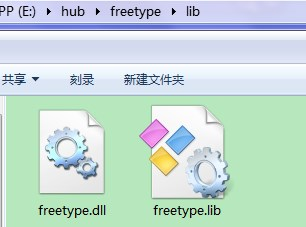
下载完后解压为E:\hub\freetype目录,把win64目录改为名称lib,如下所示:
二、获取OpenJDK源码
OpenJDK的源码有两种下载方式:
Source
Repository
链接:http://download.java.net/openjdk/jdk8/
以上是GA版本,我们这次构建的是包括fix bugs的Update Releases(http://openjdk.java.net/projects/jdk8u/),当然你也可以构建GA版本。
采用Mercurial进行版本管理下载 ,为了获取最新版本的源码,我们需要下载TortoiseHg。
Windows环境下,则可以到bitbucket官方进行下载和安装:https://tortoisehg.bitbucket.io/download/index.html
安装完注意配置TortoiseHg的hg.exe所在目录环境变量到PATH。
在一个目录(建议为英文路径)中右键选择 TortoiseHg>Clone...,克隆OpenJDK源码:
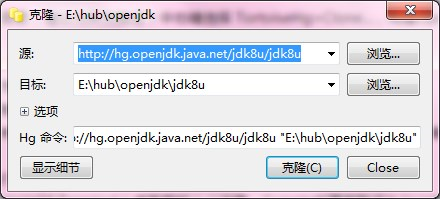
源填入OpenJDK源码的路径:http://hg.openjdk.java.net/jdk8u/jdk8u
点击“克隆”,等待完成。
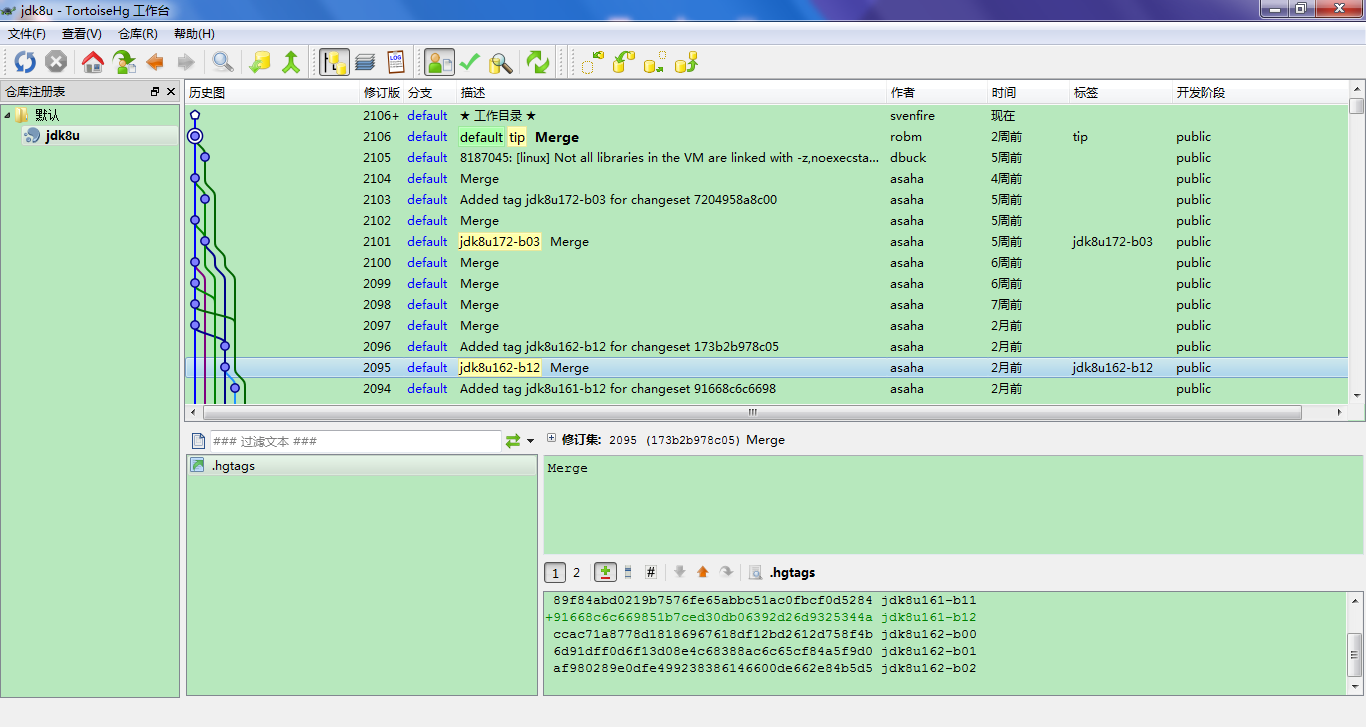
源码下载完成后,我们可以看到OpenJDK的工作台日志了。
源码中有一个README-builds.html 是构建OpenJDK的详细参考文档。本编的教程基本都会参考其中内容。
需要运行sh get_source.sh才能获取完整的代码。
使用Cygwin64 Terminal(桌面图标)(注意,Cygwin中硬盘路径为/cygdrive/盘符/路径):
cd  /cygdrive/e/hub/openjdk/jdk8u
bash get_source.sh
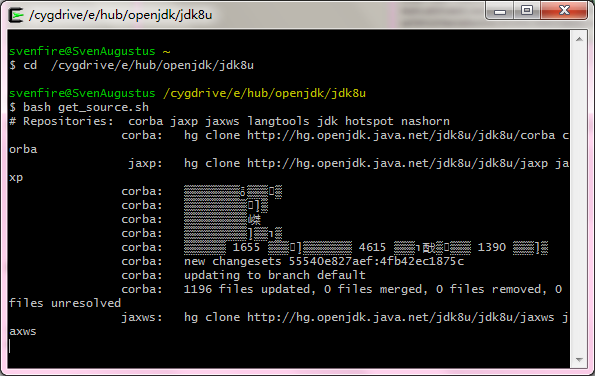
等待完成。(本机网络很不好,我在阿里云服务器上下载再解压到本机 o(╯□╰)o)
我的百度云盘OpenJDK8源码:链接:https://pan.baidu.com/s/1ggEAGp1 密码:svh1
三、编译OpenJDK版本
1、configure
到目前为止,我们已经完成了VS2010的安装、Cygwin及需要用到的工具的安装、freetype的编译生成、OpenJDK8的源码获取。
在本机,上述各组件的为止如下:
1)Cygwin安装到E:\hub\cygwin64,其下有Cygwin.bat脚本用于设置环境,或者你可以使用Cygwin64 Terminal(桌面图标)
2)freetype库的路径为E:\hub\freetype,其下有include、lib文件夹
3)有Oracle JDK7在 E:\sdkUnity\java\jdk1.7.0_80
4)下载的OpenJDK源码路径为E:\hub\openjdk\jdk8u
首先进行配置。开启一个Cygwin的bash窗口,进入OpenJDK源码路径(注意,Cygwin中硬盘路径为/cygdrive/盘符/路径),按我的配置,则为:
cd /cygdrive/e/hub/openjdk/jdk8u
开始配置:
bash ./configure --with-freetype=/cygdrive/e/hub/freetype --with-boot-jdk=/cygdrive/e/sdkUnity/java/jdk1.7.0_80 -with-target-bits=64 --with-jvm-variants=server --with-debug-level=release
以上的参数简单作一些说明: (其他可以参考README-builds.html)
--with-freetype=/cygdrive/e/hub/freetype : 指定feetype的位置,必选;
--with-boot-jdk=/cygdrive/e/sdkUnity/java/jdk1.7.0_80:启动jdk的路径,必选;
--with-target-bits=64 :指定生成64位jdk,必选;
--with-jvm-variants=server : 编译JVM的模式,有server, client, kernel, zero and zeroshark 五种 ,默认server模式;
--with-debug-level=release:编译时debug的级别,有release, fastdebug(可调试的JDK), slowdebug 三种级别;
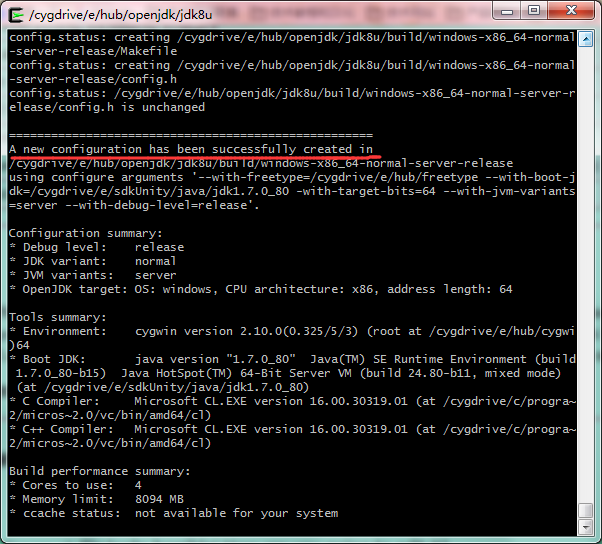
成功。
----------------
接下来,为可选操作,修改版本信息,在spec.gmk中可以找到相关定义,并根据自身需要修改。
# Different version strings generated from the above information.
JDK_VERSION:=1.8.0_162
RUNTIME_NAME=$(PRODUCT_NAME) $(PRODUCT_SUFFIX)
COOKED_JDK_UPDATE_VERSION:=0
COOKED_BUILD_NUMBER:=0
# These variables need to be generated here so that MILESTONE and
# JDK_BUILD_NUMBER can be overridden on the make command line.
# ifeq ($(MILESTONE), fcs)
# RELEASE=$(JDK_VERSION)$(BUILD_VARIANT_RELEASE)
# else
#  RELEASE=$(JDK_VERSION)-$(MILESTONE)$(BUILD_VARIANT_RELEASE)
# endif
RELEASE=$(JDK_VERSION)$(BUILD_VARIANT_RELEASE)

# ifneq ($(USER_RELEASE_SUFFIX), )
#  FULL_VERSION=$(RELEASE)-$(USER_RELEASE_SUFFIX)-$(JDK_BUILD_NUMBER)
# else
#  FULL_VERSION=$(RELEASE)-$(JDK_BUILD_NUMBER)
# endif
FULL_VERSION=$(RELEASE)-$(JDK_BUILD_NUMBER)
JRE_RELEASE_VERSION:=$(FULL_VERSION)
可能错误:cygwin 版本检测异常
checking cygwin release... 2.10.0(0.325/5/3)
configure: Your cygwin is too old. You are running 2.10.0(0.325/5/3), but at least cygwin 1.7 is required. Please upgrade.
configure: error: Cannot continue
configure exiting with result code 1
如果cygwin安装的是2.X的版本则在编译的过程中会报cygwin的版本太老,这是检测脚本的一个bug,该脚本在common/autoconf目录下使用文本编辑器打开generated-configure.sh搜索Your cygwin is too old,关注7220行原来是1.7这里我根据自己的cygwin版本改成不是1.7以下的判断。
 CYGWIN_VERSION_OLD=`$ECHO $CYGWIN_VERSION | $GREP -e '^1\.0-6'`
    if test "x$CYGWIN_VERSION_OLD" != x; then
      { $as_echo "$as_me:${as_lineno-$LINENO}: Your cygwin is too old. You are running $CYGWIN_VERSION, but at least cygwin 1.7 is required. Please upgrade." >&5
$as_echo "$as_me: Your cygwin is too old. You are running $CYGWIN_VERSION, but at least cygwin 1.7 is required. Please upgrade." >&6;}
2、make
执行编译:
make all
其他,如果只需要JVM客户端,不需要其他东西,可以:(其他可以参考README-builds.html)
make images JOBS=4
其中参数JOBS指定并行构建编译的线程数,建议为机器的CPU核数。
如果有多个配置,如:
No CONF given, but more than one configuration found in /cygdrive/e/hub/openjdk/jdk8u//build.
Available configurations:
* windows-x86_64-normal-server-release
* windows-x86_64-normal-server-slowdebug
Please retry building with CONF=
Makefile:55: *** Cannot continue。 停止。
则执行:
make images CONF=windows-x86_64-normal-server-fastdebug
如下图:
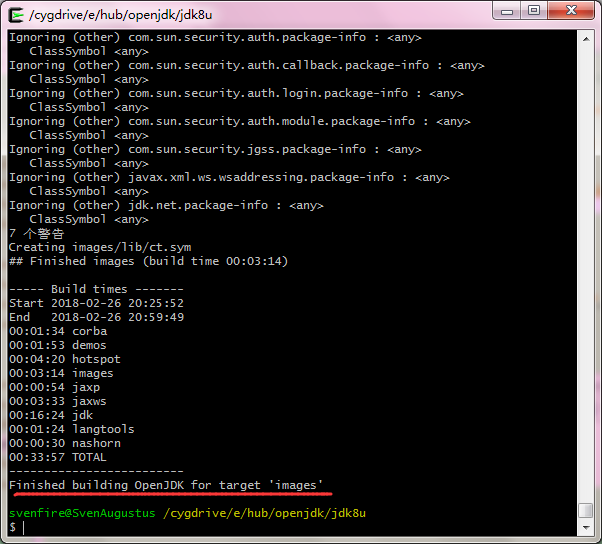
编译耗时可能比较长(我的机器30分钟),请耐心等待。
编译完的结果保存在openjdk\build\windows-x86_64-normal-server-fastdebug中。
目录下images/j2sdk-image 为构建完成的JDK;
目录下images/j2re-image 为构建完成的JRE。
测试一下:
java --version

可能错误:LNK1123: failure during conversion to COFF
LINK : fatal error LNK1123: failure during conversion to COFF: file invalid or corrupt
NMAKE : fatal error U1077: 'C:\progra
2\micros2.0\vc\bin\amd64\link.exe' : return code '0x463'Stop.
NMAKE : fatal error U1077: 'cd' : return code '0x2'
Stop.
NMAKE : fatal error U1077: '"C:\Program Files (x86)\Microsoft Visual Studio 10.0\VC\BIN\amd64\nmake.EXE"' : return code '0x2'
Stop.
make[3]: *** [Makefile:217:generic_build2] 错误 2
make[2]: *** [Makefile:167:debug] 错误 2
make[1]: *** [HotspotWrapper.gmk:45:/cygdrive/e/hub/openjdk/jdk8u/build/windows-x86_64-normal-server-release/hotspot/_hotspot.timestamp] 错误 2
make: *** [/cygdrive/e/hub/openjdk/jdk8u//make/Main.gmk:109:hotspot-only] 错误 2
参考:
因为是cvtres.exe版本错误导致的结果,所以凡是能使VS链接器找到正确的cvtres.exe版本的方法都可以解决该问题。或者使VS链接器不生成COFF的方法都可以。
解决方法:
当前系统中存在两个cvtres.exe文件,版本不同。让VS2010使用.NET 4.5的cvtres.exe程序。
具体步骤:
重命名cvtres.exe为cvtres.exe.bak:(vs2010安装的位置)C:\Program Files (x86)\Microsoft Visual Studio 10.0\VC\bin\cvtres.exe
C:\Program Files (x86)\Microsoft Visual Studio 10.0\VC\bin\amd64\cvtres.exe
这样C:\Windows\Microsoft.NET\Framework\v4.0.30319 (.NET 4.5)中的cvtres.exe文件就可以被VS2010使用。
可能错误:_the.rt.jar.contents CreateJars.gmk 格式异常
Updating images/src.zip
make[2]: *** [CreateJars.gmk:268:/cygdrive/e/hub/openjdk/jdk8u/build/windows-x86_64-normal-server-release/images/lib/_the.rt.jar.contents] 错误 1
make[2]: *** 正在等待未完成的任务....
make[1]: *** [BuildJdk.gmk:101:images] 错误 2
make: *** [/cygdrive/e/hub/openjdk/jdk8u//make/Main.gmk:136:images-only] 错误 2
解决方法:
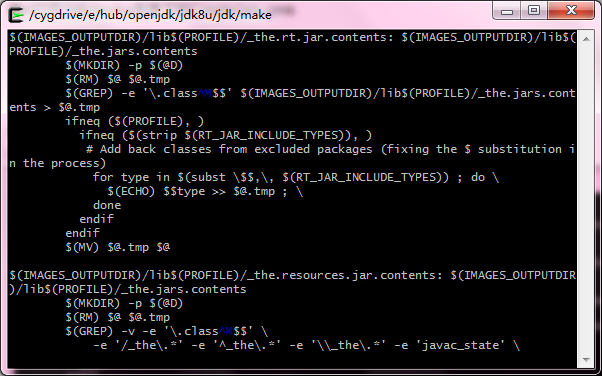
用vi打开/jdk/make目录下的CreateJars.gmk
cd  /cygdrive/e/hub/openjdk/jdk8u/jdk/make
vi CreateJars.gmk
定位到268行,相距不远处有两个$$换行符,将其转换为Windows下的换行符。
在VI下,可输入268gg。
将光标定位到两个$$之前,按i切换到insert模式后,按Ctrl + V, Ctrl + M,即可打出^M。
完成后按esc退出编辑模式,然后按:进入命令模式,输入wq保存并退出。
重新生成。 make dist-clean 然后重新make
可能错误: make clean
Starting jdk
”,由“/cygdrive/e/hub/openjdk/jdk8u/build/windows-x86_64-normal-server-release/jdk/objs/libverify/check_code.obj” 需求。 停止。
make[1]: *** [BuildJdk.gmk:70:libs-only] 错误 2
make: *** [/cygdrive/e/hub/openjdk/jdk8u//make/Main.gmk:116:jdk-only] 错误 2
解决方法:重新生成。 make clean 然后重新 make
by 斯武丶风晴 https://my.oschina.net/langxSpirit
@SvenAugustus(https://www.flysium.xyz/)
更多请关注微信公众号【编程不离宗】,专注于分享服务器开发与编程相关的技术干货:


