Oracle Database 12cR2 Installation in RHEL 7.4
Oracle Database 12cR2 Installation in RHEL 7.4
Description:
This article is about Oracle Database 12cR2 Installation in RHEL 7.4. In this article we are going to see all the prerequisite, oracle binary installation, post installation and database creation to be done for Oracle 12cR2 Database.
Note:
The Hardware configuration for the server with memory of 8GB, swap 8GB and total hard disk capacity used is 250GB.
Kindly refer Here for RHEL 7.4 Installation in VMWare.
Pre-Install:
Step 1:
Change the hostname in the below file using any text editor if needed and reboot the server:
# cat /etc/hostname
prod101.oracledbwr.com
# shutdown -r now
Check the hostname once the server rebooted
# hostname
# cat /etc/hosts
192.168.1.211 prod101.oracledbwr.com prod101
Step 2:
Using any text editor, create or edit the /etc/sysctl.d/97-oracle-database-sysctl.conf file, and add or edit lines similar to:
# cat /etc/sysctl.d/97-oracle-database-sysctl.conf
kernel.sem = 250 32000 100 128
kernel.shmall = 2097152 #shmall 40 percent of the size of physical memory in pages /proc/sys/kernel/shmall
kernel.shmmax = 4294967296 #shmmax Half the size of physical memory in bytes. Here we have 8GB of RAM
kernel.shmmni = 4096
kernel.panic_on_oops = 1
fs.file-max = 6815744
fs.aio-max-nr = 1048576
net.ipv4.ip_local_port_range = 9000 65500
net.core.rmem_default = 262144
net.core.rmem_max = 4194304
net.core.wmem_default = 262144
net.core.wmem_max = 1048576
To change the current values of the kernel parameters without reboot of server, execute the below command:
# /sbin/sysctl –system
Review the output. If the values are incorrect, edit the /etc/sysctl.d/97-oracle-database-sysctl.conf file, then enter this command again.
Confirm that the values are set correctly:
# /sbin/sysctl -a
Step 3:
Add the following lines to a file called “/etc/security/limits.d/oracle-database-server-12cR2-preinstall.conf” file:
# cat /etc/security/limits.d/oracle-database-server-12cR2-preinstall.conf
oracle soft nofile 1024
oracle hard nofile 65536
oracle soft nproc 16384
oracle hard nproc 16384
oracle soft stack 10240
oracle hard stack 32768
oracle hard memlock 134217728
oracle soft memlock 134217728
Step 4:
The following packages are listed as required, including the 32-bit version of some of the packages. Many of the packages should be installed already.
binutils-2.23.52.0.1-12.el7 (x86_64)
compat-libcap1-1.10-3.el7 (x86_64)
glibc-2.17-36.el7 (i686)
glibc-2.17-36.el7 (x86_64)
glibc-devel-2.17-36.el7 (i686)
glibc-devel-2.17-36.el7 (x86_64)
ksh
libaio-0.3.109-9.el7 (i686)
libaio-0.3.109-9.el7 (x86_64)
libaio-devel-0.3.109-9.el7 (i686)
libaio-devel-0.3.109-9.el7 (x86_64)
libX11-1.6.0-2.1.el7 (i686)
libX11-1.6.0-2.1.el7 (x86_64)
libXau-1.0.8-2.1.el7 (i686)
libXau-1.0.8-2.1.el7 (x86_64)
libXi-1.7.2-1.el7 (i686)
libXi-1.7.2-1.el7 (x86_64)
libXtst-1.2.2-1.el7 (i686)
libXtst-1.2.2-1.el7 (x86_64)
libgcc-4.8.2-3.el7 (i686)
libgcc-4.8.2-3.el7 (x86_64)
libstdc++-4.8.2-3.el7 (i686)
libstdc++-4.8.2-3.el7 (x86_64)
libstdc++-devel-4.8.2-3.el7 (i686)
libstdc++-devel-4.8.2-3.el7 (x86_64)
libxcb-1.9-5.el7 (i686)
libxcb-1.9-5.el7 (x86_64)
make-3.82-19.el7 (x86_64)
net-tools-2.0-0.17.20131004git.el7 (x86_64) (for Oracle RAC and Oracle Clusterware)
smartmontools-6.2-4.el7 (x86_64)
sysstat-10.1.5-1.el7 (x86_64)
Verify the installed RPM’s by executing the following command:
# rpm -q binutils compat-libcap1 glibc-2.17 glibc-devel-2.17 ksh libaio libaio-devel libX11 \
libXau libXi libXtst libgcc libstdc++- libstdc++-devel libxcb make net-tools smartmontools sysstat
Step 5:
Create the required groups for Oracle Database 12cR2 Installation
# /usr/sbin/groupadd -g 54321 oinstall
# /usr/sbin/groupadd -g 54322 dba
# /usr/sbin/groupadd -g 54323 oper
# /usr/sbin/groupadd -g 54324 backupdba
# /usr/sbin/groupadd -g 54325 dgdba
# /usr/sbin/groupadd -g 54326 kmdba
# /usr/sbin/groupadd -g 54327 asmdba
# /usr/sbin/groupadd -g 54328 asmoper
# /usr/sbin/groupadd -g 54329 asmadmin
# /usr/sbin/groupadd -g 54330 racdba
Add “oracle” user with appropriate primary and secodary groups below
# /usr/sbin/useradd -u 54321 -g oinstall -G dba,oper,backupdba,dgdba,kmdba,asmdba,asmoper,asmadmin oracle
# passwd oracle
Step 6:
Create oraInst.loc file to mention the group of inventory location
# cat /etc/oraInst.loc
inventory_loc=/oradb/app/oraInventory
inst_group=oinstall
Create necessary directories for Oracle Binaries installation and provide appropriate permissions:
mkdir -p /oradb/app/oraInventory
mkdir -p /oradb/app/oracle/product/12.2.0.1/db_1
chown -R oracle:oinstall /oradb
chmod -R 775 /oradb
Step 7:
Set secure linux by editing the “/etc/selinux/config” file, making sure the SELINUX flag is set as follows
# cat /etc/selinux/config
SELINUX=permissive
Once the change is complete, restart the server or run the following command.
# setenforce Permissive
Step 8:
If we need to disable firewall in linux do the following:
# systemctl stop firewalld
# systemctl disable firewalld
Step 9:
As root user execute the following command:
xhost +
Step 10:
Login as oracle user set the following entry in .bash_profile
# su – oracle
# cat .bash_profile
# .bash_profile
# Get the aliases and functions
if [ -f ~/.bashrc ]; then
. ~/.bashrc
fi
# User specific environment and startup programs
PATH=$PATH:$HOME/.local/bin:$HOME/bin
export PATH
export LC_ALL=C
if [ $USER = “oracle” ]; then
if [ $SHELL = “/bin/ksh” ]; then
ulimit -p 16384
ulimit -n 65536
else
ulimit -u 16384 -n 65536
fi
fi
Create an environment file for the database to be created with the following variables:
# cat /home/oracle/prod.env
# Oracle Settings
export TMP=/tmp
export TMPDIR=$TMP
export ORACLE_HOSTNAME=prod101.oracledbwr.com
export ORACLE_UNQNAME=PROD_PROD1
export ORACLE_BASE=/oradb/app/oracle
export ORACLE_HOME=$ORACLE_BASE/product/12.2.0.1/db_1
export ORACLE_SID=PROD
export PATH=/usr/sbin:/usr/local/bin:$PATH
export PATH=$ORACLE_HOME/bin:$PATH
export LD_LIBRARY_PATH=$ORACLE_HOME/lib:/lib:/usr/lib
export CLASSPATH=$ORACLE_HOME/jlib:$ORACLE_HOME/rdbms/jlib
Oracle Installation:
Before starting the installation by “runInstaller” from the unzipped “linuxx64_12201_database.zip”, remember to set the display variable or “xhost +” as oracle user.
# su – oracle
#xhost +
Note:
Oracle as two options during the binary installation, first option is to install binary and create a database during the installation and the the second option is to install only the binaries. Here, we are going with the second option.
Step 1:
# pwd
/home/oracle
# unzip linuxx64_12201_database.zip
cd database
./runInstaller
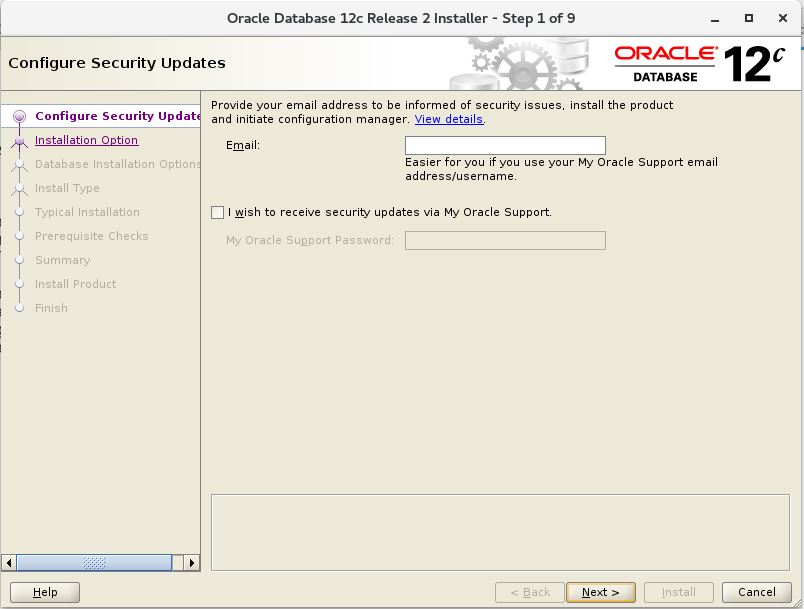
Once, runInstaller is executed, the below GUI will started for Oracle 12cR2 Installation. In the first empty box provide your E-mail ID if you wish to receive updates from oracle, else uncheck and press “Next”.
Step 2:
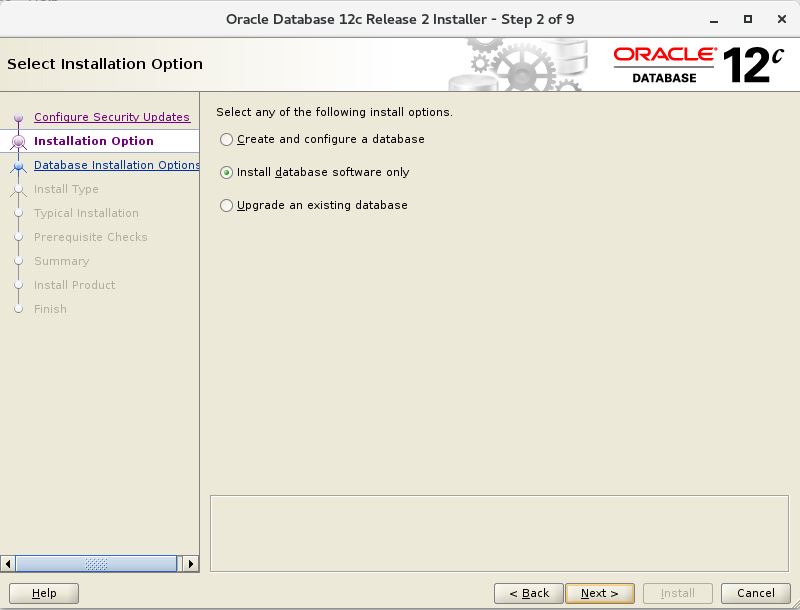
As I said already, we are installing only the oracle binaries now. Hence, select “Install database software only” and press “Next”.
Step 3:
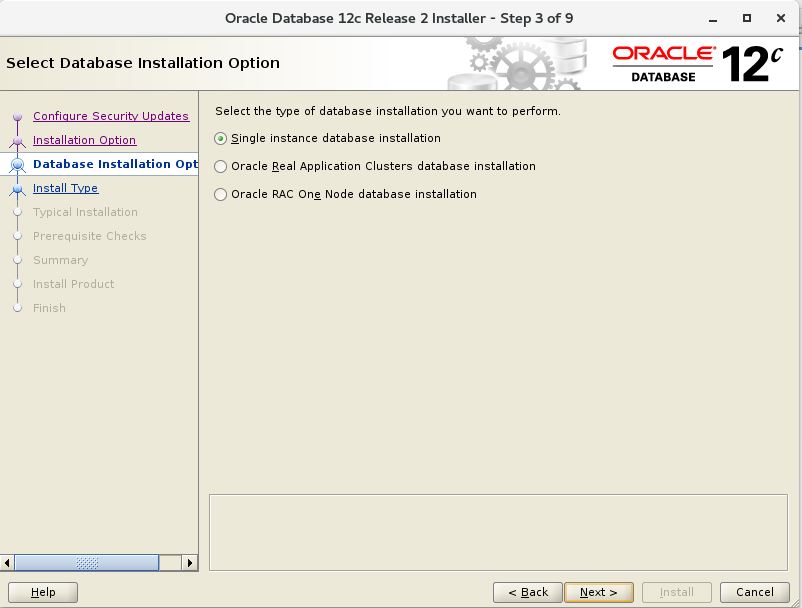
Since, we are going to install a standalone database, select option 1.
Step 4:
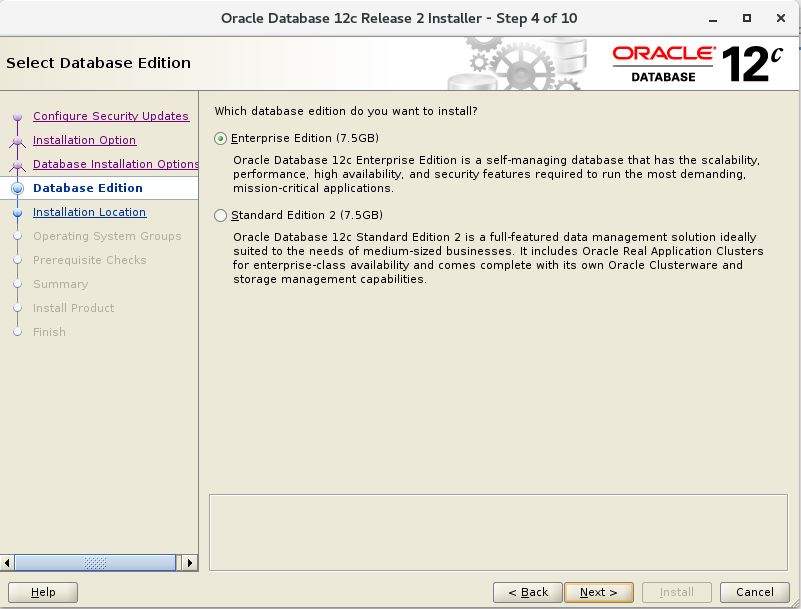
Select the appropriate option as per your licensing in the below screen and press “Next”.
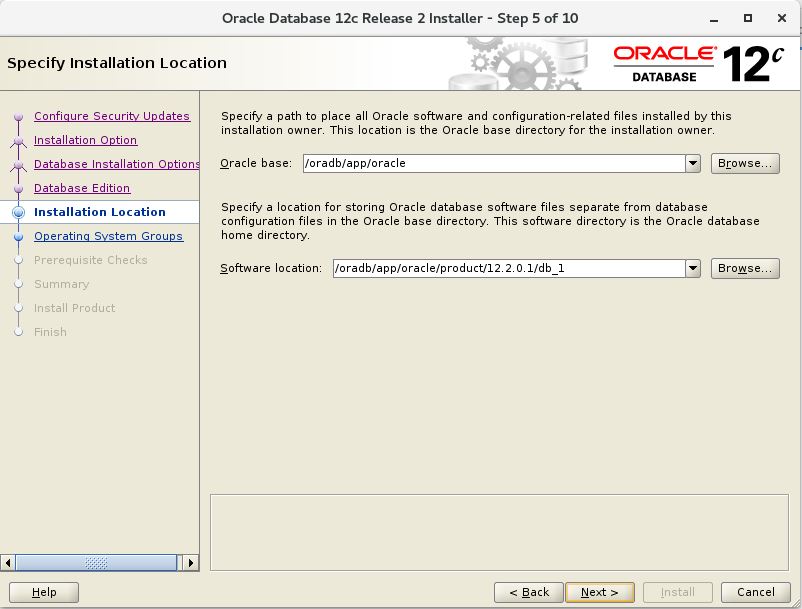
Step 5:
Set the ORACLE_BASE and ORACLE_HOME directories for oracle binary installation as we already created during the Pre-install.
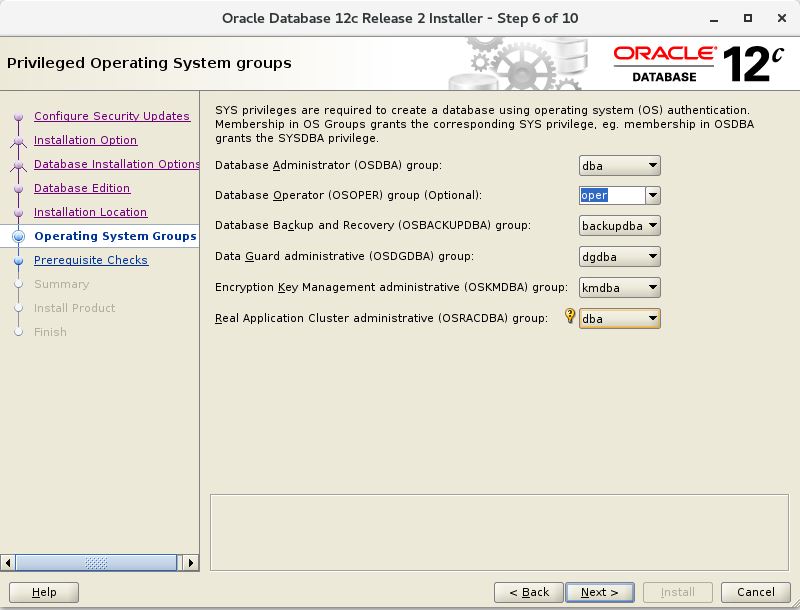
Step 6:
Select the appropriate groups created during the pre-install in the below screen and press “Next”.
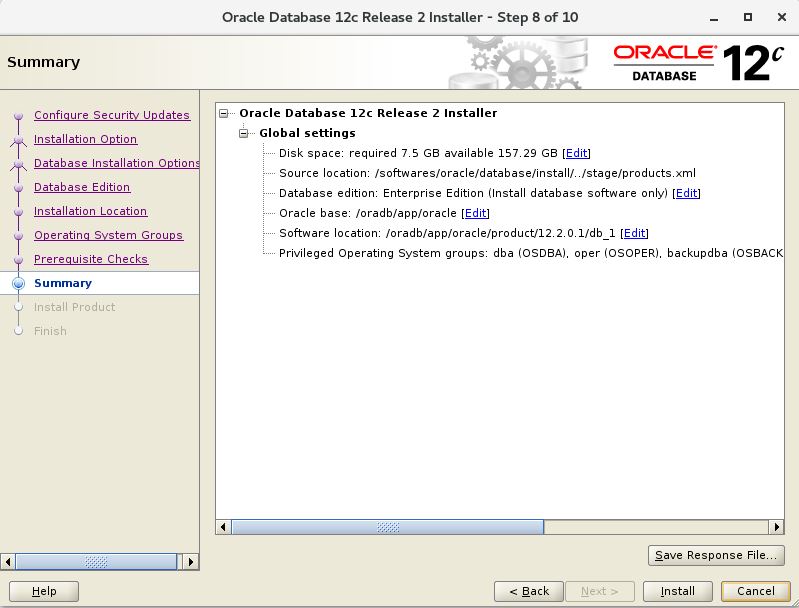
Step 7:
Once, the pre-checks has been completed without any failures, start the installation by “Install” in the below screen.
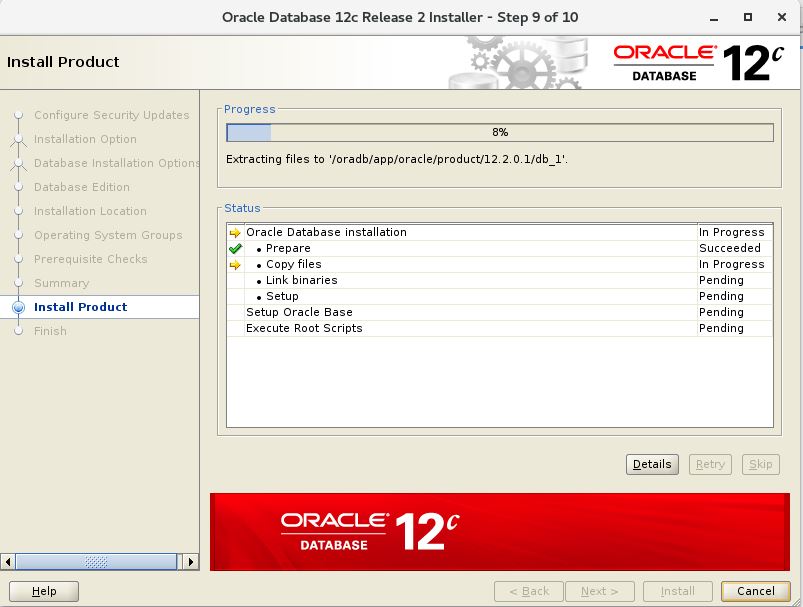
See the progress of the oracle binaries installation below.
Post-Install:
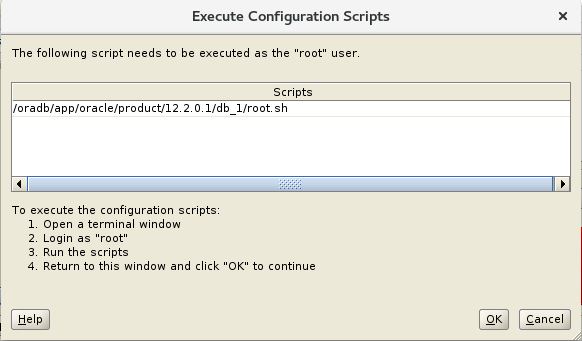
Once the binaries are installed, when the below screen apprears run the “root.sh” from the newly installed ORACLE_HOME directory from the terminal and press ”OK” and “Close” the GUI from the next screen.
# /oradb/app/oracle/product/12.2.0.1/db_1/root.sh
Database Creation:
Once the oracle binaries are installed successfully, run the environment file which we created already during pre-install and start dbca for Database creation.
Step 1:
# pwd
/home/oracle
# . prod.env
# dbca
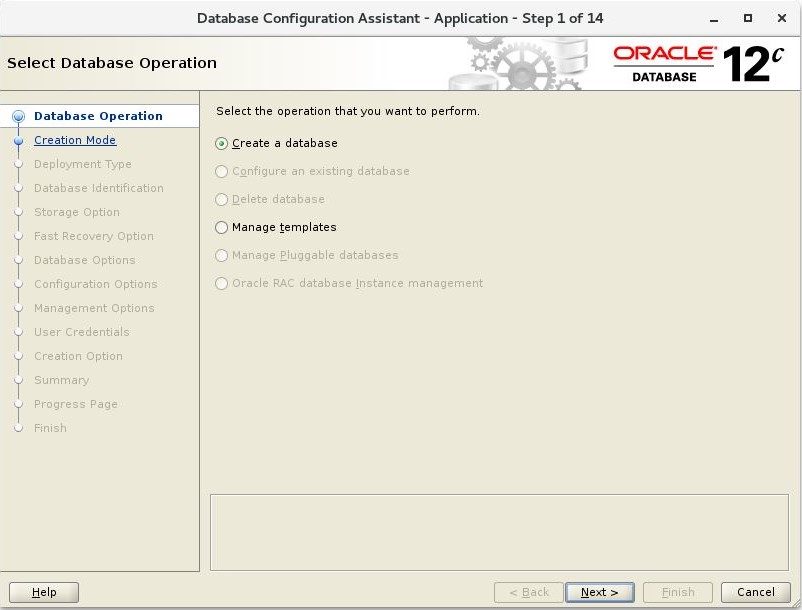
Here, since we are create a database for the first time in this server, almost all options are disabled except create database.
Step 2:
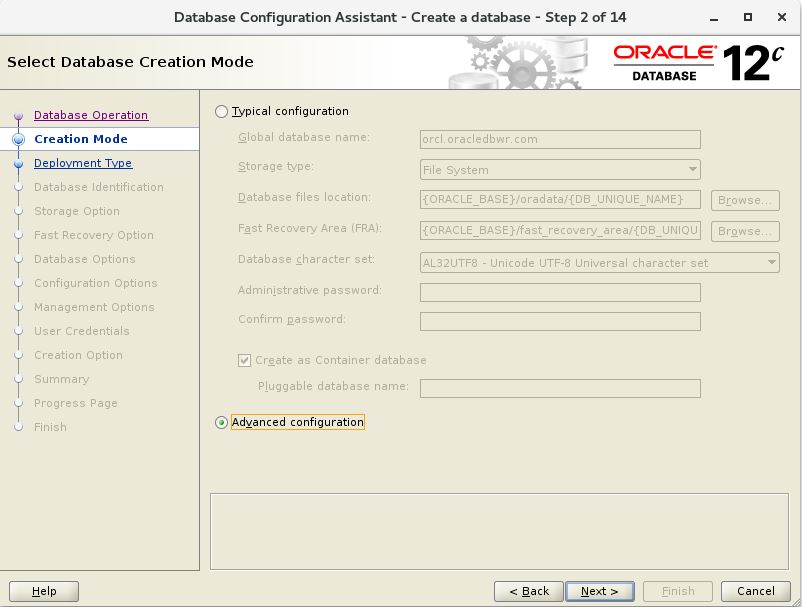
Select “Advanced Configuration” to create database custom configuration options like location of the database files, SGA & PGA and other parameters of the database.
Step 3:
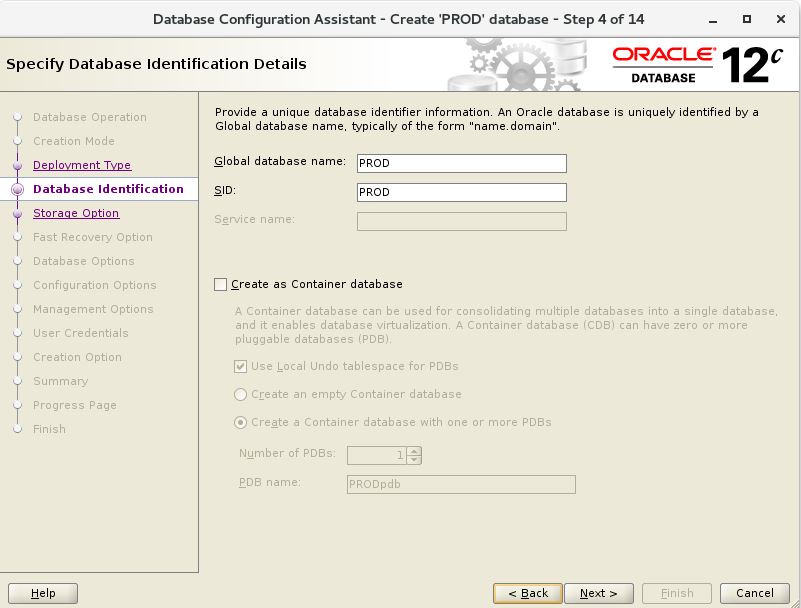
Provide the Global database name and SID of the database. Also, uncheck “Create as Container database” since we create a normal database.
Step 4:
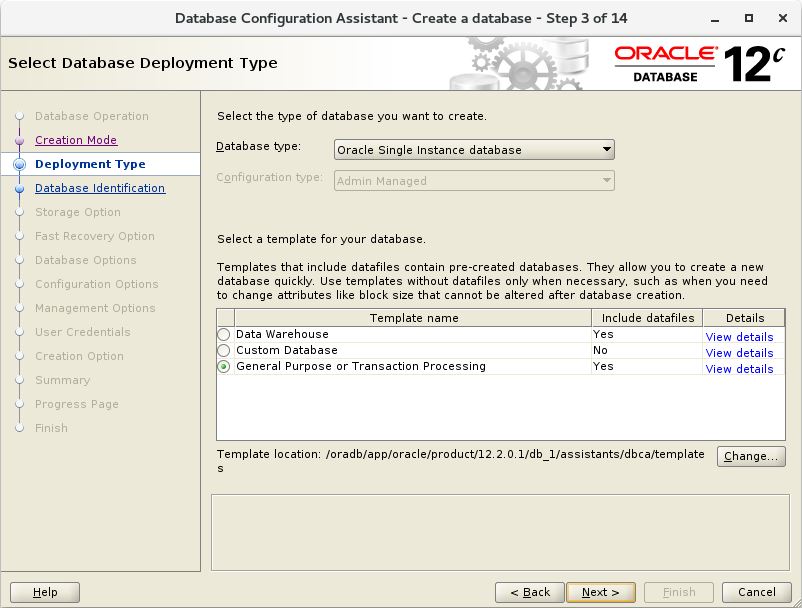
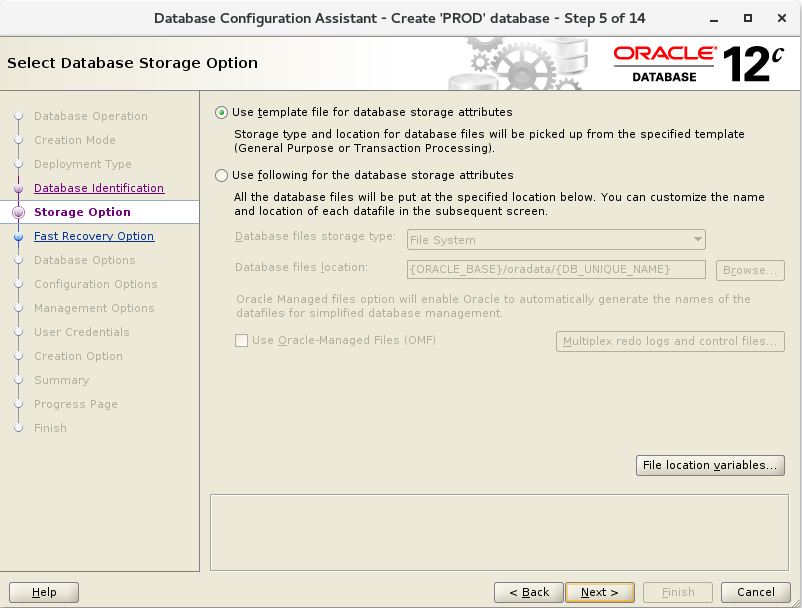
If you want place the datafiles in different directory other the default location, select option 2 and provide the directory.
Step 5:
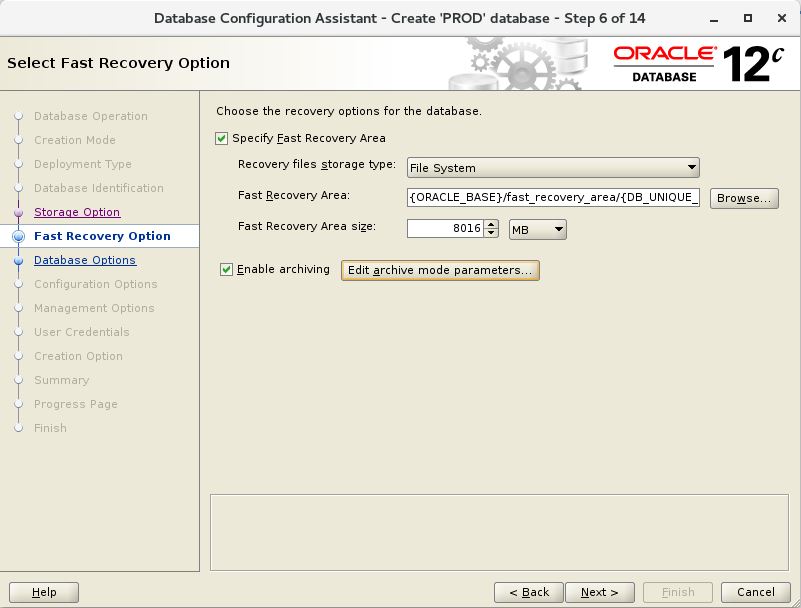
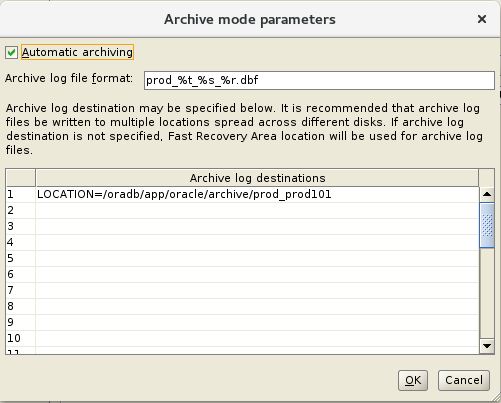
Check “Specify Fast Recovery Area” to place the backups and select “Enable archiving”. Also, I am specifying custom location to place the archive logs. So, select “Edit archive mode parameters” and provide the location.
Step 6:
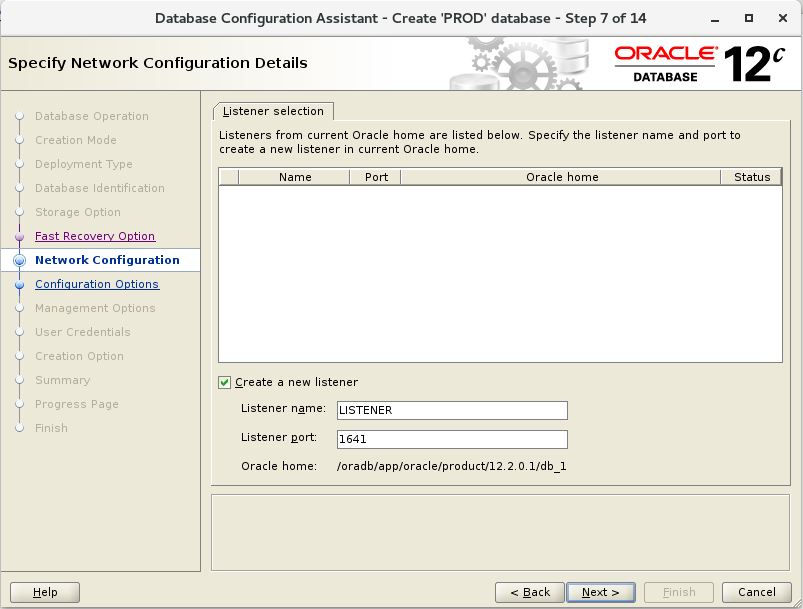
Provide the listener name and port# in the below screen.
Step 7:
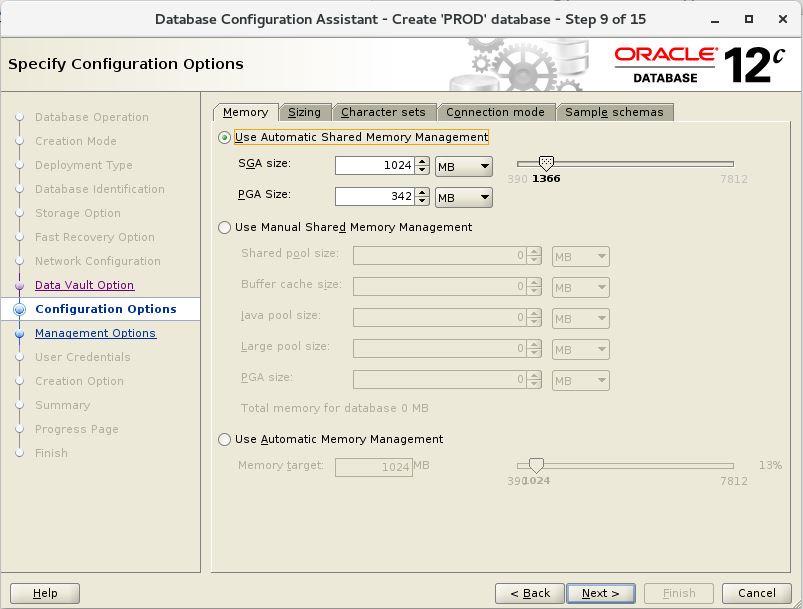
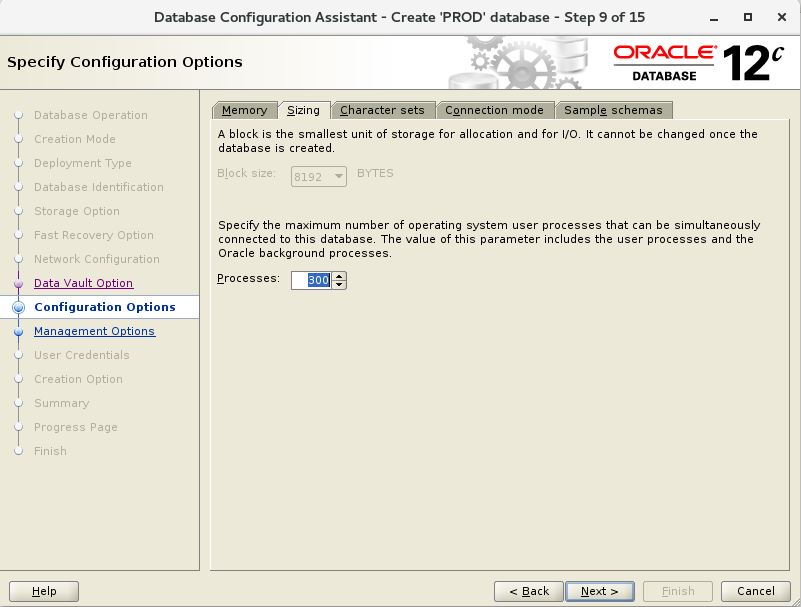
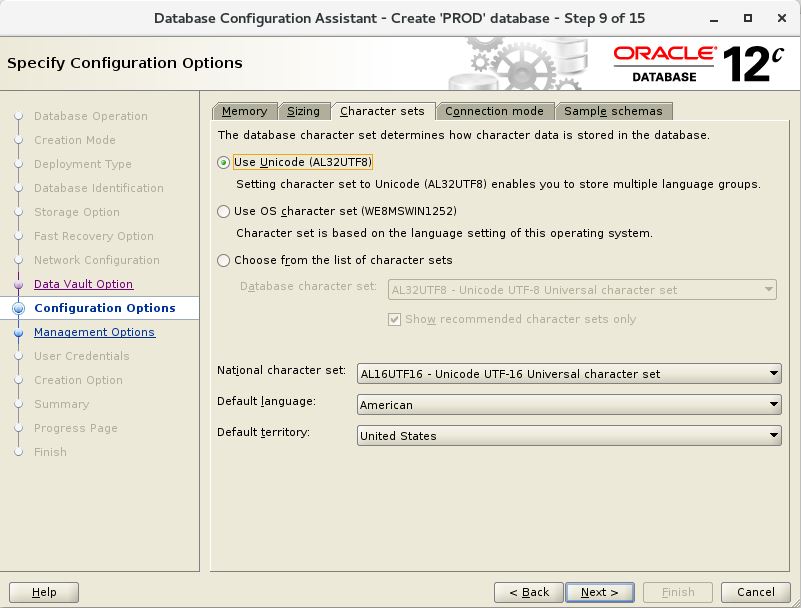
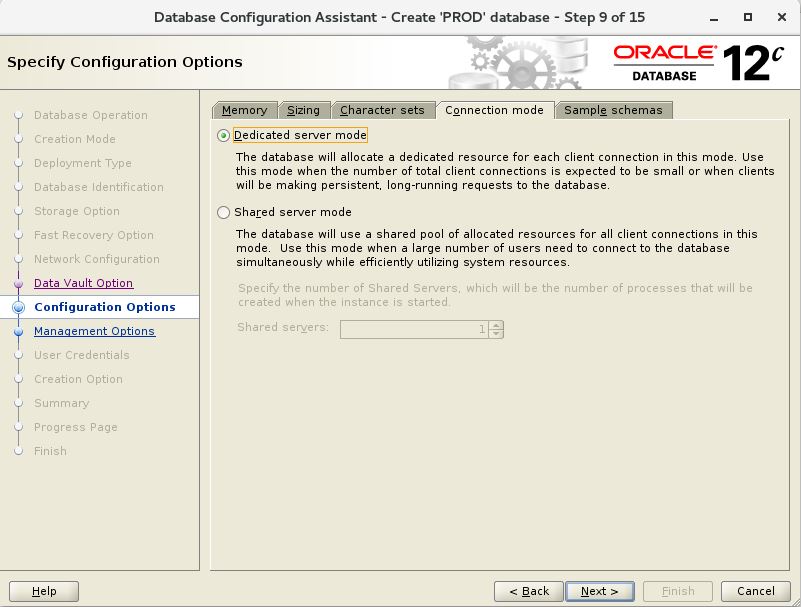
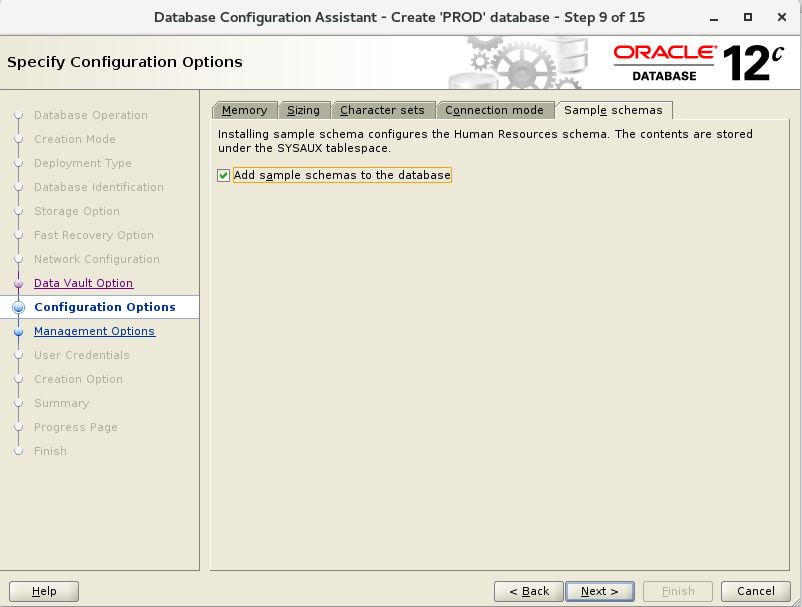
Provide the appropriate SGA & PGA, processes, characterset from the below GUI.
Step 8:
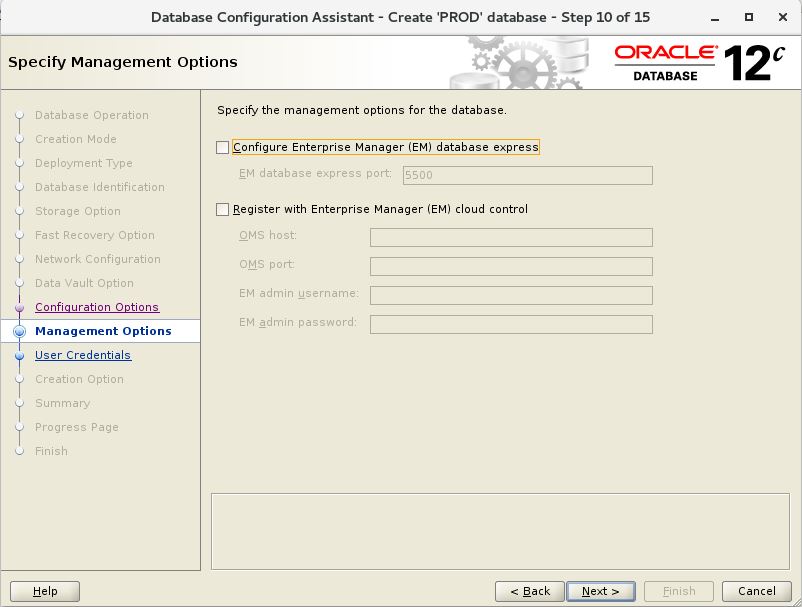
Configure Enterprise Manager if needed, else uncheck and press “Next”.
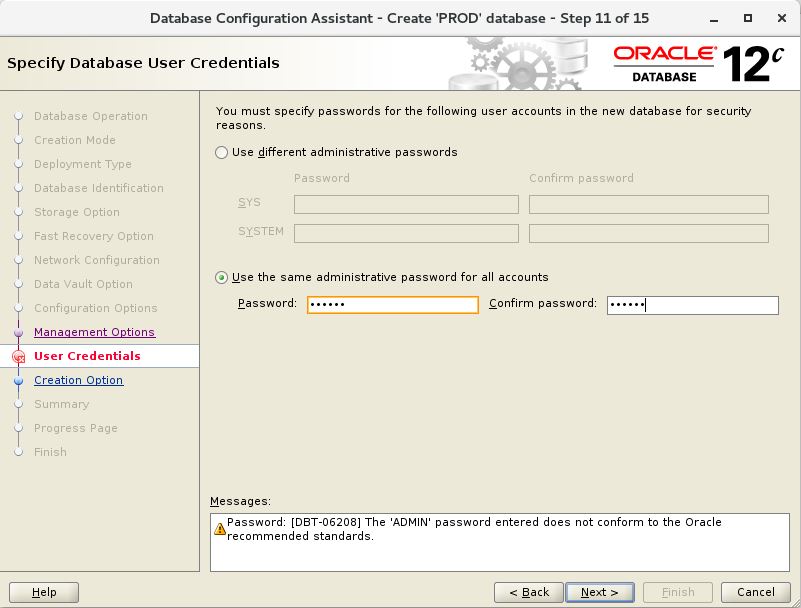
Step 9:
Provide the password for administrative accounts.
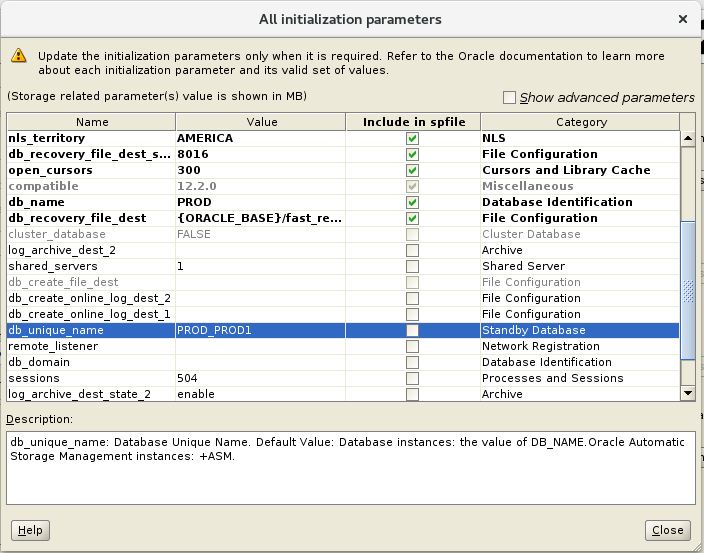
Step 10:
Select “Create database” option and “All Initialization Parameters” to check the parameters of the database.
Step 11:
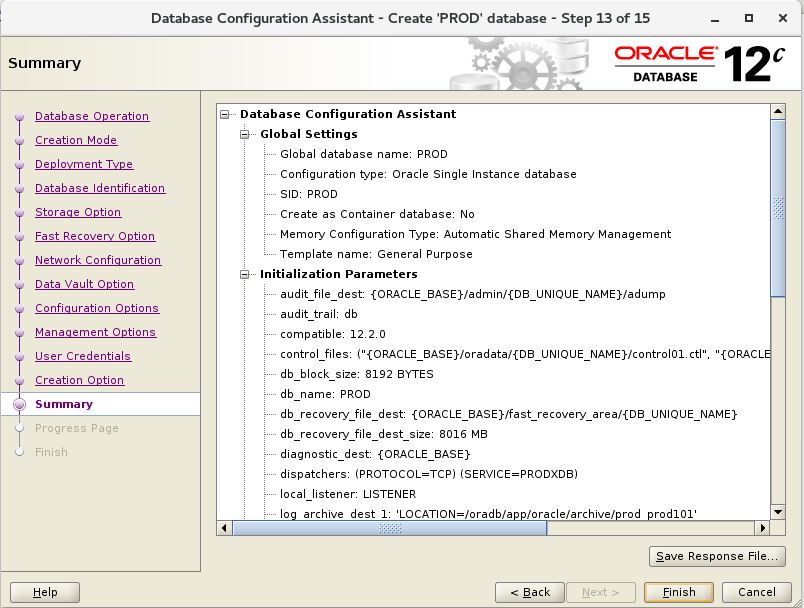
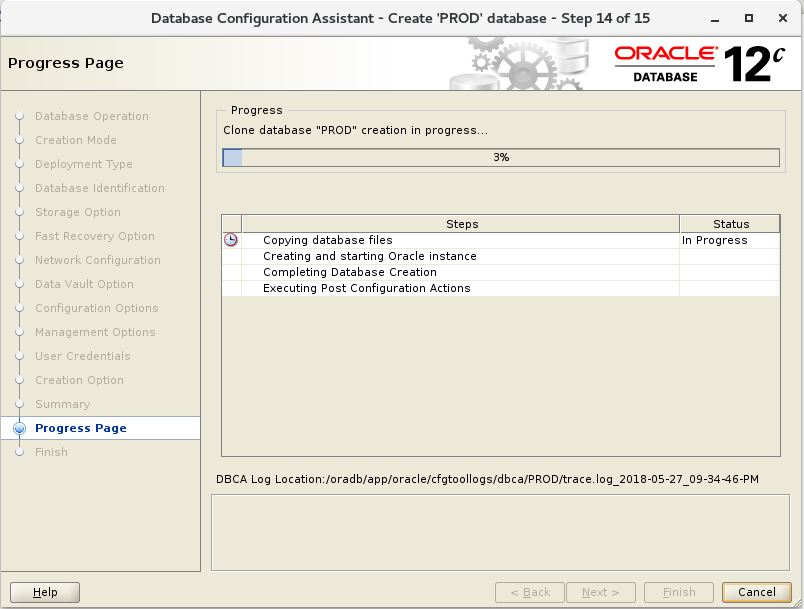
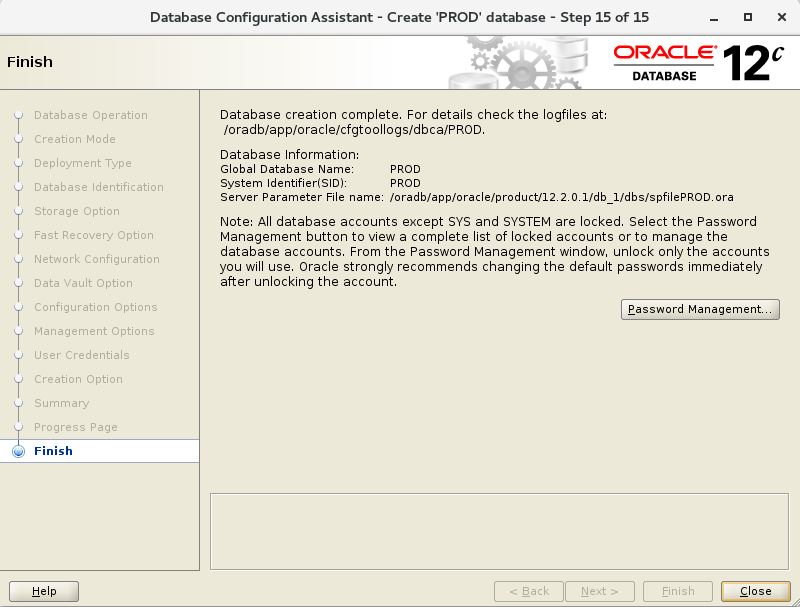
Click on Finish to start the database creation.
Catch Me On:- Hariprasath Rajaram
LinkedIn:https://www.linkedin.com/in/hari-prasath-aa65bb19/
Facebook:https://www.facebook.com/HariPrasathdba
FB Group:https://www.facebook.com/groups/894402327369506/
FB Page: https://www.facebook.com/dbahariprasath/?
Twitter: https://twitter.com/hariprasathdba


