MaterialApp
见名思其意,材料设计类型的App,在安卓5.0正式加入一些材料设计类型的组件之后,App风格也越来越趋向于材料设计类型。MaterialApp就是符合材料设计理念的App框架级Widget。它其实也是一个Widget。它由主题,title,路由,主页等。以下是其构造方法:
const MaterialApp({Key key,//导航键this.navigatorKey,//主页,应用默认所显示的界面 Widgetthis.home,//路由,应用的顶级导航表格,这个是多页面应用用来控制页面跳转的,类似于网页的网址this.routes = const <String, WidgetBuilder>{},//初始路由,第一个显示的路由名字,默认值为 Window.defaultRouteNamethis.initialRoute,//生成路由,生成路由的回调函数,当导航的命名路由的时候,会使用这个来生成界面this.onGenerateRoute,//未知路由this.onUnknownRoute,//导航观察器,应用 Navigator 的监听器this.navigatorObservers = const <NavigatorObserver>[],//构造者this.builder,//标题,在任务管理窗口中所显示的应用名字this.title = '',//生成标题this.onGenerateTitle,//颜色,应用的主要颜色值(primary color),也就是安卓任务管理窗口中所显示的应用颜色this.color,//主题,应用各种 UI 所使用的主题颜色this.theme,this.darkTheme,this.themeMode = ThemeMode.system,//地域,国际化this.locale,//本地化委托this.localizationsDelegates,//区域分辨率回调this.localeListResolutionCallback,this.localeResolutionCallback,//支持区域this.supportedLocales = const <Locale>[Locale('en', 'US')],//调试显示材质网格,是否显示 纸墨设计 基础布局网格,用来调试 UI 的工具this.debugShowMaterialGrid = false,//显示性能标签this.showPerformanceOverlay = false,this.checkerboardRasterCacheImages = false,this.checkerboardOffscreenLayers = false,this.showSemanticsDebugger = false,this.debugShowCheckedModeBanner = true,})
主页
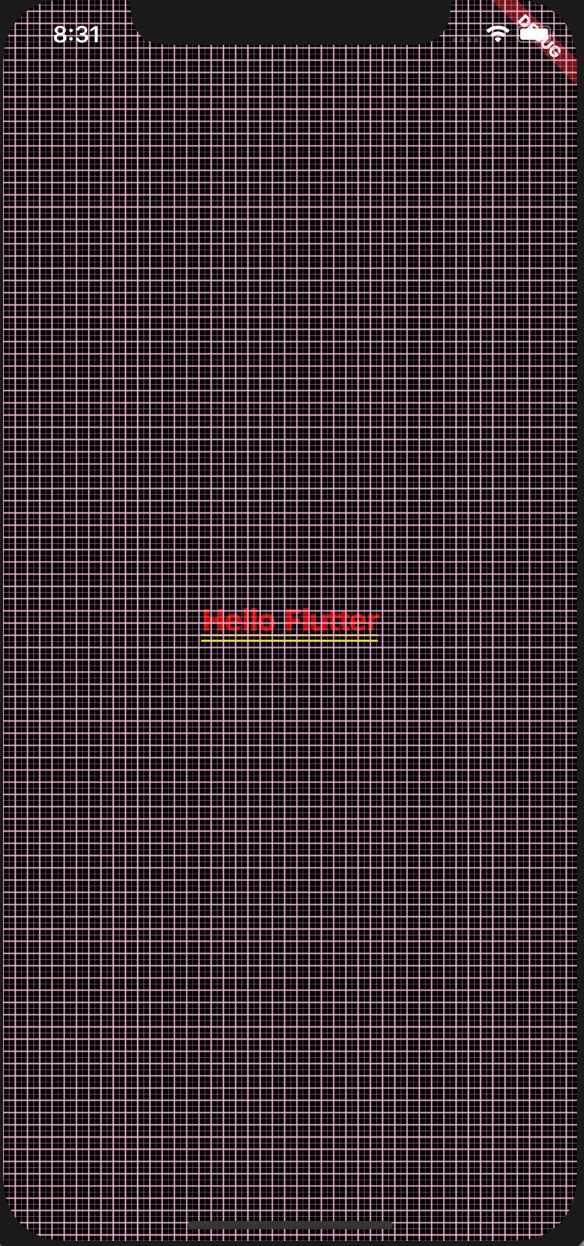
一个用来定义打开应用时候显示的第一个Widget界面。如:
class MaterialMyApp extends StatelessWidget {@overrideWidget build(BuildContext context) {return MaterialApp(title: "我是Flutter标题",theme: ThemeData(primaryColor: Colors.redAccent,),home:Center(child: Text("Hello Flutter",style: TextStyle(fontSize: 20),),)//MyHomePage(),,debugShowMaterialGrid: true,);}}
效果图
title
任务窗口中,APP显示的标题名字。如:
class MaterialMyApp extends StatelessWidget {@overrideWidget build(BuildContext context) {return MaterialApp(title: "我是Flutter标题",theme: ThemeData(primaryColor: Colors.redAccent,),home:MyHomePage(),);}}
路由
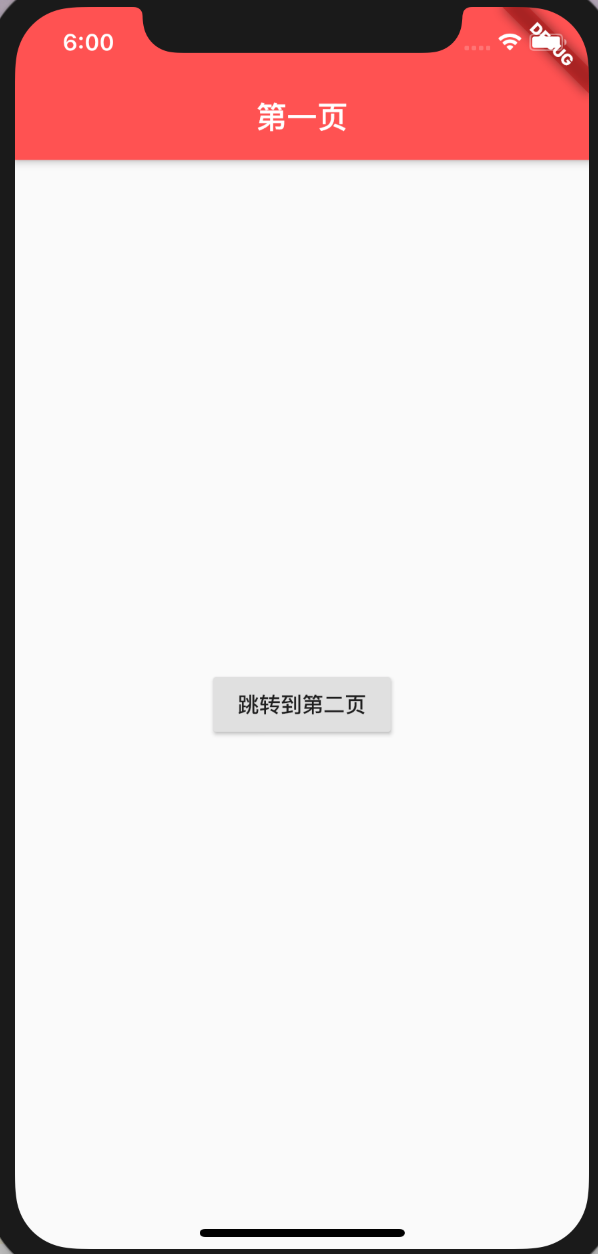
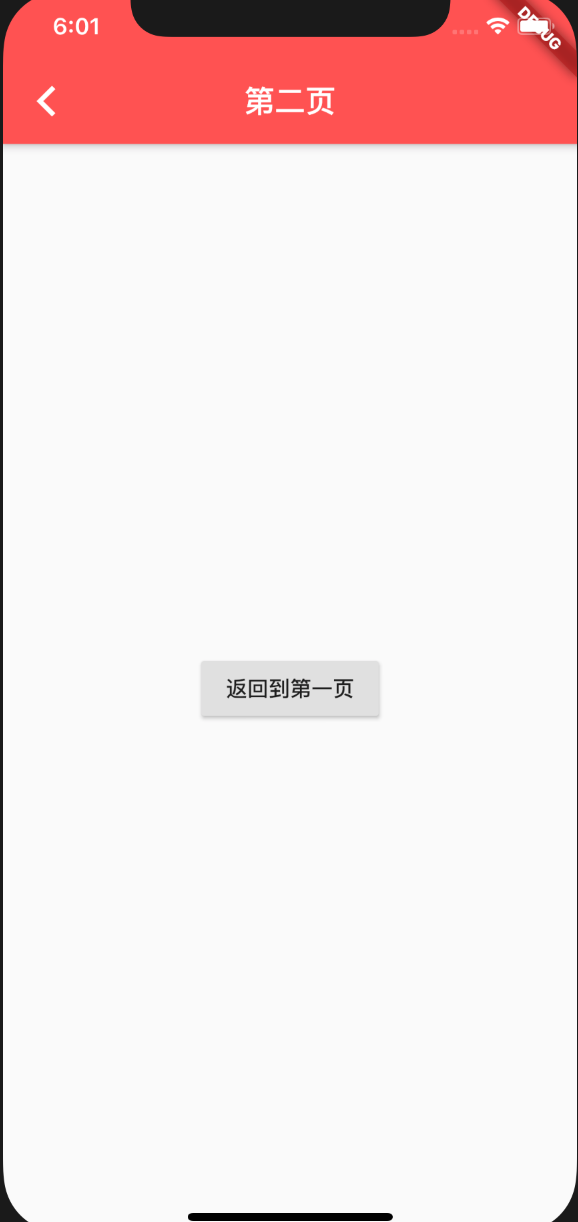
Map 类型,是应用的顶级路由表。当我们再使用Navigator.pushNamed进行命名路由的跳转时,会在此路表中进行查找并跳转。如果你的应用程序只有一个页面,则无需使用routes,直接指定home对应的Widget即可。如:
class MaterialMyApp extends StatelessWidget {@overrideWidget build(BuildContext context) {return MaterialApp(title: "我是Flutter标题",routes: <String,WidgetBuilder>{"/first":(BuildContext context)=>FirstPage(),"/second":(BuildContext context)=>SecondPage()},theme: ThemeData(primaryColor: Colors.redAccent,),home:/*Center(child: Text("Hello Flutter",style: TextStyle(fontSize: 20),),)*/FirstPage(),debugShowMaterialGrid: false,);}}class FirstPage extends StatelessWidget {@overrideWidget build(BuildContext context) {return Scaffold(appBar: AppBar(title: Text("第一页"),),body: Center(child: RaisedButton(onPressed:(){Navigator.pushNamed(context, '/second');},child: Text("跳转到第二页"),),),);}}class SecondPage extends StatelessWidget {@overrideWidget build(BuildContext context) {return Scaffold(appBar: AppBar(title: Text("第二页"),),body: Center(child: RaisedButton(onPressed:(){Navigator.of(context).pop(context);},child: Text("返回到第一页"),),),);}}
效果图
国际化
Scaffold
Scaffold是一个路由页的骨架,同样也是Material组件,主要有底部导航,顶部导航,侧面抽屉布局导航。
构造方法
const Scaffold({Key key,this.appBar,//设置应用栏,显示在脚手架顶部this.body,//展示页面的内容this.floatingActionButton,//设置悬浮于上层区域的按钮this.floatingActionButtonLocation,//设置floatingActionButton的位置this.floatingActionButtonAnimator,this.persistentFooterButtons,this.drawer,//设置左边侧边栏this.endDrawer,//设置右边侧边栏this.bottomNavigationBar,//底部导航栏this.bottomSheet,//底部抽屉栏this.backgroundColor,//背景颜色this.resizeToAvoidBottomPadding,//自动适应底部paddingthis.resizeToAvoidBottomInset,this.primary = true,this.drawerDragStartBehavior = DragStartBehavior.start,this.extendBody = false,this.drawerScrimColor,})
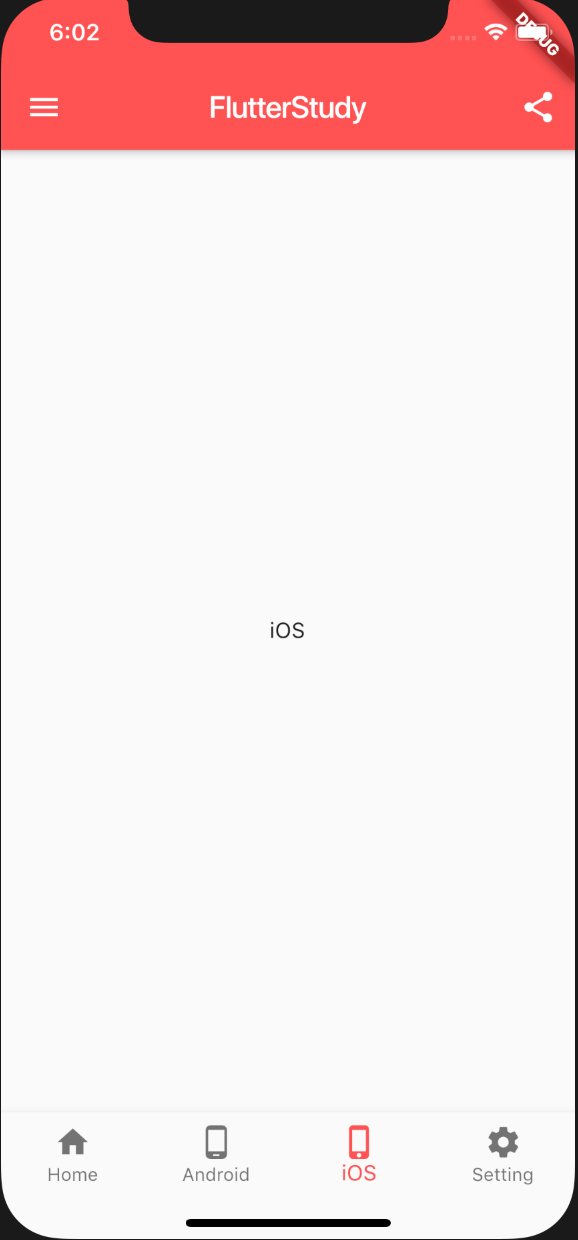
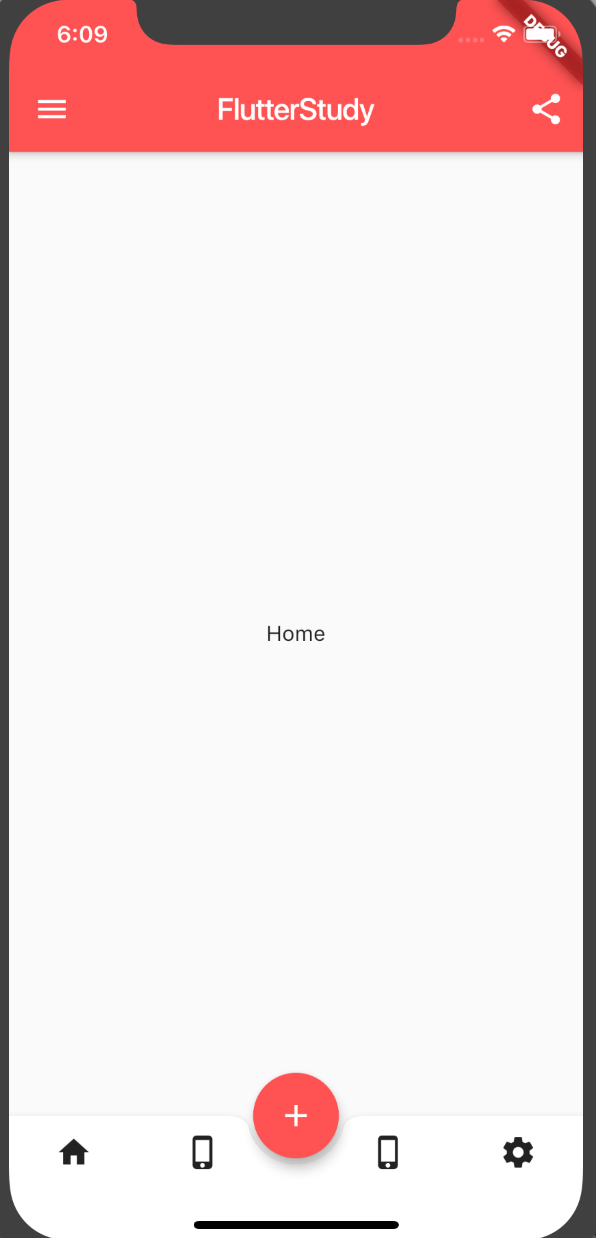
下面是一个常用的页面导航,包括appBar,drawer,还有bottomNavigationBar。
效果图
appBar
AppBar是一个Material风格的导航栏,通过它可以设置导航栏标题、导航栏菜单、导航栏底部的Tab标题。
其常用属性
AppBar({Key key,this.leading, //导航栏最左侧Widget,常见为抽屉菜单按钮或返回按钮。this.automaticallyImplyLeading = true, //如果leading为null,是否自动实现默认的leading按钮this.title,// 页面标题this.actions, // 导航栏右侧菜单this.bottom, // 导航栏底部菜单,通常为Tab按钮组this.elevation = 4.0, // 导航栏阴影this.centerTitle, //标题是否居中this.backgroundColor,//背景颜色...})
以上示意图AppBar代码。
appBar: new AppBar(title:new Text("FlutterStudy"),centerTitle: true,actions: <Widget>[IconButton(icon: Icon(Icons.share), onPressed: (){_scaffoldKey.currentState.showSnackBar(SnackBar(content:Text("点击了分享!")));})],),
图

drawer
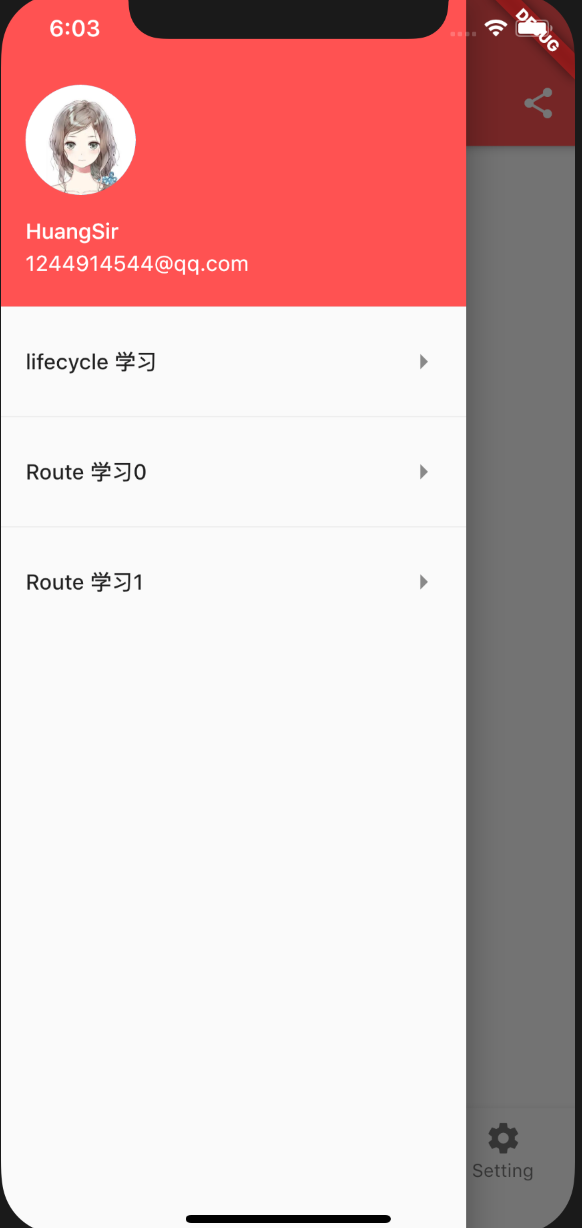
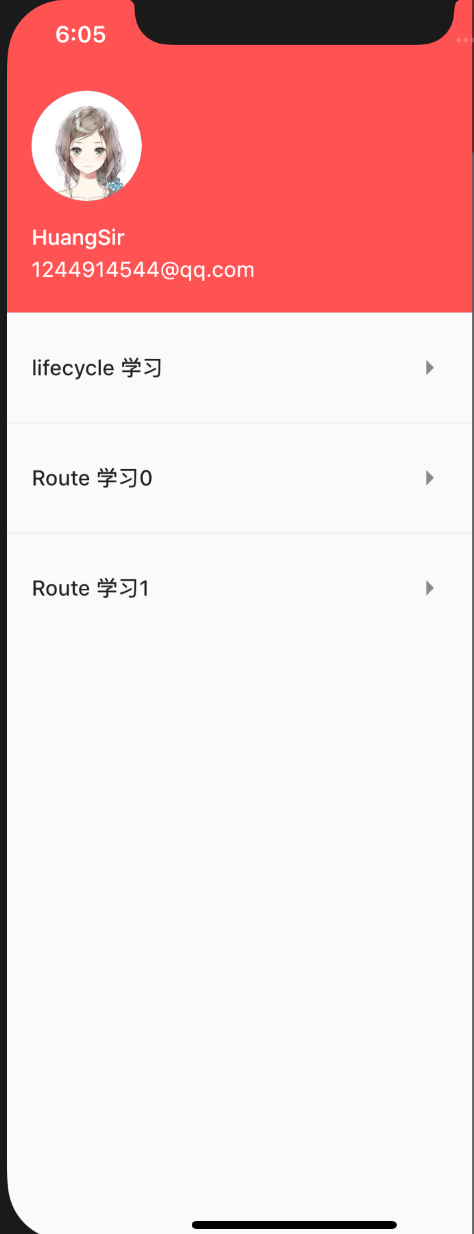
Scaffold的drawer和endDrawer属性可以分别接受一个Widget来作为页面的左、右抽屉菜单。如果开发者提供了抽屉菜单,那么当用户手指从屏幕左(或右)侧向里滑动时便可打开抽屉菜单。如果给Scaffold添加了抽屉菜单,默认情况下Scaffold会自动将AppBar的leading设置为菜单按钮。
drawer: new Drawer(child: new DrawerPage(),//提供一个Widget),
图
bottomNavigationBar
- BottomNavigationBar 常用的底部导航控件,还有一种BottomAppBar控件,它和FloatingActionButton配合实现底部不规则导航。
new BottomNavigationBar(items: [new BottomNavigationBarItem(icon: new Icon(Icons.home),title: new Text("Home")),new BottomNavigationBarItem(icon: new Icon(Icons.phone_android),title: new Text("Android")),new BottomNavigationBarItem(icon: new Icon(Icons.phone_iphone),title: new Text("iOS")),new BottomNavigationBarItem(icon: new Icon(Icons.settings),title: new Text("Setting")),],type: BottomNavigationBarType.fixed,currentIndex: _curIndex,onTap: (index){setState(() {_curIndex=index;});},)
图

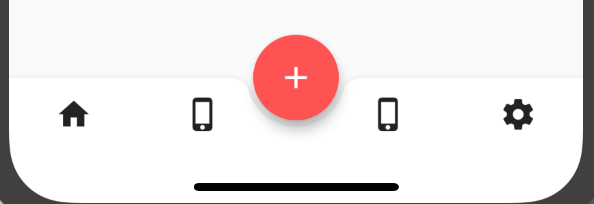
- BottomAppBar
BottomAppBar(color: Colors.white,shape: CircularNotchedRectangle(), // 底部导航栏打一个圆形的洞child: Row(children: [IconButton(icon: Icon(Icons.home),onPressed: (){setState(() {_curIndex=0;});},),IconButton(icon: Icon(Icons.phone_iphone),onPressed: (){setState(() {_curIndex=1;});},),SizedBox(), //中间位置空出IconButton(icon: Icon(Icons.phone_iphone),onPressed: (){setState(() {_curIndex=2;});},),IconButton(icon: Icon(Icons.settings),onPressed: (){setState(() {_curIndex=3;});},),],mainAxisAlignment: MainAxisAlignment.spaceAround, //均分底部导航栏横向空间),),floatingActionButton:isNormalShow?null: FloatingActionButton(onPressed: (){},backgroundColor: Colors.redAccent,child: Icon(Icons.add),),floatingActionButtonLocation:isNormalShow?null: FloatingActionButtonLocation.centerDocked,//设置floatingActionButton的位置
控制isNormalShow属性控制显示不同的底部导航。
图
完整代码
import 'package:flutter/material.dart';class MyScaffold1 extends StatelessWidget {@overrideWidget build(BuildContext context) {return MaterialApp(title: "我是标题",theme: ThemeData(primaryColor: Colors.redAccent),home: HomePage(),);}}class HomePage extends StatefulWidget {@override_HomePage createState() => _HomePage();}class _HomePage extends State<HomePage>{final GlobalKey<ScaffoldState> _scaffoldKey = GlobalKey<ScaffoldState>();int _curIndex=0;List<ContentPage> contents=new List();bool isNormalShow=true;@overridevoid initState() {// TODO: implement initStatesuper.initState();contents.add(new ContentPage(content:"Home"));contents.add(new ContentPage(content:"Android"));contents.add(new ContentPage(content:"iOS"));contents.add(new ContentPage(content:"Setting"));}@overridevoid dispose() {// TODO: implement disposesuper.dispose();}@overrideWidget build(BuildContext context) {// TODO: implement buildreturn new Scaffold(key: _scaffoldKey,appBar: new AppBar(title:new Text("FlutterStudy"),centerTitle: true,actions: <Widget>[IconButton(icon: Icon(Icons.share), onPressed: (){_scaffoldKey.currentState.showSnackBar(SnackBar(content:Text("点击了分享!")));})],),drawer: new Drawer(child: new DrawerPage(),),body: contents[_curIndex],bottomNavigationBar:isNormalShow? new BottomNavigationBar(items: [new BottomNavigationBarItem(icon: new Icon(Icons.home),title: new Text("Home")),new BottomNavigationBarItem(icon: new Icon(Icons.phone_android),title: new Text("Android")),new BottomNavigationBarItem(icon: new Icon(Icons.phone_iphone),title: new Text("iOS")),new BottomNavigationBarItem(icon: new Icon(Icons.settings),title: new Text("Setting")),],type: BottomNavigationBarType.fixed,currentIndex: _curIndex,onTap: (index){setState(() {_curIndex=index;});},):BottomAppBar(color: Colors.white,shape: CircularNotchedRectangle(), // 底部导航栏打一个圆形的洞child: Row(children: [IconButton(icon: Icon(Icons.home),onPressed: (){setState(() {_curIndex=0;});},),IconButton(icon: Icon(Icons.phone_iphone),onPressed: (){setState(() {_curIndex=1;});},),SizedBox(), //中间位置空出IconButton(icon: Icon(Icons.phone_iphone),onPressed: (){setState(() {_curIndex=2;});},),IconButton(icon: Icon(Icons.settings),onPressed: (){setState(() {_curIndex=3;});},),],mainAxisAlignment: MainAxisAlignment.spaceAround, //均分底部导航栏横向空间),),floatingActionButton:isNormalShow?null: FloatingActionButton(onPressed: (){},backgroundColor: Colors.redAccent,child: Icon(Icons.add),),floatingActionButtonLocation:isNormalShow?null: FloatingActionButtonLocation.centerDocked,);}}class DrawerWidget extends StatefulWidget {@overrideState<StatefulWidget> createState() {// TODO: implement createStatereturn new _DrawerWidgetStage();}}class _DrawerWidgetStage extends State<DrawerWidget> {@overrideWidget build(BuildContext context) {// TODO: implement buildreturn new ListView(padding: const EdgeInsets.only(),children: <Widget>[new UserAccountsDrawerHeader(accountName: new Text("HuangSir"),accountEmail: new Text("1244914544@qq.com"),currentAccountPicture: new CircleAvatar(backgroundImage: new NetworkImage("http://img.52z.com/upload/news/image/20181108/20181108204521_83402.jpg"),),),_getListTitle("lifecycle 学习", "/LifecyclePage"),new Divider(),_getListTitle("Route 学习0", "/RoutePage0"),new Divider(),_getListTitle("Route 学习1", "/RoutePage1"),],);}ListTile _getListTitle(String title, String route) {return new ListTile(title: new Text(title),trailing: new Icon(Icons.arrow_right),onTap: () {Navigator.of(context).pop();Navigator.pushNamed(context, route);},);}}class DrawerPage extends StatelessWidget {@overrideWidget build(BuildContext context) {// TODO: implement buildreturn new Scaffold(body: new DrawerWidget(),);}}//内容页class ContentPage extends StatelessWidget {final String content;const ContentPage({Key key, this.content}) : super(key: key);@overrideWidget build(BuildContext context) {return Center(child: Text(this.content),);}}
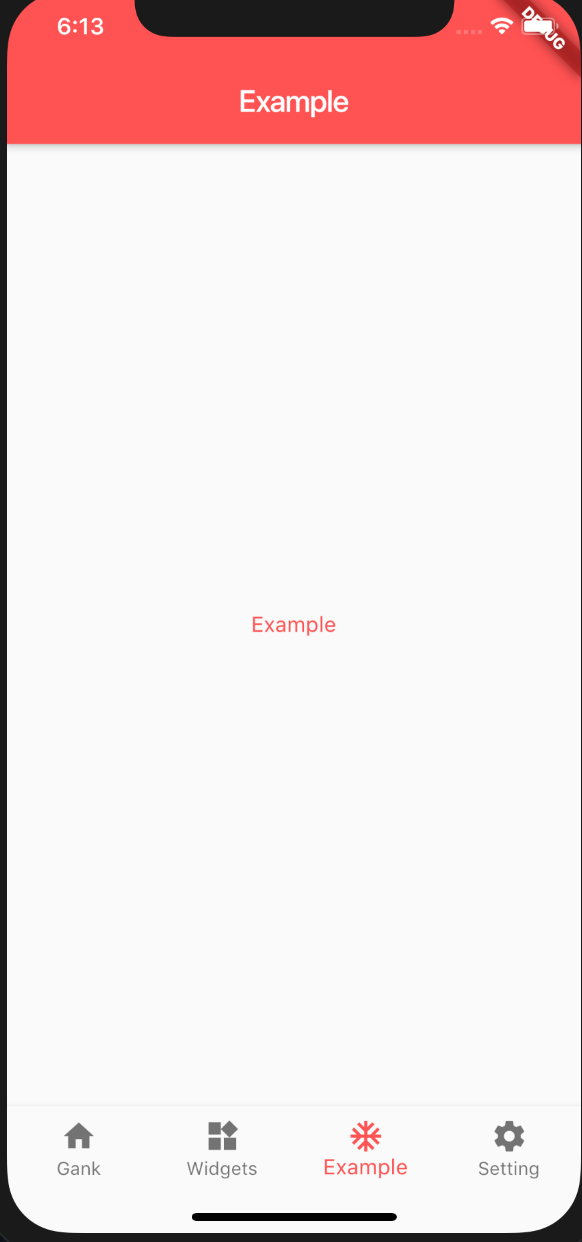
还有一种底部导航配合PageView实现的常用的App框架。但是每次点击页面都会调用页面的initState方法,其解决方法是使其内容页 with AutomaticKeepAliveClientMixin,实现
@override// TODO: implement wantKeepAlivebool get wantKeepAlive => true;
即可。
效果图
完整代码
import 'package:flutter/material.dart';class MaterialMyApp extends StatelessWidget {@overrideWidget build(BuildContext context) {return MaterialApp(title: "我是Flutter标题",routes: <String, WidgetBuilder>{"/first": (BuildContext context) => FirstPage(),"/second": (BuildContext context) => SecondPage()},theme: ThemeData(primaryColor: Colors.redAccent,),home: MyHomePage(),debugShowMaterialGrid: false,);}}class FirstPage extends StatelessWidget {@overrideWidget build(BuildContext context) {return Scaffold(appBar: AppBar(title: Text("第一页"),),body: Center(child: RaisedButton(onPressed: () {Navigator.pushNamed(context, '/second');},child: Text("跳转到第二页"),),),);}}class SecondPage extends StatelessWidget {@overrideWidget build(BuildContext context) {return Scaffold(appBar: AppBar(title: Text("第二页"),),body: Center(child: RaisedButton(onPressed: () {Navigator.of(context).pop(context);},child: Text("返回到第一页"),),),);}}////// 主页///class MyHomePage extends StatefulWidget {@override_MyHomePageState createState() => _MyHomePageState();}class _MyHomePageState extends State<MyHomePage> {var _curIndex = 0;var _pagerController = new PageController(initialPage: 0);List<String> _tabs = ["Gank", "Widgets", "Example", "Setting"];@overridevoid initState() {super.initState();}@overridevoid dispose() {super.dispose();}@overrideWidget build(BuildContext context) {return Scaffold(body: new PageView.builder(itemBuilder: (BuildContext context, int index) {return _buildPageItem(context, index);},itemCount: _tabs.length,controller: _pagerController,onPageChanged: (index) {_onChangePageView(index);},),bottomNavigationBar: BottomNavigationBar(items: [_buildBottomItem(Icons.home, _tabs[0]),_buildBottomItem(Icons.widgets, _tabs[1]),_buildBottomItem(Icons.ac_unit, _tabs[2]),_buildBottomItem(Icons.settings, _tabs[3]),],currentIndex: _curIndex,type: BottomNavigationBarType.fixed,onTap: (index) {_pagerController.animateToPage(index,duration: const Duration(milliseconds: 300), curve: Curves.ease);},),);}void _onChangePageView(int index) {setState(() {_curIndex = index;});}Widget _buildPageItem(BuildContext context, int index) {return ContentWidget(content: _tabs[index]);}BottomNavigationBarItem _buildBottomItem(IconData iconData, String tab) {return new BottomNavigationBarItem(icon: Icon(iconData), title: Text(tab));}}////// 内容页面///class ContentWidget extends StatefulWidget {final String content;const ContentWidget({Key key, this.content}) : super(key: key);@overrideState<StatefulWidget> createState() {// TODO: implement createStatereturn new __ContentWidgetStage();}}class __ContentWidgetStage extends State<ContentWidget>with AutomaticKeepAliveClientMixin {@overridevoid initState() {// TODO: implement initStatesuper.initState();print("initState===>" + this.widget.content);}@overrideWidget build(BuildContext context) {// TODO: implement buildreturn Scaffold(appBar: AppBar(title: Text(this.widget.content),),body: Center(child: Text(this.widget.content,style: TextStyle(color: Colors.redAccent),),),);}@override// TODO: implement wantKeepAlivebool get wantKeepAlive => true;}
本文分享自微信公众号 - Flutter学习簿(gh_d739155d3b2c)。
如有侵权,请联系 support@oschina.cn 删除。
本文参与“OSC源创计划”,欢迎正在阅读的你也加入,一起分享。


