一、我的资料:
1、返回样式
getSupportActionBar().setDisplayShowHomeEnabled(false);
getSupportActionBar().setDisplayShowTitleEnabled(true);
getSupportActionBar().setDisplayHomeAsUpEnabled(true);
2、编辑头像和刷新
<?xml version="1.0" encoding="utf-8"?>
<menu xmlns:android="http://schemas.android.com/apk/res/android" >

    <item
        android:id="@+id/menu_userinfo_edit_btn"
        android:showAsAction="always"
        android:icon="@drawable/ic_action_edit"
        android:title="@string/userinfo_edit"/>

    <item
        android:id="@+id/menu_userinfo_refresh_btn"
        android:showAsAction="ifRoom"
        android:icon="@drawable/ic_action_refresh"
        android:title="@string/refresh"/>

</menu>

@Override
public boolean onCreateOptionsMenu(Menu menu) {
    getSupportMenuInflater().inflate(R.menu.menu_userinfo, menu);
    return super.onCreateOptionsMenu(menu);
}

@Override
public boolean onOptionsItemSelected(MenuItem item) {
    switch (item.getItemId()) {
    case android.R.id.home:
        finish();
        break;
    case R.id.menu_userinfo_edit_btn:
        CharSequence[] items = { getString(R.string.img_from_album),
                getString(R.string.img_from_camera) };
        imageChooseItem(items);
        break;
    case R.id.menu_userinfo_refresh_btn:
        loadUserInfoThread(true);
        break;
    default:
        break;
    }
    return super.onOptionsItemSelected(item);
}
3、截屏


4、执行耗时操作的提示方式
源代码采用的是创建一个LoadingDialog对象,在刷新、上传头像的时候,显示对话框,完成后消失。这个类似IOS上面的UIAlertView,如图:
UIAlertView *alert = [[UIAlertView alloc]
                              initWithTitle:@"Something was done"
                              message:msg
                              delegate:self
                              cancelButtonTitle:@"Phew!"
                              otherButtonTitles:nil];

[alert show];

在这里,简单的改造下,代码和效果如下:
4.1、刷新
1)、在Activity的onCreate()中,设置requestWindowFeature
protected void onCreate(Bundle savedInstanceState) {
    requestWindowFeature(Window.FEATURE_INDETERMINATE_PROGRESS);
    super.onCreate(savedInstanceState);
    setContentView(R.layout.user_info);

    setTitle(R.string.main_menu_myinfo);

    // 初始化视图控件
    this.initView();
    // 初始化视图数据
    this.initData();
}
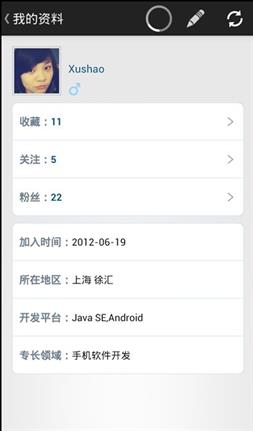
2)、刷新完成,取消“转圈圈”
private void initData() {
    mHandler = new Handler() {
        @Override
        public void handleMessage(Message msg) {
            // if (loading != null)
            // loading.dismiss();

            setSupportProgressBarIndeterminateVisibility(false);

            // 刷新成功
            if (msg.what == 1 && msg.obj != null) {
                Toast.makeText(UserInfoActivity.this, "刷新成功",
                        Toast.LENGTH_SHORT).show();
                user = (MyInformation) msg.obj;
                // 加载用户头像
                UIHelper.showUserFace(face, user.getFace());
3)、开始刷新的时候,启动“转圈圈”
private void loadUserInfoThread(final boolean isRefresh) {
    // loading = new LoadingDialog(this);
    // loading.show();

    setSupportProgressBarIndeterminateVisibility(true);

// ......
4)、效果图

4.2、上传头像
和刷新差不多,只是增加了提示语。关于提示,大家可以有不同的创意好风格,这里我就随便挑个简单的。大家如果有好的想法,欢迎提出来,供大家学习交流。
不过上传的时候,采用这种设计并不好,因为用户很容易按下返回键。所以我觉得还是采用Dialog或AlertView更合适。
当然,这里纯粹为了演示效果和偷懒,仍旧采用了和刷新一样的“圆圈”。
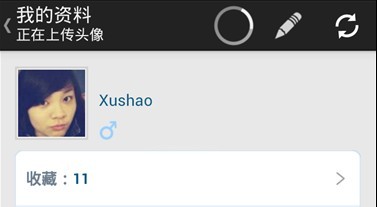
1)、开始上传,添加subtitle
// if (loading != null) {
// loading.setLoadText("正在上传头像···");
// loading.show();
// }

getSupportActionBar().setSubtitle("正在上传头像");
setSupportProgressBarIndeterminateVisibility(true);
2)、上传完成,取消subtitle
// if (loading != null)
// loading.dismiss();

getSupportActionBar().setSubtitle(null);
setSupportProgressBarIndeterminateVisibility(false);
3)、效果图
二、首页资讯
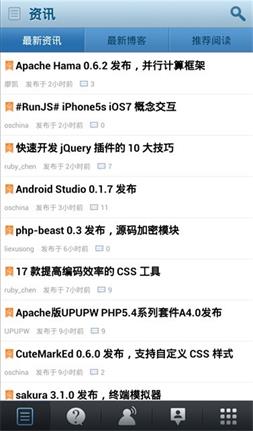
1、享受阅读:由于去掉了底部的一组导航按钮,所以显示的有效空间更大,而且减少了对阅读的干扰。
2、单手操作:横向滑动时,切换顶部的三个Tab,切换更方便,特别是大屏手机,单手操作的话,很难在左图中切换资讯、博客、阅读。

三、Actionbar和Tab样式简介
Actionbar默认的主题有Theme.Holo.Light和Theme.Holo.Light.DarkActionBar,前者是灰白色的Actionbar,后者是黑色的Actionbar。
使用Theme.Holo.Light.DarkActionBar效果:


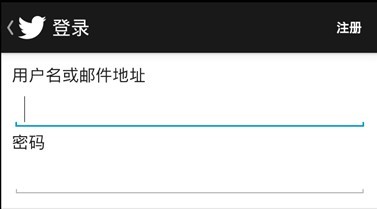
Twitter的登录页面(不知道我下载的这个是不是山寨的:)~~)
Path的商店界面

四、自定义
1、自定义Actionbar背景
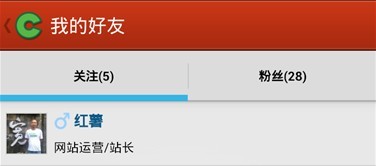
下面是在values和values-14中自定义Actionbar样式,由于时间仓促(22点了,困~),不一定完全合理和正确,仅提供一种思路。
1)、在res/values/styles目录下,使用的是Theme.Sherlock.Light.DarkActionBar
自定义的时候,只需要覆盖它的actionBarStyle即可:
<style name="AppBaseTheme" parent="Theme.Sherlock.Light.DarkActionBar"></style>

<!-- Application theme. -->
<style name="AppTheme" parent="AppBaseTheme">
    <!-- All customizations that are NOT specific to a particular API-level can go here. -->
    <item name="actionBarStyle">@style/MyActionBarStyle</item>
</style>

<style name="MyActionBarStyle" parent="@style/Widget.Sherlock.Light.ActionBar.Solid.Inverse">
    <item name="background">@drawable/ab_custom_blue_holo_light</item>
</style>
当然,对应的字体颜色,图标颜色,菜单样式等等,都可能会变得不那么协调了,这需要多覆盖几项其它样式,比如字体颜色,图标的普通样式和按下样式等。
最好都定义在自己写的MyActionBar样式中,不要直接去覆盖系统的资源图片、字体和颜色值等。
2)、在res/values-14/styles目录下,只需要覆盖系统定义的即可:
<!--
        Base application theme for API 14+. This theme completely replaces
        AppBaseTheme from BOTH res/values/styles.xml and
        res/values-v11/styles.xml on API 14+ devices.
    -->
    <style name="AppBaseTheme" parent="android:Theme.Holo.Light">

        <!-- API 14 theme customizations can go here. -->
        <item name="android:actionBarStyle">@style/MyActionBarStyle</item>
    </style>

    <!-- Application theme. -->
    <style name="AppTheme" parent="AppBaseTheme"></style>

    <style name="MyActionBarStyle" parent="@android:style/Widget.Holo.Light.ActionBar">
        <item name="android:background">@drawable/ab_custom_blue_holo_light</item>
    </style>
上面的自定义,我只是简单的处理了下,具体开发的话,应该更规范点。
2、项目源码
https://git.oschina.net/xsjayz/OsChina\_Slidingmenu\_20130808


