前言
作为一名前端工程师,我们每天都在和组件打交道,我们也许基于react/vue使用过很多第三方组件库,比如ant design,elementUI,iView等,或者基于它们进行过组件的二次开发,比如业务组件,UI组件等,亦或者觉得团队能力很强,可以不依赖第三方而独立开发属于自己的组件库。无论何种形式,组件开发已然成为我们工作中的必备技能,为了更好的复用性和可维护性,组件化开发是必然选择,也正是因为组件化开发越来越重要,几年前web标准推出了Web Component这一概念,意在解决html原生标记语言复用性的问题。
目前vue或者react框架中也支持使用Web Component,而且在Web Component中也可以动态的调用react或者vue的api来实现组件或页面的渲染,这给我们开发者提供了更大的自由度,从而在日益复杂的项目中能使用更加灵活且优雅的方式来进行组件化开发。
我们使用Web Component可以通过原生的方式来实现组件化而不依赖与vue或者react这些第三方框架,并且现代浏览器对其支持还算不错,相信未来Web Component将会成为组件开发的趋势。所以接下来笔者将会带大家一步步来学习Web Component,并且使用Web Component实现两个常用组件:
- Button
- Modal
大家在掌握了Web Component之后可以开发更多自定义组件,那么写下来就来学习一下吧。
正文
在开始正文之前笔者还想多啰嗦一下,也是之前有很多朋友问我的问题:如何在公司平衡好工作和成长?
其实笔者也经历过这种迷茫期,之前因为公司业务繁忙而不得不忙于编写业务代码,几乎没有时间去学习和成长。有些时候项目做完之后又有新的需求要处理,感觉瞬间被掏空。(B端产品为了满足客户需求往往在产品把控上很难做取舍,因为客户就是上帝, 所以工程师和产品的关系很微妙~)
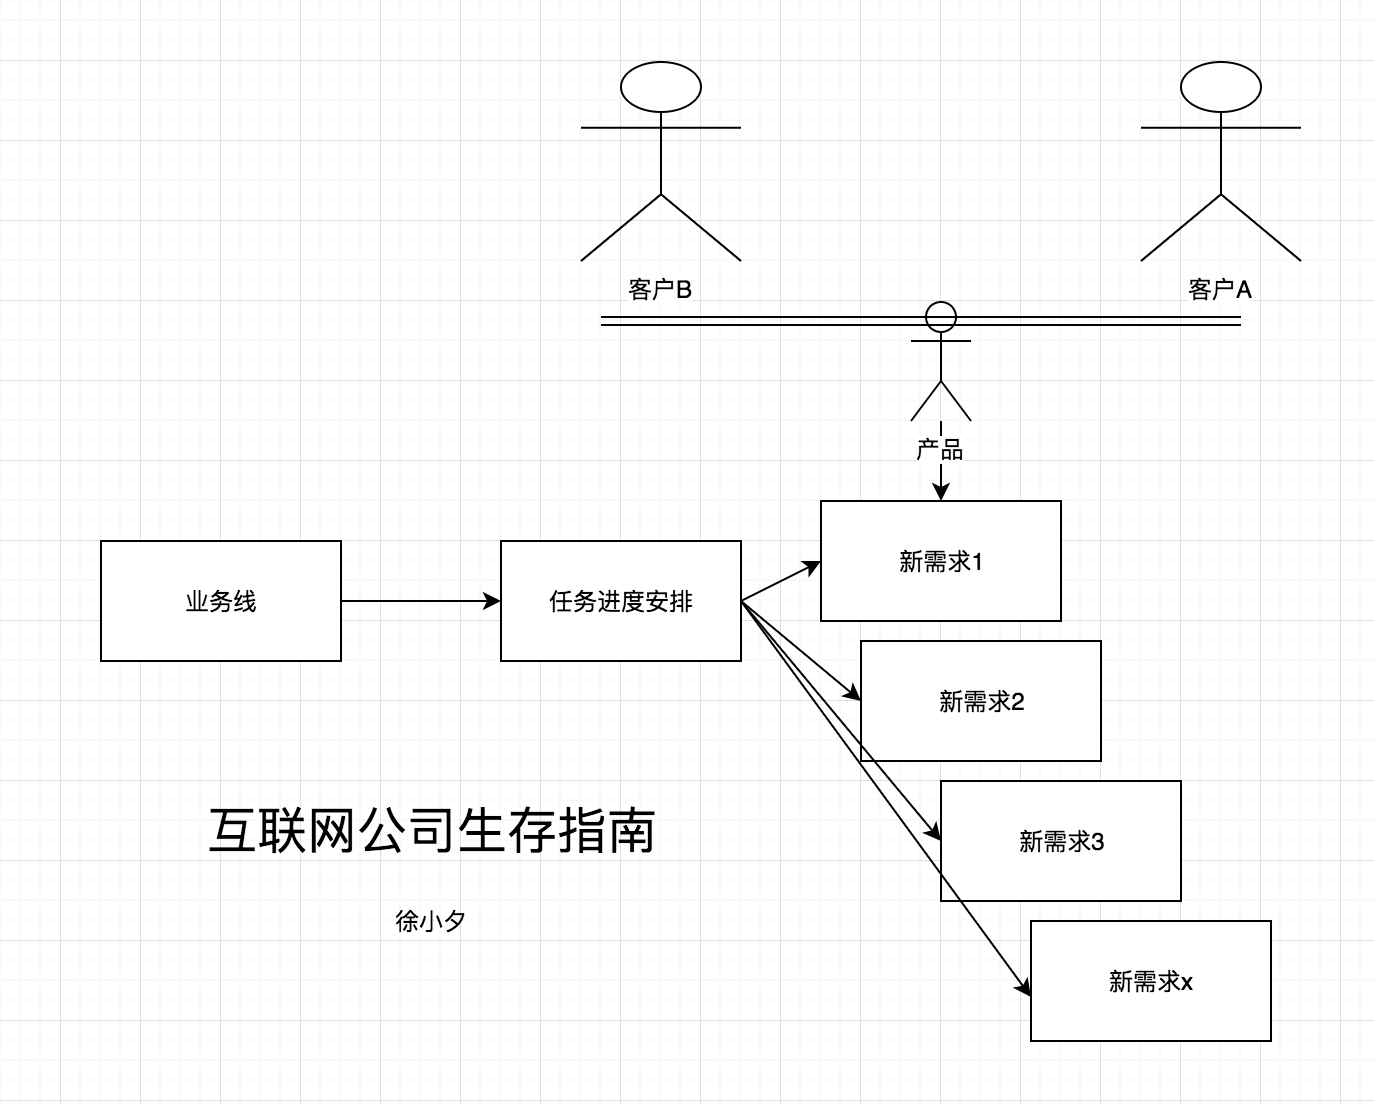 一般情况下遇到以上的情景,作为一个合格的企业员工的,当然是业务和任务优先,在完成工作之后再去考虑成长和学习。当然公司也不会一直这么忙,所以当空闲的时候,我们可以好好利用(当然偶尔刷刷手机也是允许的,取决于个人)。
另一方面,我们可以通过提高工作效率来压缩工作时间,因为业务代码做多了总会有点规律和总结,如果整体架构设计的好,一般第一次做过了,第二次再遇到类似的业务几乎“秒关”,这一块对于前端来说,组件系统和模块化尤其重要;对于后端来说,微服务是很好的例子。
所以说如何学习和成长,以上两点是笔者3年工作的总结,希望能给大家以启发。
另一个问题就是如何快速掌握新技术?这个答案在这篇文章结束后,大家也许会明白些许。
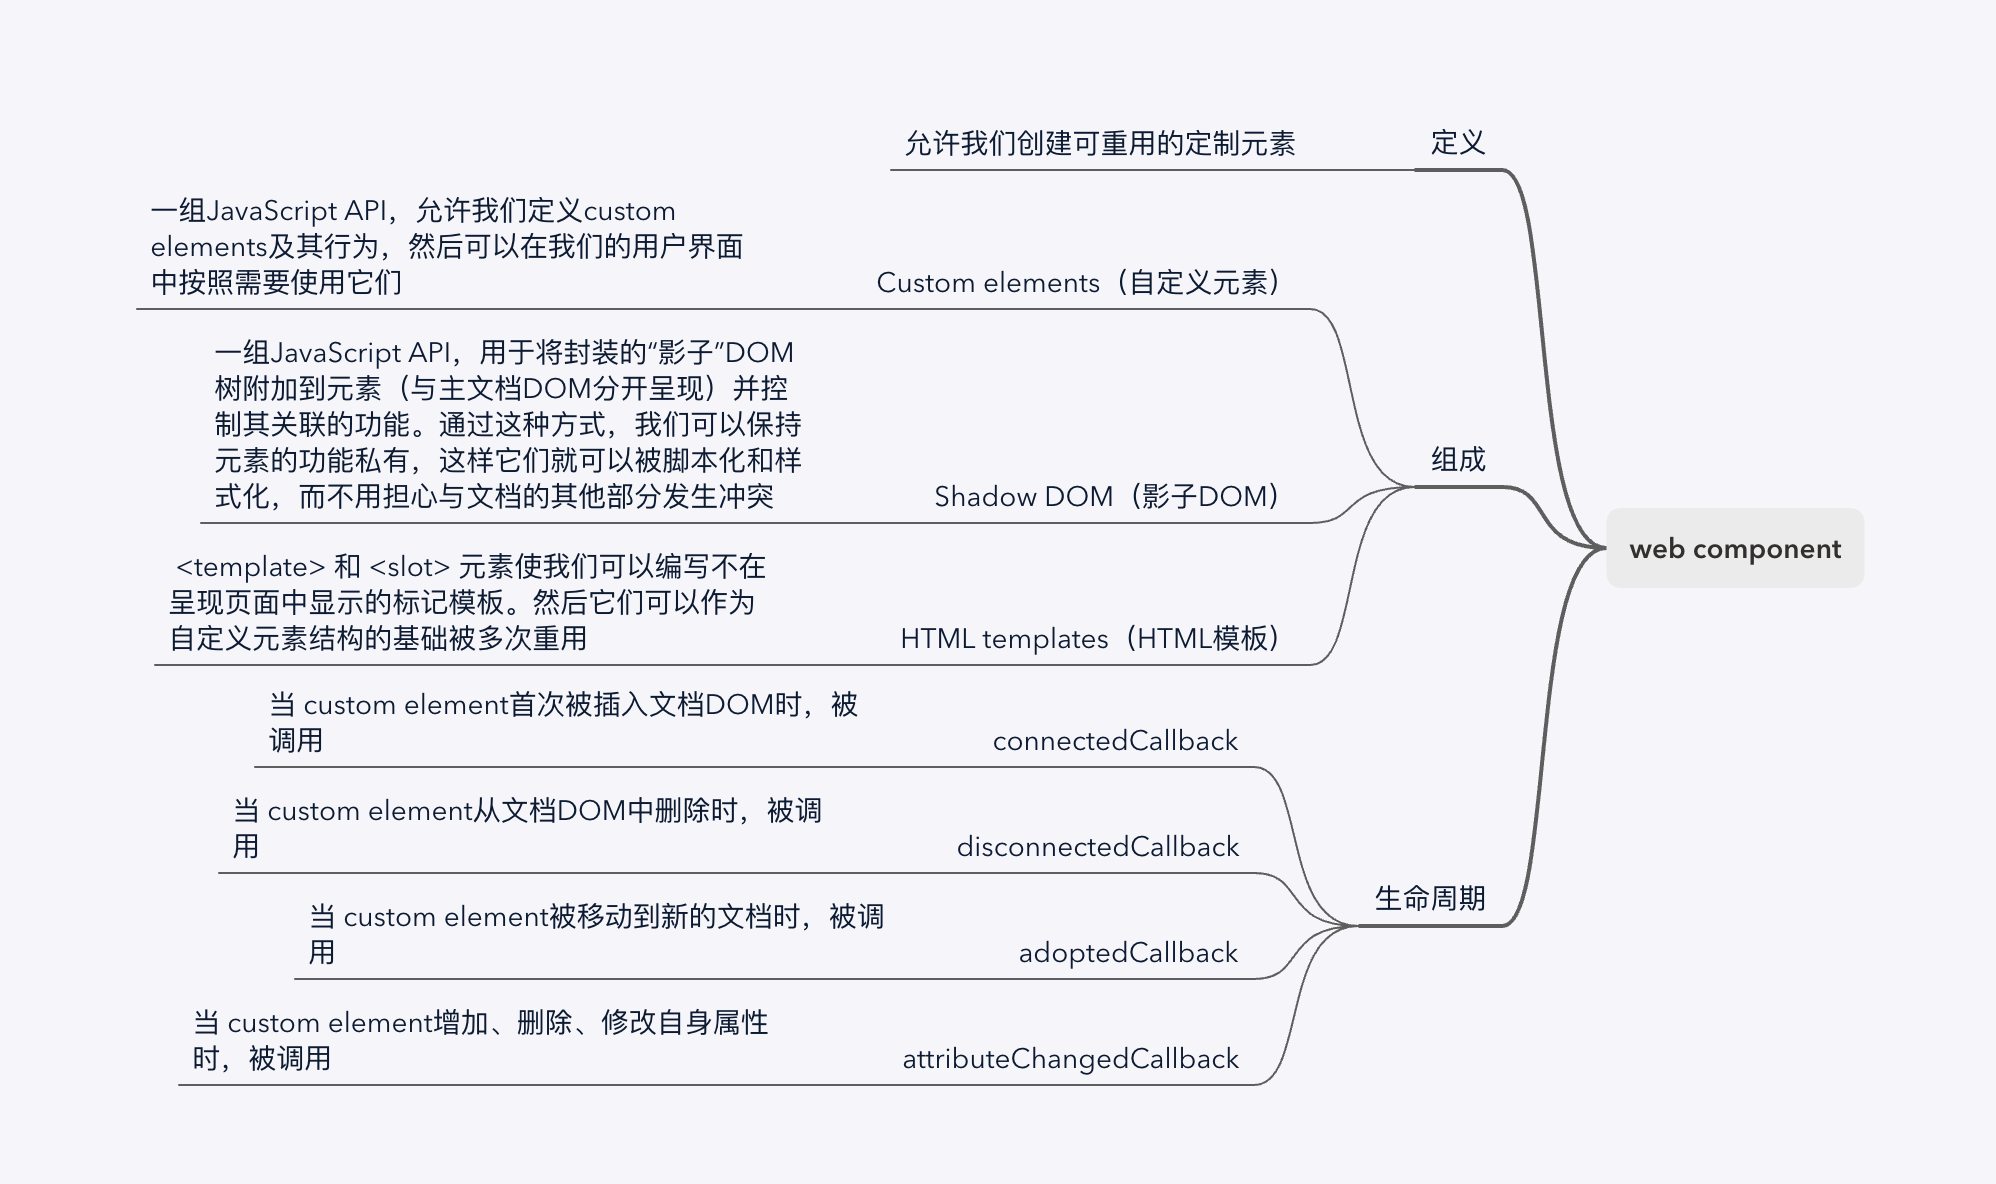
好了,废话到此为止,接下来进入我们的Web Component实战。笔者对其知识点梳理成如下的思维导图:
1. Web Component基础知识
Web Components主要由三项技术组成,分别为
- Custom elements(自定义元素)
- Shadow DOM(影子DOM)
- HTML templates(HTML模板)
它们可以一起使用来创建功能强大的定制元素,并且可以在我们喜欢的任何地方重用,不必担心代码冲突。接下来笔者就分别介绍这三项技术。
1.1 Custom elements(自定义元素)
custom elements也就是我们常说的自定义标签,它主要通过CustomElementRegistry接口来定义,CustomElementRegistry.define(name, class, extends) 方法用来注册一个custom element,该方法接受以下参数:
- name 所创建的元素名称,且需符合 DOMString 标准的字符串。注意,custom element 的名称不能是单个单词,且其中必须要有短横线
- class 用于定义元素行为的类
- extends 可选参数,一个包含 extends 属性的配置对象,指定了所创建的元素继承自哪个内置元素,可以继承任何内置元素。
具体案例如下:
customElements.define(
'word-count',
class WordCount extends HTMLParagraphElement {
  constructor() {
    super();

    // 元素的功能代码
    ...
  }
}, { extends: 'p' });接下来另一个比较重要的知识点就是custom element的生命周期回调函数,具体介绍如下:
- connectedCallback:当 custom element首次被插入文档DOM时,被调用
- disconnectedCallback:当 custom element从文档DOM中删除时,被调用
- adoptedCallback:当 custom element被移动到新的文档时,被调用
- attributeChangedCallback: 当 custom element增加、删除、修改自身属性时,被调用
大家可以先理解一下生命周期函数的用法,在下面的组件实战中会有详细的应用。
1.2 Shadow DOM(影子DOM)
Shadow DOM 接口可以将一个隐藏的、独立的 DOM附加到一个元素上,并且允许将隐藏的 DOM 树附加到常规的 DOM 树中:以 shadow root 节点为起始根节点,在这个根节点的下方,可以是任意元素,和普通的 DOM 元素一样。MDN对其有一张详细的草图方便大家理解:
 上图中4个术语意思如下:
- Shadow host:一个常规 DOM节点,Shadow DOM 会被附加到这个节点上。
- Shadow tree:Shadow DOM内部的DOM树。
- Shadow boundary:Shadow DOM结束的地方,也是常规 DOM开始的地方。
- Shadow root: Shadow tree的根节点
如果我们想将一个 Shadow DOM 附加到 custom element 上,可以在 custom element 的构造函数中添加如下实现:
class Button extends HTMLElement {
  constructor() {
    super();
    let shadow = this.attachShadow({mode: 'open'});
  }
}
我们将 Shadow DOM 附加到一个元素之后,可以使用 DOM APIs对它进行操作,如下:
class Button extends HTMLElement {
  constructor() {
    super();
    let shadow = this.attachShadow({mode: 'open'});
    let para = document.createElement('p');
    shadow.appendChild(para);
  }
}
我们甚至可以将样式插入到Shadow DOM中, 如下:
let style = document.createElement('style');

style.textContent = `
    .btn-wrapper {
      position: relative;
    }
    .btn {
        // ...
    }
`

shadow.appendChild(style);
以上是定义组件的最基本方式,一个完整的demo如下:
class Button extends HTMLElement {
  constructor() {
    super();
    let shadow = this.attachShadow({mode: 'open'});
    let para = document.createElement('p');
    shadow.appendChild(para);
    let style = document.createElement('style');

    style.textContent = `
        .btn-wrapper {
          position: relative;
        }
        .btn {
            // ...
        }
    `

    shadow.appendChild(style);
  }
}
customElements.define('xu-button', Button);
1.3 HTML templates(HTML模板)
<template> 和 <slot> 元素可以用来灵活填充 Web组件的 shadow DOM 的模板.它们的使用很简单,有点类似于vue的template和slot。一个简单的tempalte例子如下:
<template id="xu_tpl">
  <p>趣谈前端</p>
</template>
我们可以用 JavaScript 获取它的引用,然后添加到DOM中,代码如下:
let template = document.getElementById('xu_tpl');
let templateContent = template.content;
document.body.appendChild(templateContent);
至于slot,使用和vue的slot有点类似,主要提供一种插槽机制,比如我们在模版中定义一个插槽:
<template id="xu_tpl">
  <p><slot name="xu-text">趣谈插槽</slot></p>
</template>
我们可以这么使用slot:
<xu-button>
  <span slot="xu-text">趣谈前端,让前端更有料!</span>
</xu-button>
介绍完基本概念之后,我们开始实战开发。
2. Web Component组件开发实战
在开发之前,我们先来看看实现效果:
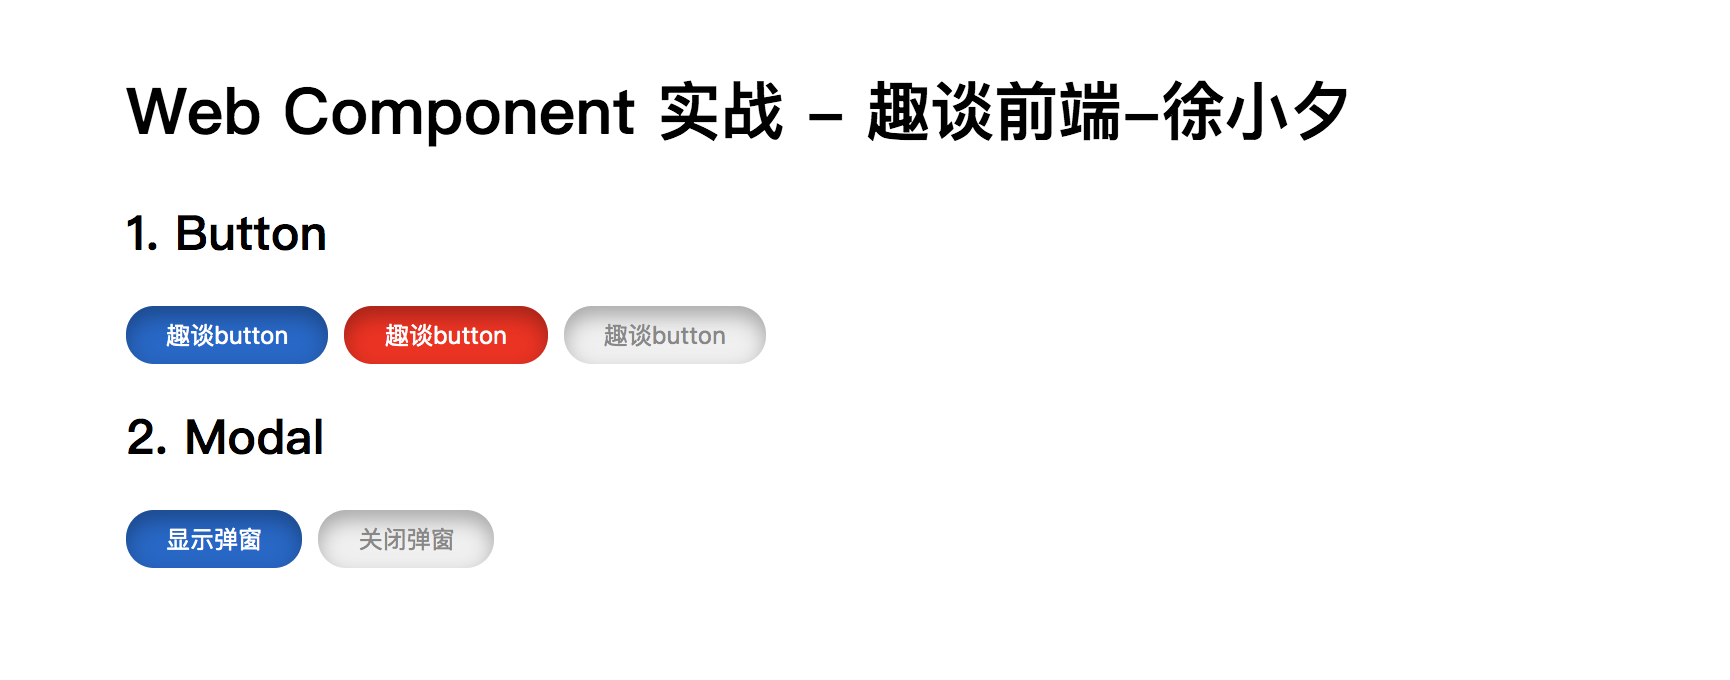
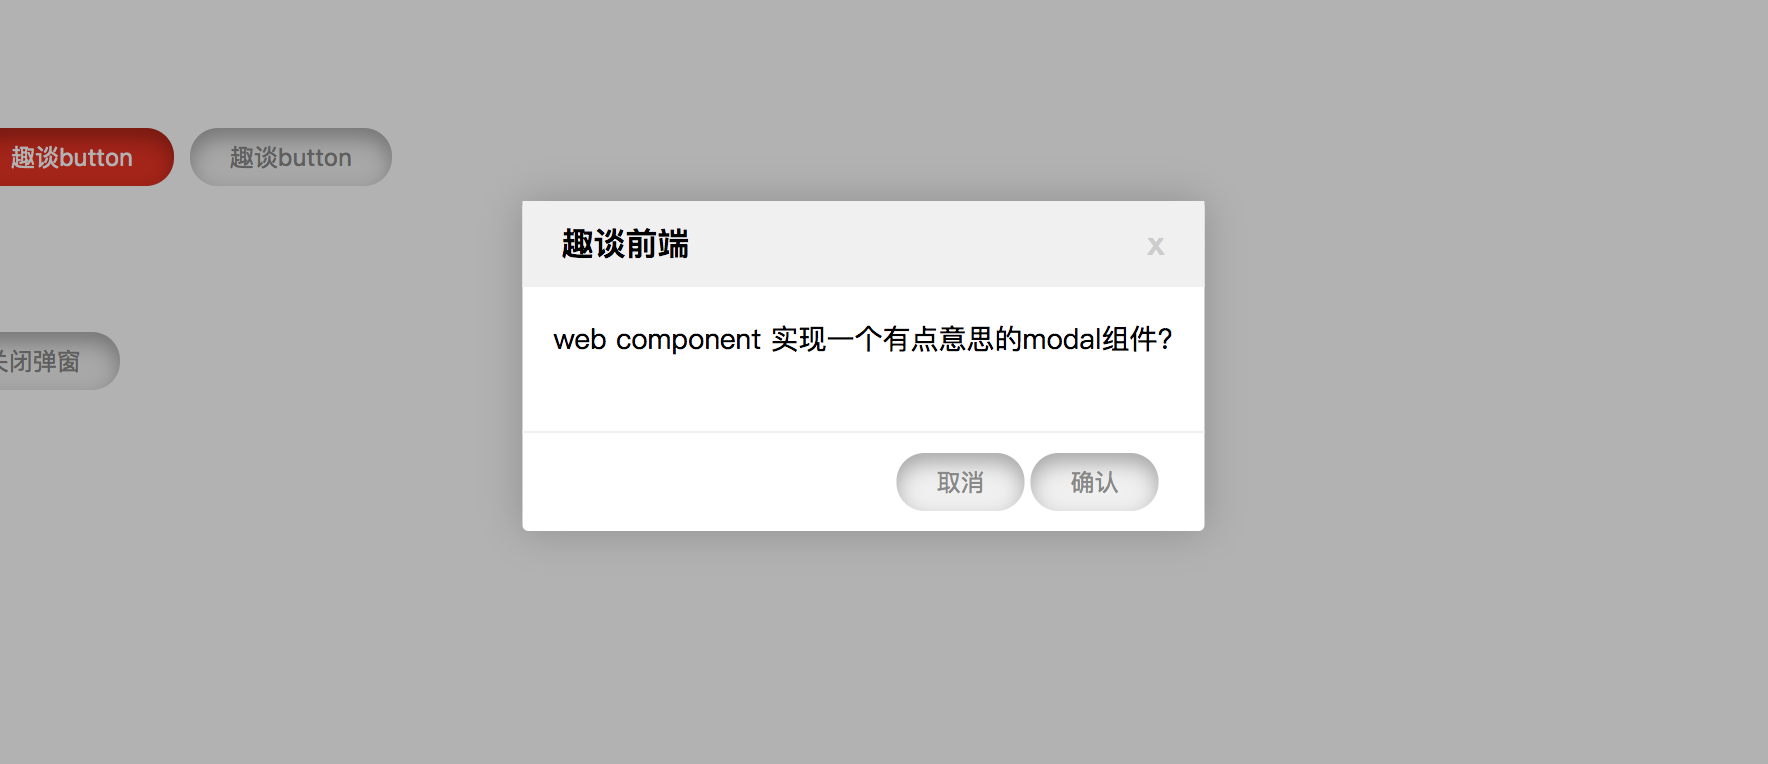 第一张图是我们的自定义按钮组件(Button), 图二是笔者实现的弹窗(modal)组件。感觉还算有模有样,我们只需要引入这几个组件,即可在项目中使用,代码的目录结构如下:
 接下来我们就开始实现它们吧。
2.1 Button组件实现
我们像任何vue或者react组件一样,在设计组件之前一定要界定组件的边界和功能点,笔者在之前的从0到1教你搭建前端团队的组件系统(高级进阶必备)也有系统的介绍,这里就不在介绍了。
我们实现一个可以定制主题并且可以插入任意内容的Button组件,利用上面将的知识点,要实现插入自定义内容,我们可以使用template和slot, 首先定义template和slot,代码如下:
<template id="btn_tpl">
  <slot name="btn-content">button content</slot>
</template>要想首先自定义按钮主题,我们可以通过props来实现用户控制,就像antd的Button组件,支持primary,warning等类型,具体实现如下:
// Button.js
class Button extends HTMLElement {
  constructor() {
    super();
    // 获取模板内容
    let template = document.getElementById('btn_tpl');
    let templateContent = template.content;

    const shadowRoot = this.attachShadow({ mode: 'open' });
    const btn = document.createElement('button');
    btn.appendChild(templateContent.cloneNode(true));
    btn.setAttribute('class', 'xu-button');
    // 定义并获取按钮类型  primary | warning | default
    const type = {
      'primary': '#06c',
      'warning': 'red',
      'default': '#f0f0f0'
    }
    const btnType = this.getAttribute('type') || 'default';
    const btnColor = btnType === 'default' ? '#888' : '#fff';

    // 创建样式
    const style = document.createElement('style');
    // 为shadow Dom添加样式
    style.textContent = `
      .xu-button {
        position: relative;
        margin-right: 3px;
        display: inline-block;
        padding: 6px 20px;
        border-radius: 30px;
        background-color: ${type[btnType]};
        color: ${btnColor};
        outline: none;
        border: none;
        box-shadow: inset 0 5px 10px rgba(0,0,0, .3);
        cursor: pointer;
      }
    `
    shadowRoot.appendChild(style);
    shadowRoot.appendChild(btn);
  }
}
customElements.define('xu-button', Button);在构造函数中,我们会定义元素实例所拥有的全部功能。通过用户传入的type属性来在Button组件挂载前设置其类型。对于自定义的插槽,我们可以通过template.content来获取其内容,然后插入shadowRoot中使其拥有slot能力。具体使用如下:
<xu-button type="primary"><span slot="btn-content" id="btn_show">趣谈button</span></xu-button>
<xu-button type="warning"><span slot="btn-content">趣谈button</span></xu-button>
<xu-button type="default"><span slot="btn-content">趣谈button</span></xu-button>
我们的Button组件拥有大部分原生dom的能力,包括dom操作,事件等,如下所示我们给自定义Button添加点击事件:
document.querySelector('#btn_show').addEventListener('click', () => {
    modal.setAttribute('visible', 'true');
}, false)
2.2 Modal组件实现
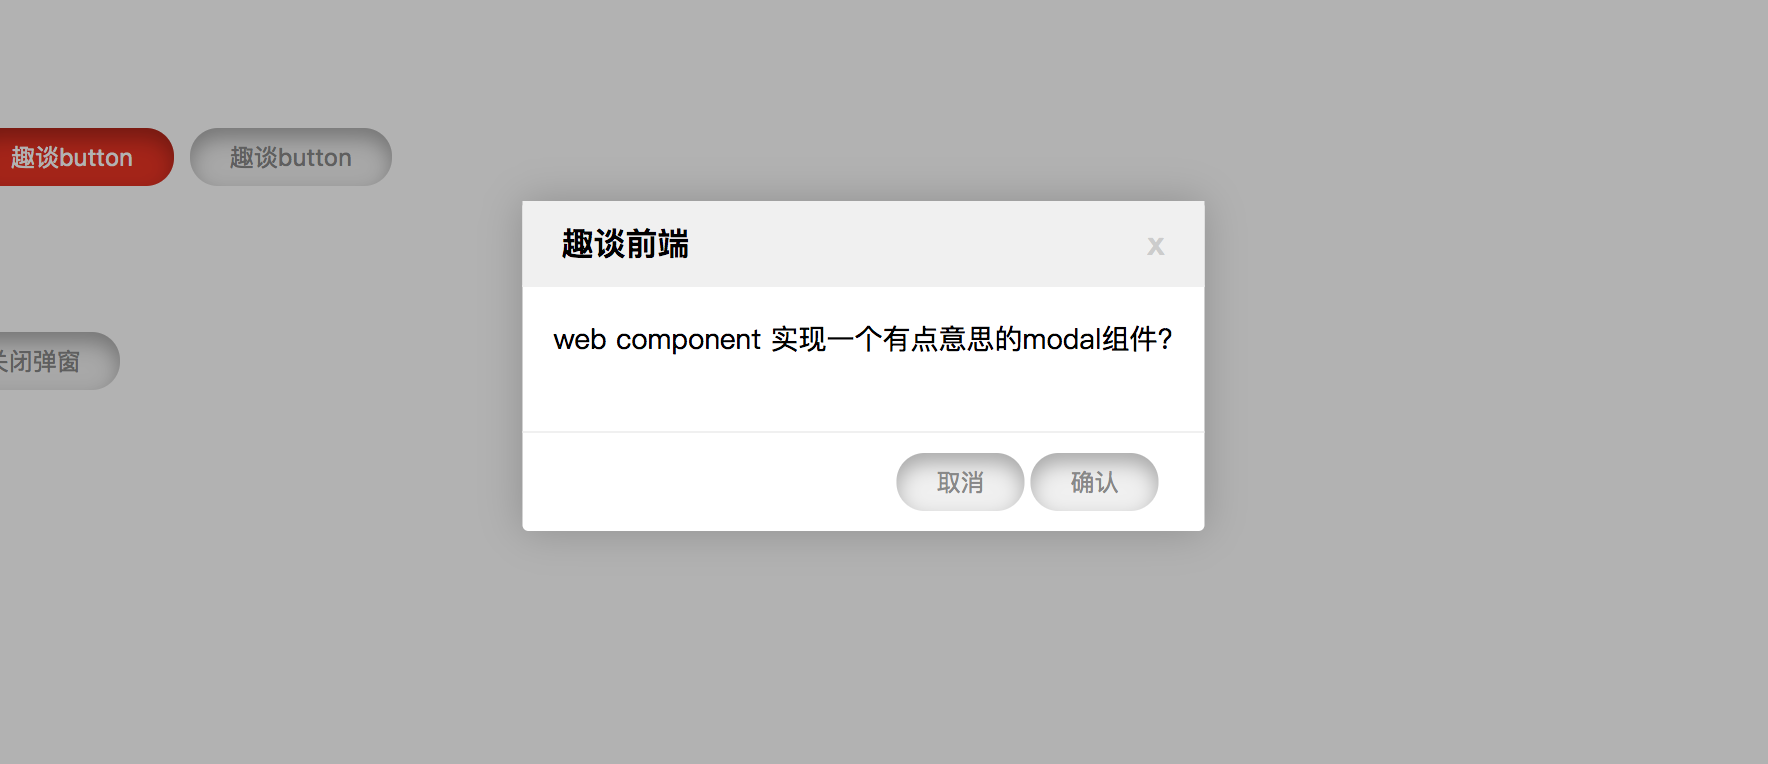
Modal组件的实现和Button原理类似,不过过程稍微复杂一点,我们需要考虑Modal内容的插槽,Modal的显示和隐藏的控制等,如下图所示:
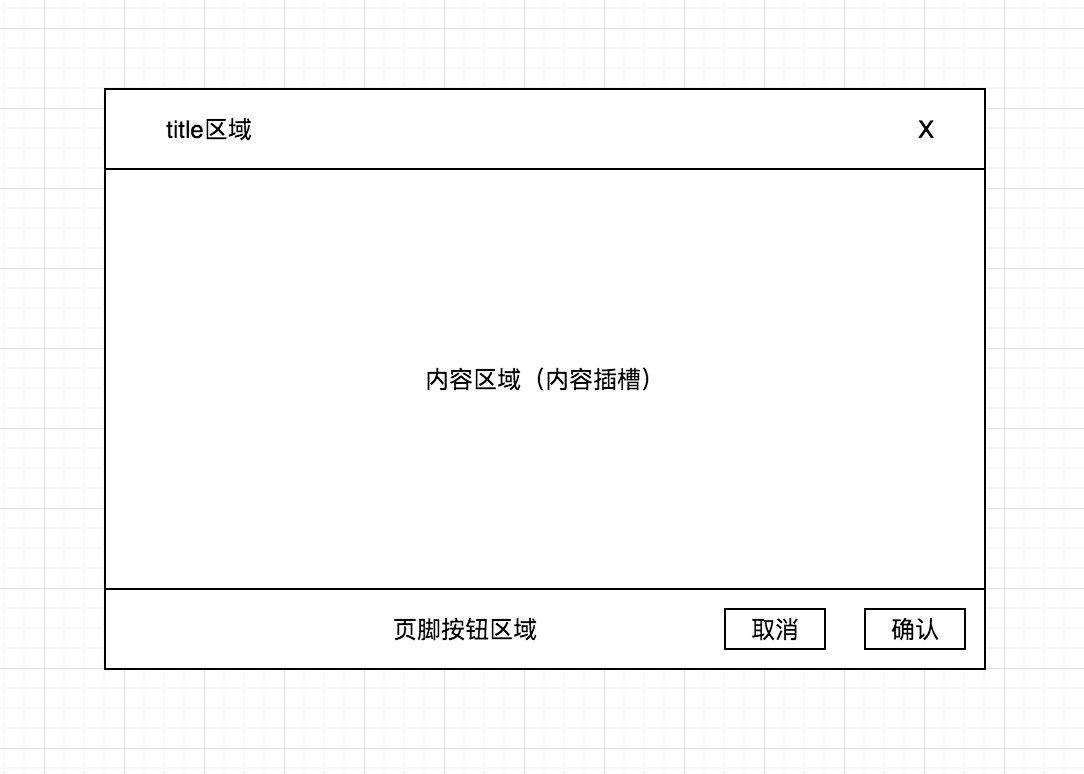 具体的dom实现细节笔者就不一一介绍了,大家可以有不同的实现。我们主要来关注关闭按钮的逻辑和插槽。
首先title内容我们可以通过props来传递,Modal的内容插槽如下:
<template id="modal_tpl">
    <style>
      .modal-content {
        padding: 16px;
        font-size: 14px;
        max-height: 800px;
        overflow: scroll;
      }
    </style>
    <div class="modal-content">
      <slot name="modal-content">modal content</slot>
    </div>
</template>由上可以看出tempalte我们定义了内部样式,很多复杂的Web Component组件也可以采用类似的设计去实现。这里我们就简单定义如上。
接下来的重点是关闭按钮和控制Modal显示和隐藏的逻辑,这块逻辑我们应该放在Modal组件内部来实现,我们不可能通过外部操作dom样式来控制Modal的显示和隐藏。我们先来回忆一下,antd组件或者elementUI的Modal可以通过传入visible属性来控制Modal的显示和隐藏,而且我们点击右上角的关闭按钮时,可以不改变任何属性的情况下关闭Modal,那么我们想想是怎么做到的呢?我们在Web Component组件内部,又能如何实现这一逻辑呢?
其实我们可以利用笔者上面介绍的Web Component组件生命周期来解决这一问题。首先对于关闭按钮来说,我们可以绑定一个事件,通过控制内部样式来让Modal隐藏。对于用户在外部修改了visible属性,我们如何让它自动随着visible的变化而显示或者隐藏呢?
我们可以利用attributeChangedCallback这个生命周期函数,并配合observedAttributes这一静态方法来实现自动监听。我们可以在observedAttributes中监听visible属性的变化,一旦该属性被修改,就会自动触发attributeChangedCallback。 具体代码如下:
attributeChangedCallback(name, oldValue, newValue) {
    if(oldValue) {
      const childrenNodes = this.shadowRoot.childNodes;
      for(let i = 0; i < childrenNodes.length; i++) {
        if(childrenNodes[i].nodeName === 'DIV' && childrenNodes[i].className === 'wrap') {
          if(newValue === 'true') {
            childrenNodes[i].style.display = 'block';
          }else {
            childrenNodes[i].style.display = 'none';
          }
        }
      }
    }
  }
  // 如果需要在元素属性变化后,触发 attributeChangedCallback()回调函数,
  // 你必须监听这个属性。这可以通过定义observedAttributes() get函数来实现
  static get observedAttributes() {
    return ['visible'];
}以上代码中之所以要判断oldValue值是否存在, 是因为在实现第一次渲染时由于visible被赋值也会触发attributeChangedCallback,所以为了避免第一次执行该函数, 我们会控制只有oldValue值存在时才执行更新操作。
Modal组件的难点攻克了,剩下的就很好实现了,接下来是笔者实现的Modal组件,代码如下:
class Modal extends HTMLElement {
  constructor() {
    super();
    // 获取模板内容
    let template = document.getElementById('modal_tpl');
    let templateContent = template.content;

    const shadowRoot = this.attachShadow({ mode: 'open' });
    const wrap = document.createElement('div');
    const modal = document.createElement('div');
    const header = document.createElement('header');
    const btnClose = document.createElement('span');
    const mask = document.createElement('div');
    const footer = document.createElement('footer');
    const btnCancel = document.createElement('xu-button');
    const btnOk = document.createElement('xu-button');

    // wrap
    wrap.setAttribute('class', 'wrap');

    // modal
    modal.setAttribute('class', 'xu-modal');

    // header
    let title = this.getAttribute('title');
    header.textContent = title;
    btnClose.setAttribute('class', 'xu-close');
    btnClose.textContent = 'x';
    header.appendChild(btnClose);
    modal.appendChild(header);

    btnClose.addEventListener('click', () => {
      wrap.style.display = 'none';
    })

    // content
    modal.appendChild(templateContent.cloneNode(true));

    // footer
    btnOk.setAttribute('type', 'primary');
    const slot1 = document.createElement('span');
    slot1.setAttribute('slot', 'btn-content');
    slot1.textContent = '确认';
    btnOk.appendChild(slot1);

    const slot2 = document.createElement('span');
    slot2.setAttribute('slot', 'btn-content');
    slot2.textContent = '取消';
    btnCancel.appendChild(slot2);

    footer.appendChild(btnCancel);
    footer.appendChild(btnOk);
    modal.appendChild(footer);

    // mask
    mask.setAttribute('class', 'mask');
    wrap.appendChild(mask);
    wrap.appendChild(modal);

    // 创建样式
    const style = document.createElement('style');
    const width = this.getAttribute('width');
    const isVisible = this.getAttribute('visible');
    // 为shadow Dom添加样式
    style.textContent = `
      .wrap {
        position: fixed;
        left: 0;
        right: 0;
        bottom: 0;
        top: 0;
        display: ${isVisible === 'true' ? 'block' : 'none'}
      }
      // 忽略部分样式
    `
    shadowRoot.appendChild(style);
    shadowRoot.appendChild(wrap);
  }
  connectedCallback(el) {
    console.log('insert dom', el)
  }
  disconnectedCallback() {
    console.log('Custom square element removed from page.');
  }
  adoptedCallback() {
    console.log('Custom square element moved to new page.');
  }
  attributeChangedCallback(name, oldValue, newValue) {
    if(oldValue) {
      const childrenNodes = this.shadowRoot.childNodes;
      for(let i = 0; i < childrenNodes.length; i++) {
        if(childrenNodes[i].nodeName === 'DIV' && childrenNodes[i].className === 'wrap') {
          if(newValue === 'true') {
            childrenNodes[i].style.display = 'block';
          }else {
            childrenNodes[i].style.display = 'none';
          }
        }
      }
    }
  }
  // 如果需要在元素属性变化后,触发 attributeChangedCallback()回调函数,
  // 你必须监听这个属性。这可以通过定义observedAttributes() get函数来实现
  static get observedAttributes() {
    return ['visible'];
  }
}
customElements.define('xu-modal', Modal);
更详细的代码笔者已经上传到github了,大家感兴趣可以clone到本地运行体验一下,效果还是相当不错的。
github地址: Web Component实战demo
最后
如果想学习更多前端技能,实战和学习路线, 欢迎在公众号《趣谈前端》加入我们的技术群一起学习讨论,共同探索前端的边界。


