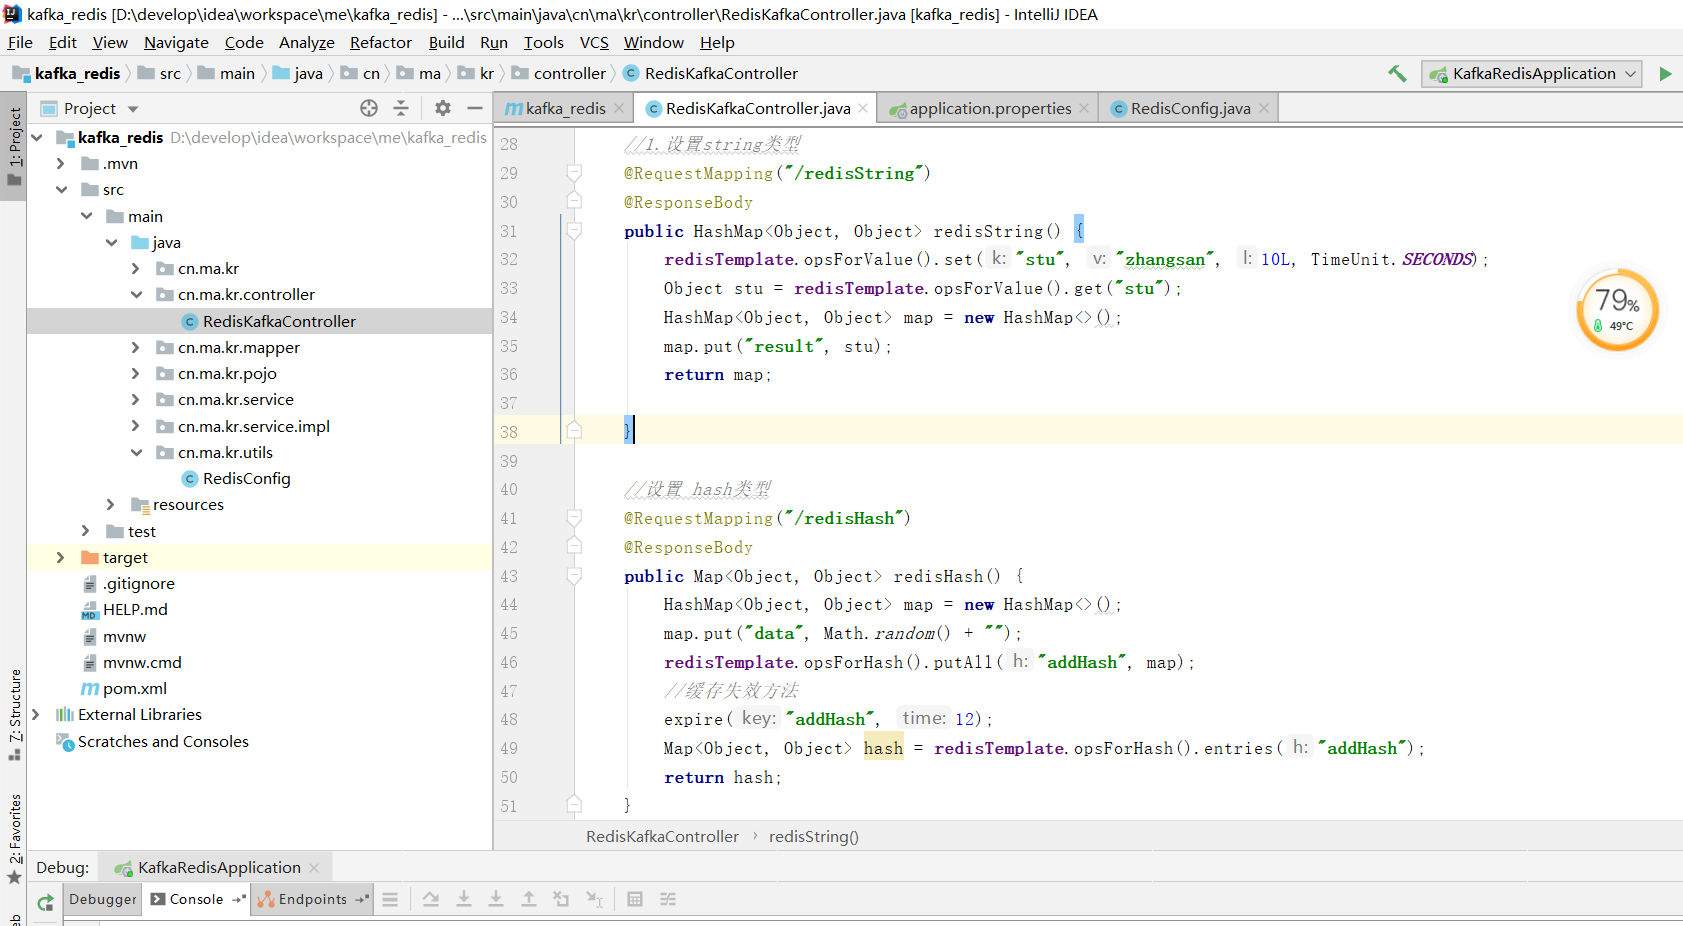
本次是在 175的但单机版基础上继续的
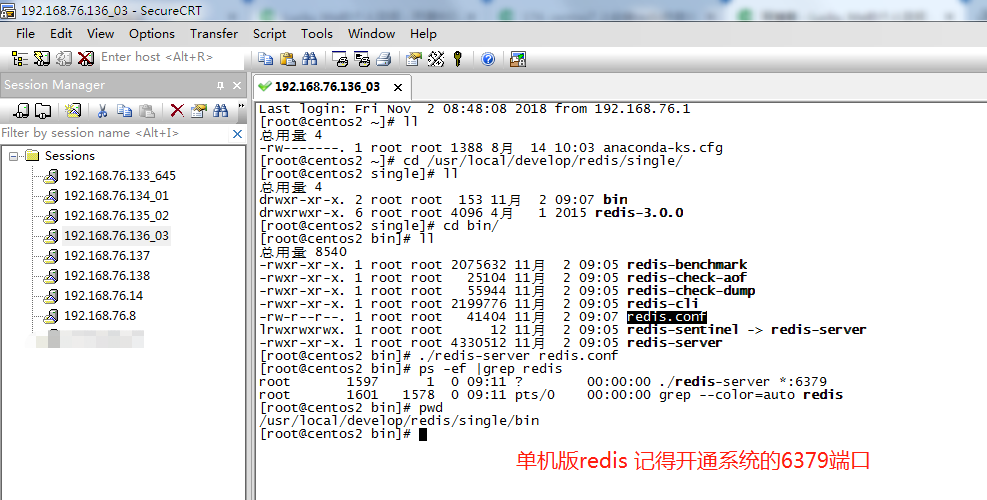
单机版redis安装:
https://my.oschina.net/springMVCAndspring/blog/1922742
1. 安装好单机版redis(教程:上面链接)
2. 安装redis集群
2.1 准备
(0) 环境
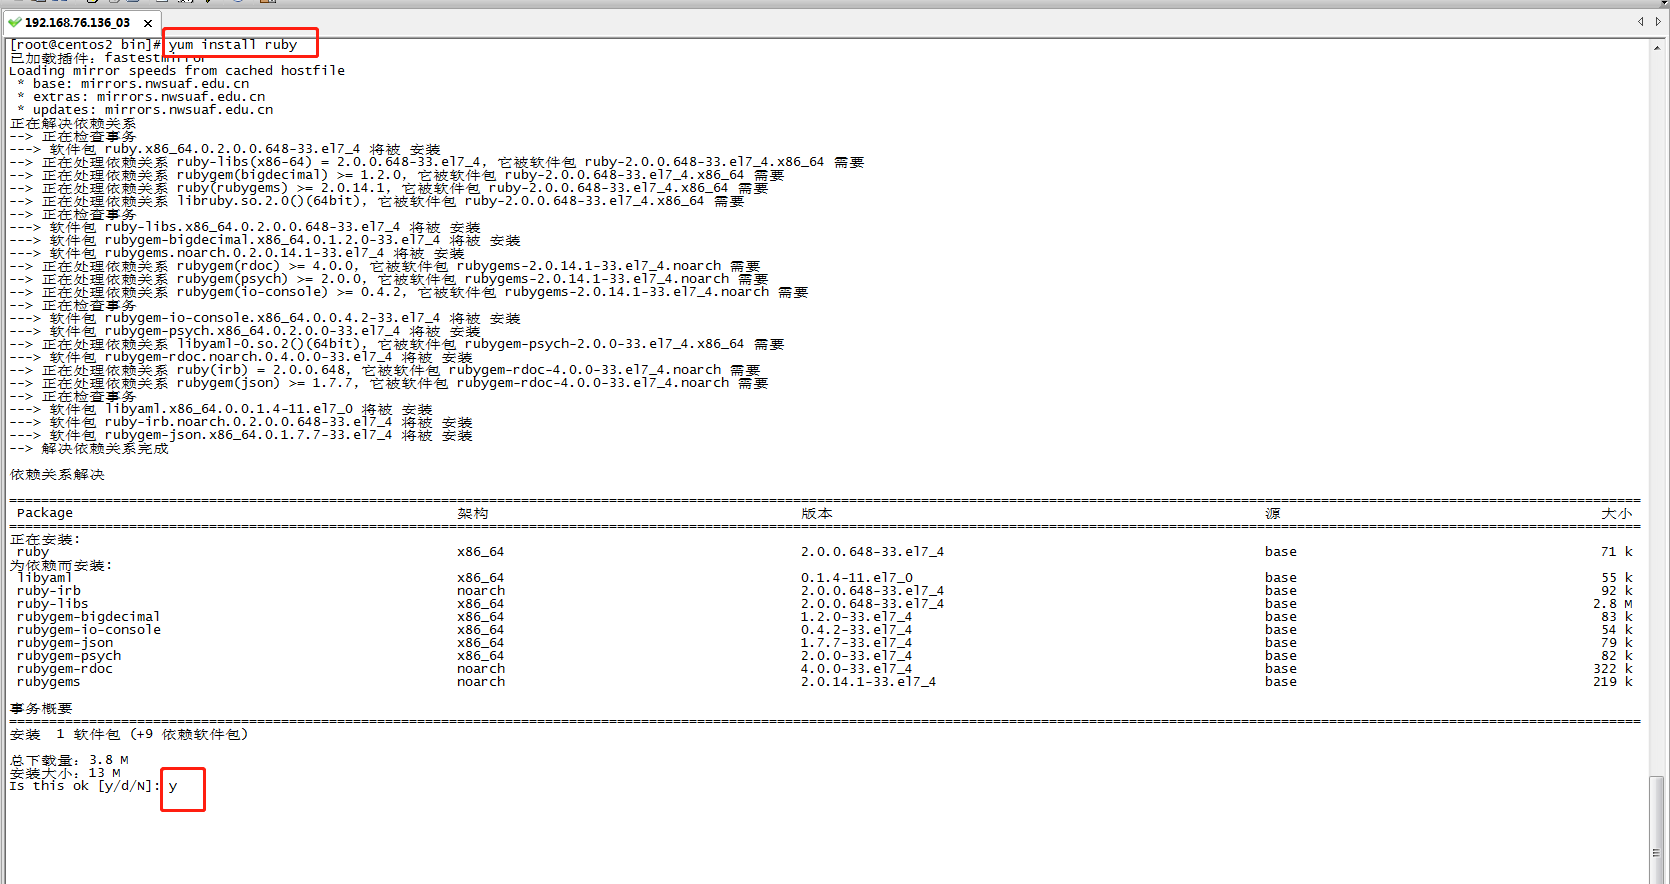
a.执行环境
yum install ruby
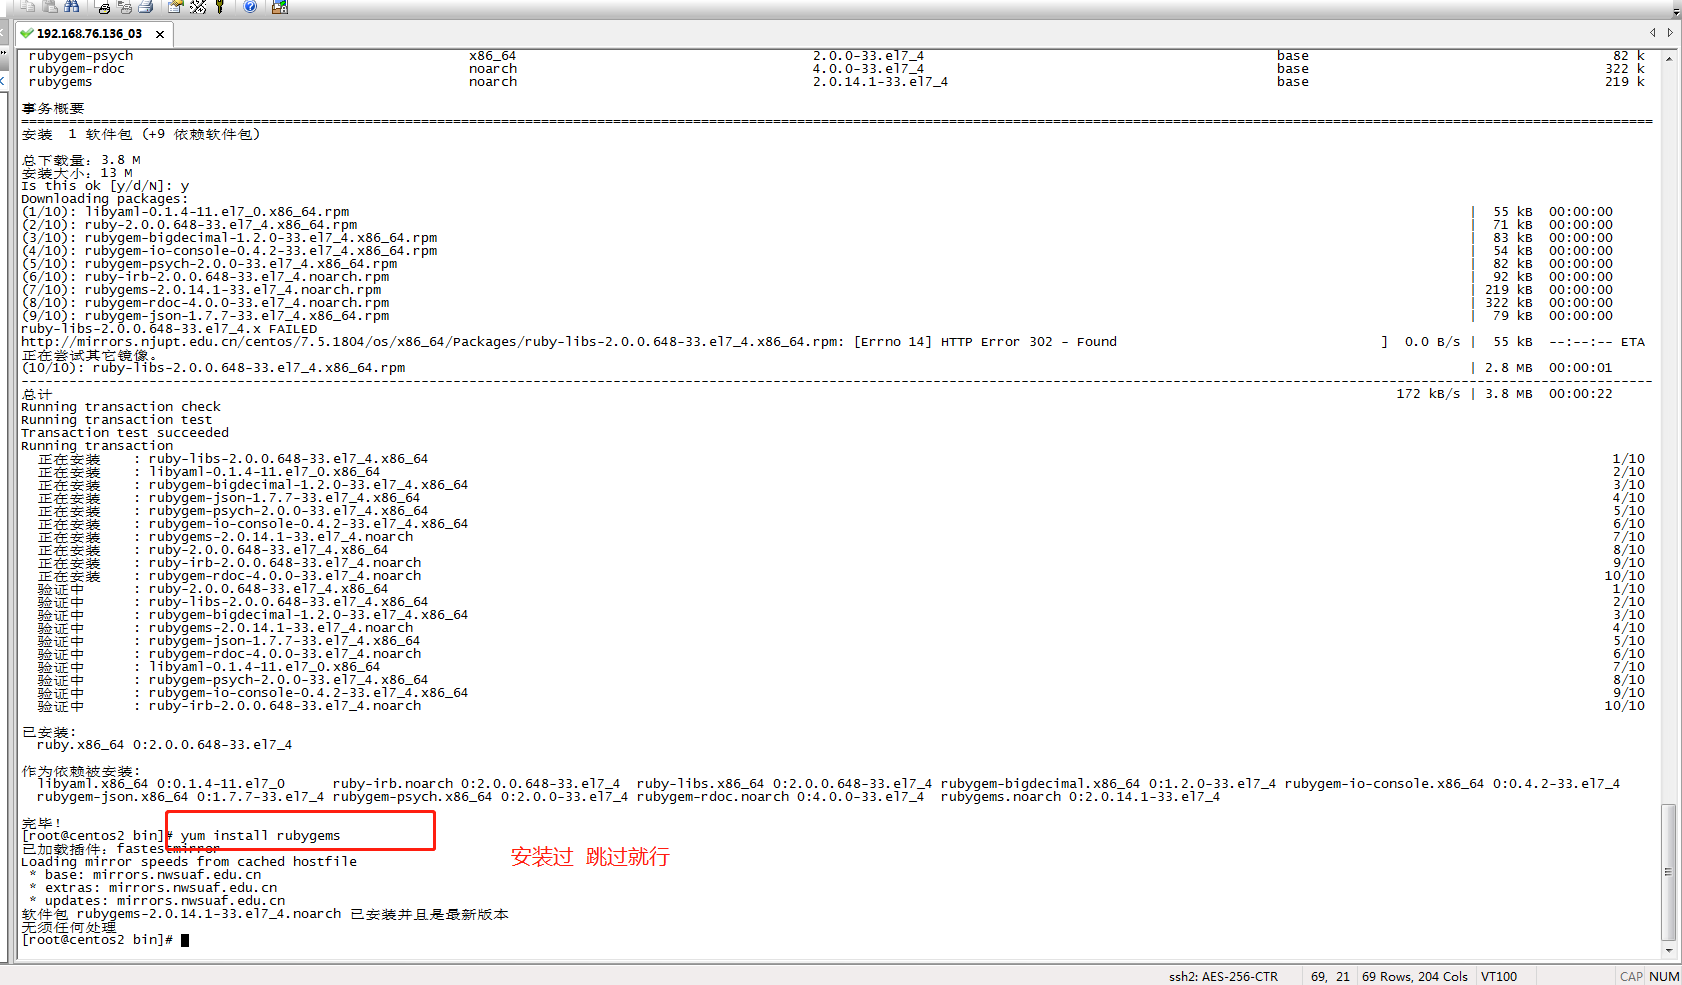
b. 执行命令
yum install rubygems
c.导入集群安装插件
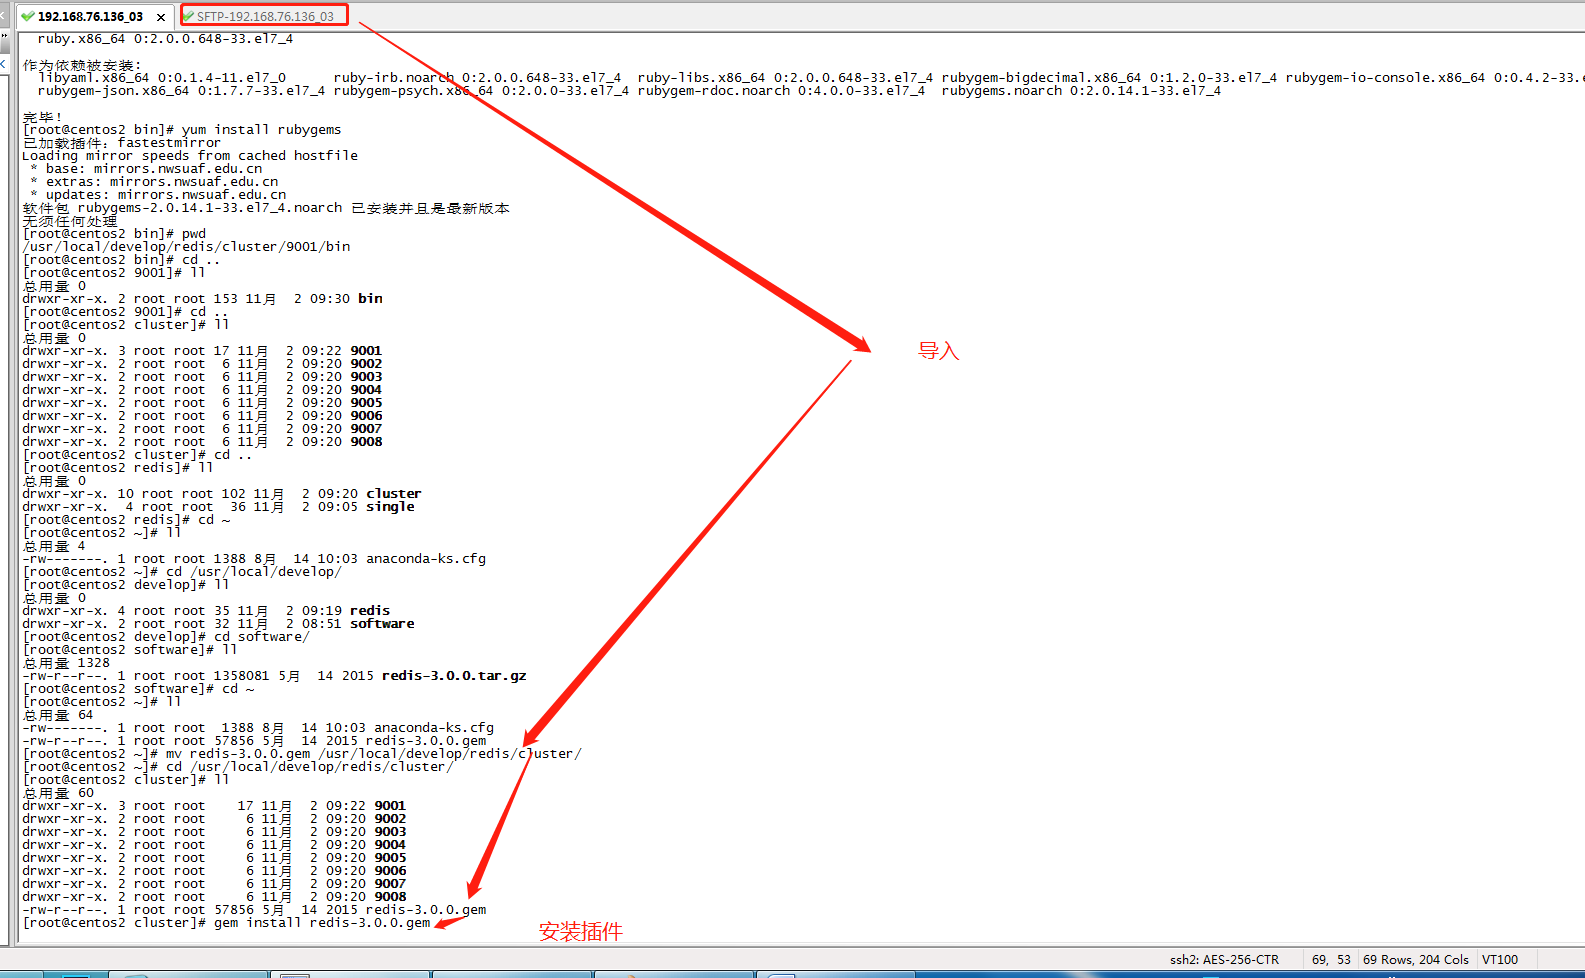
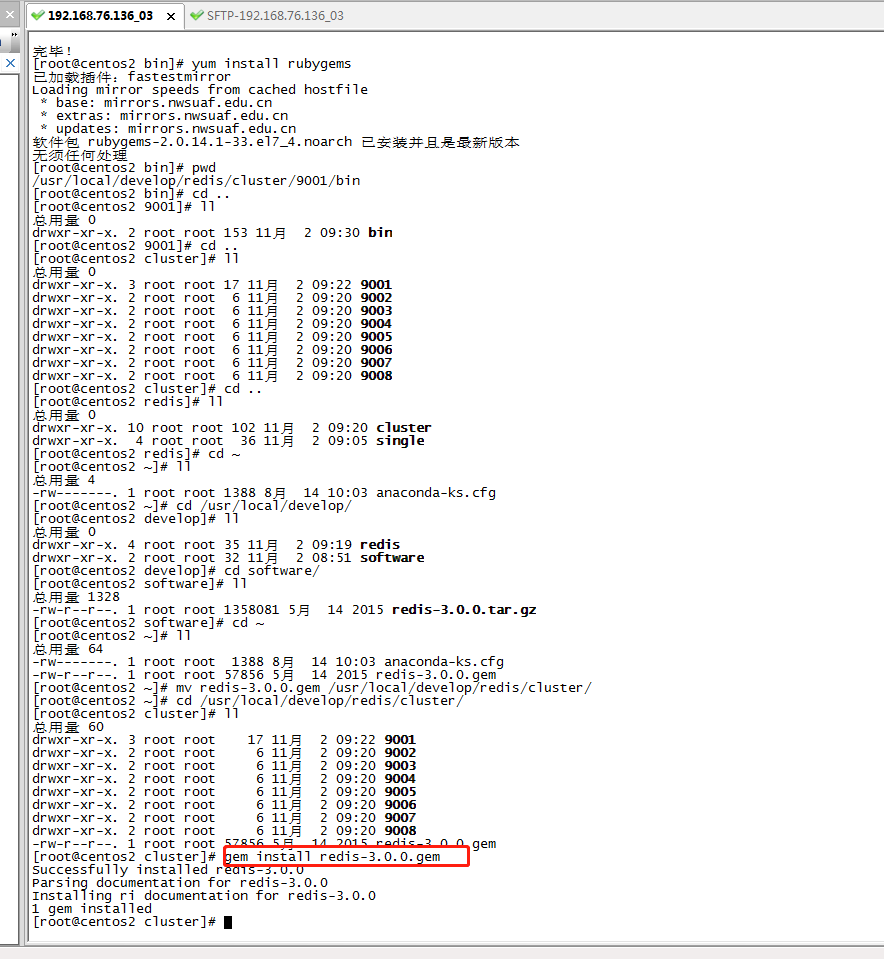
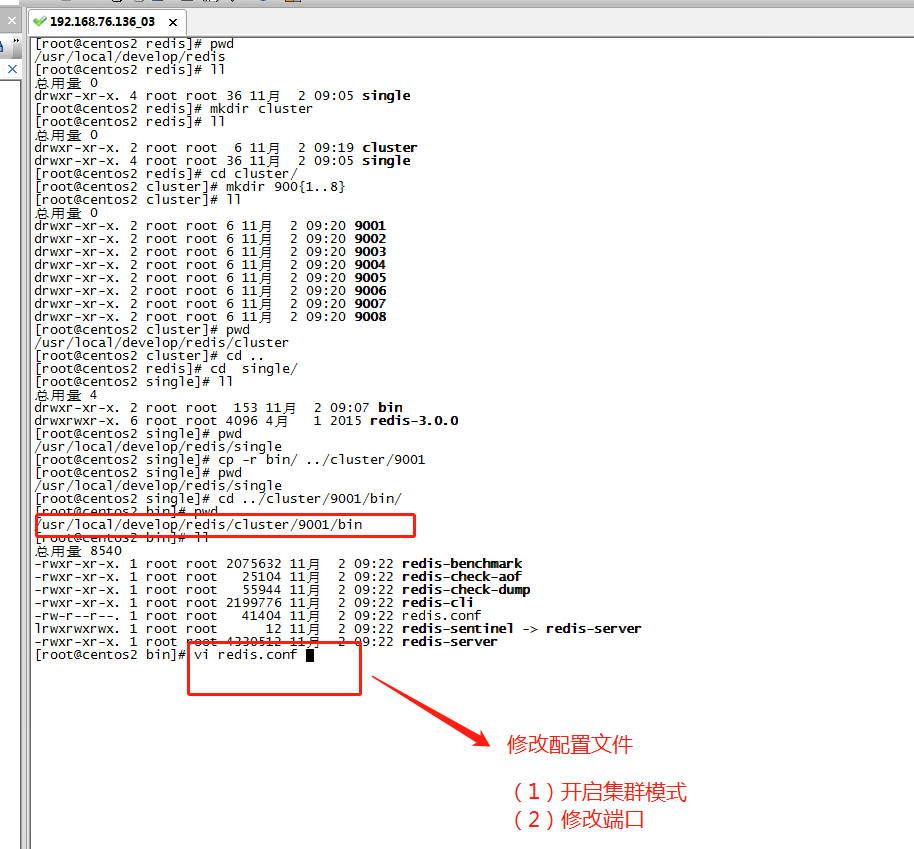
2.2 复制单机版的安装成功后的文件
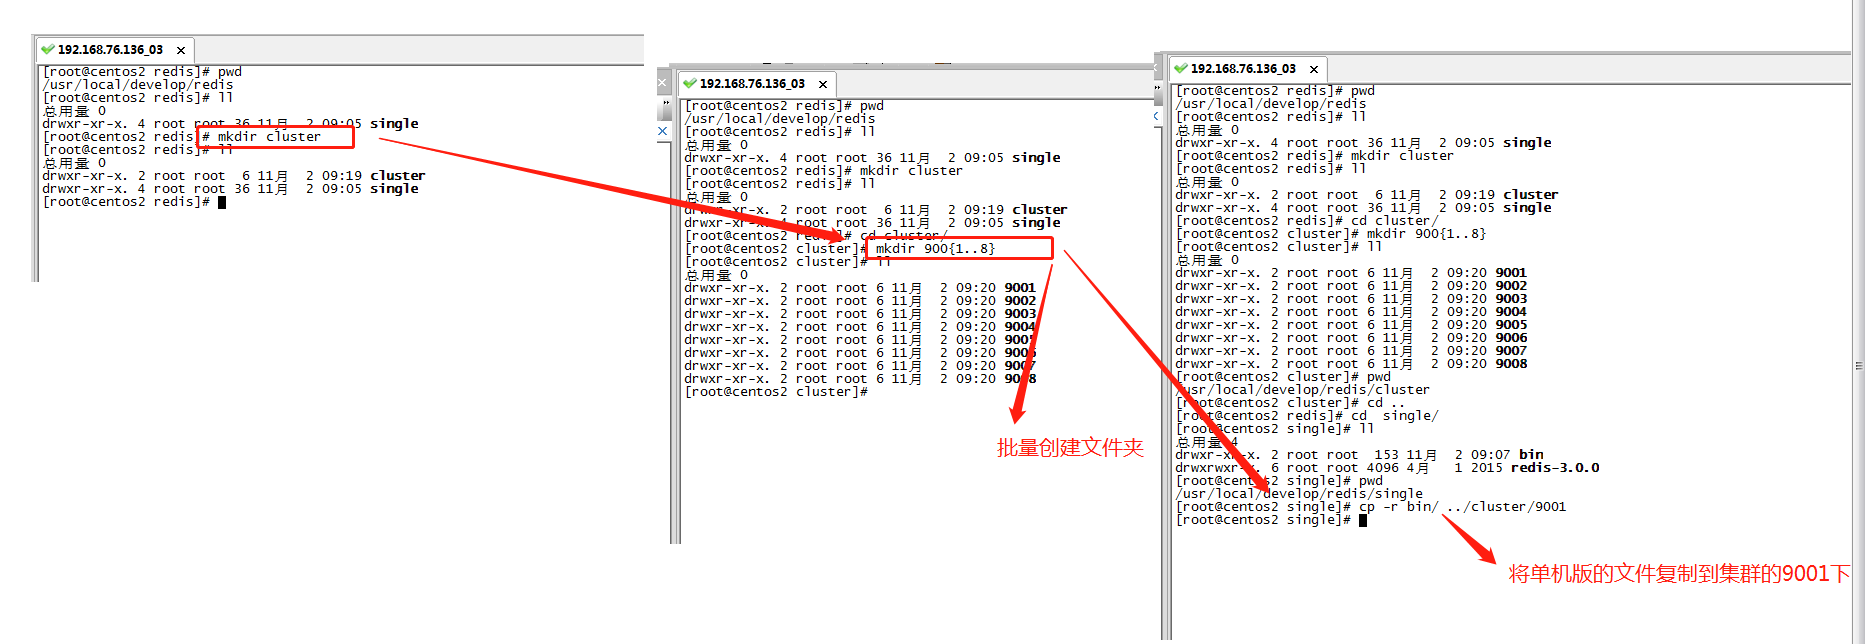
2.3 修改每一个集群的配置文件
开通:9001 9002 ........9008 这8个端口
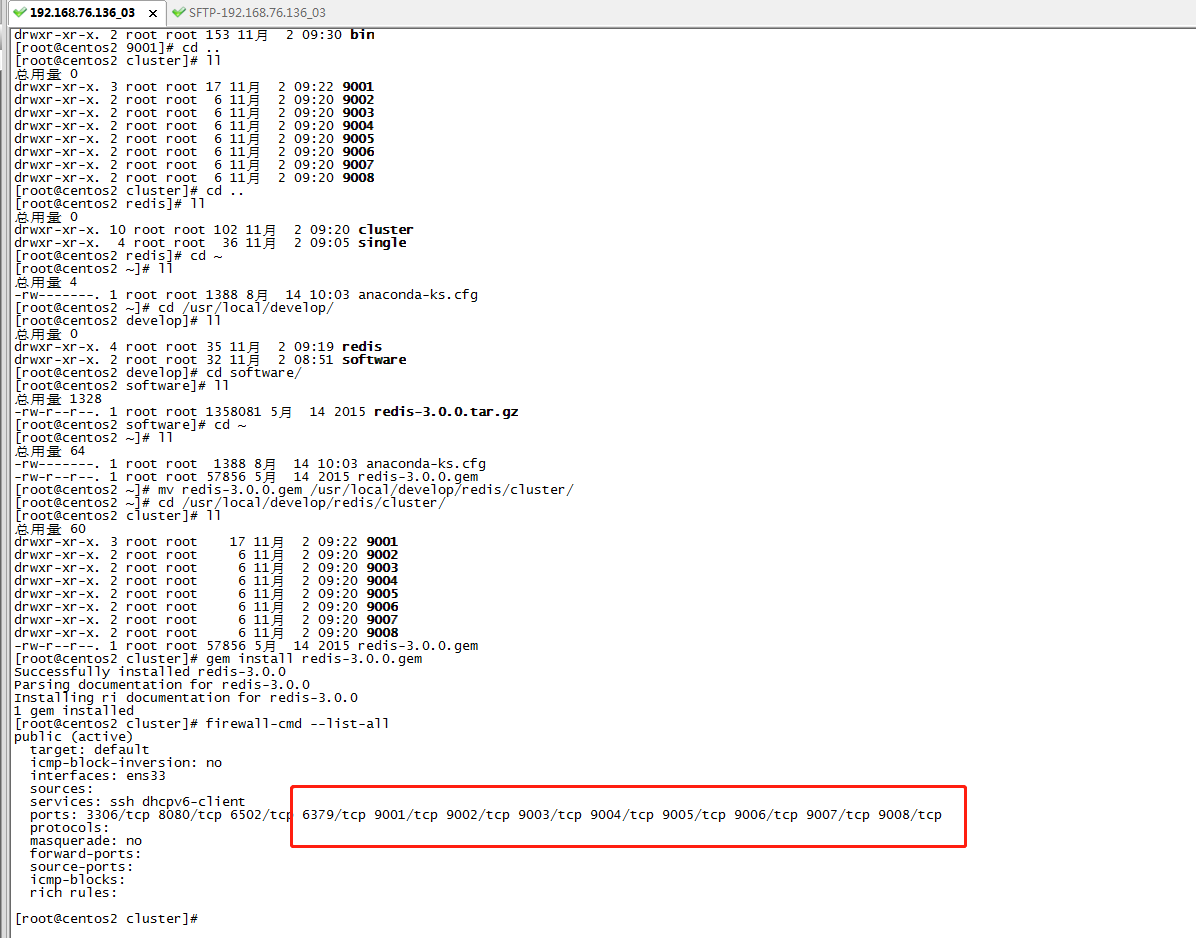
以9001举例其他的一次类推
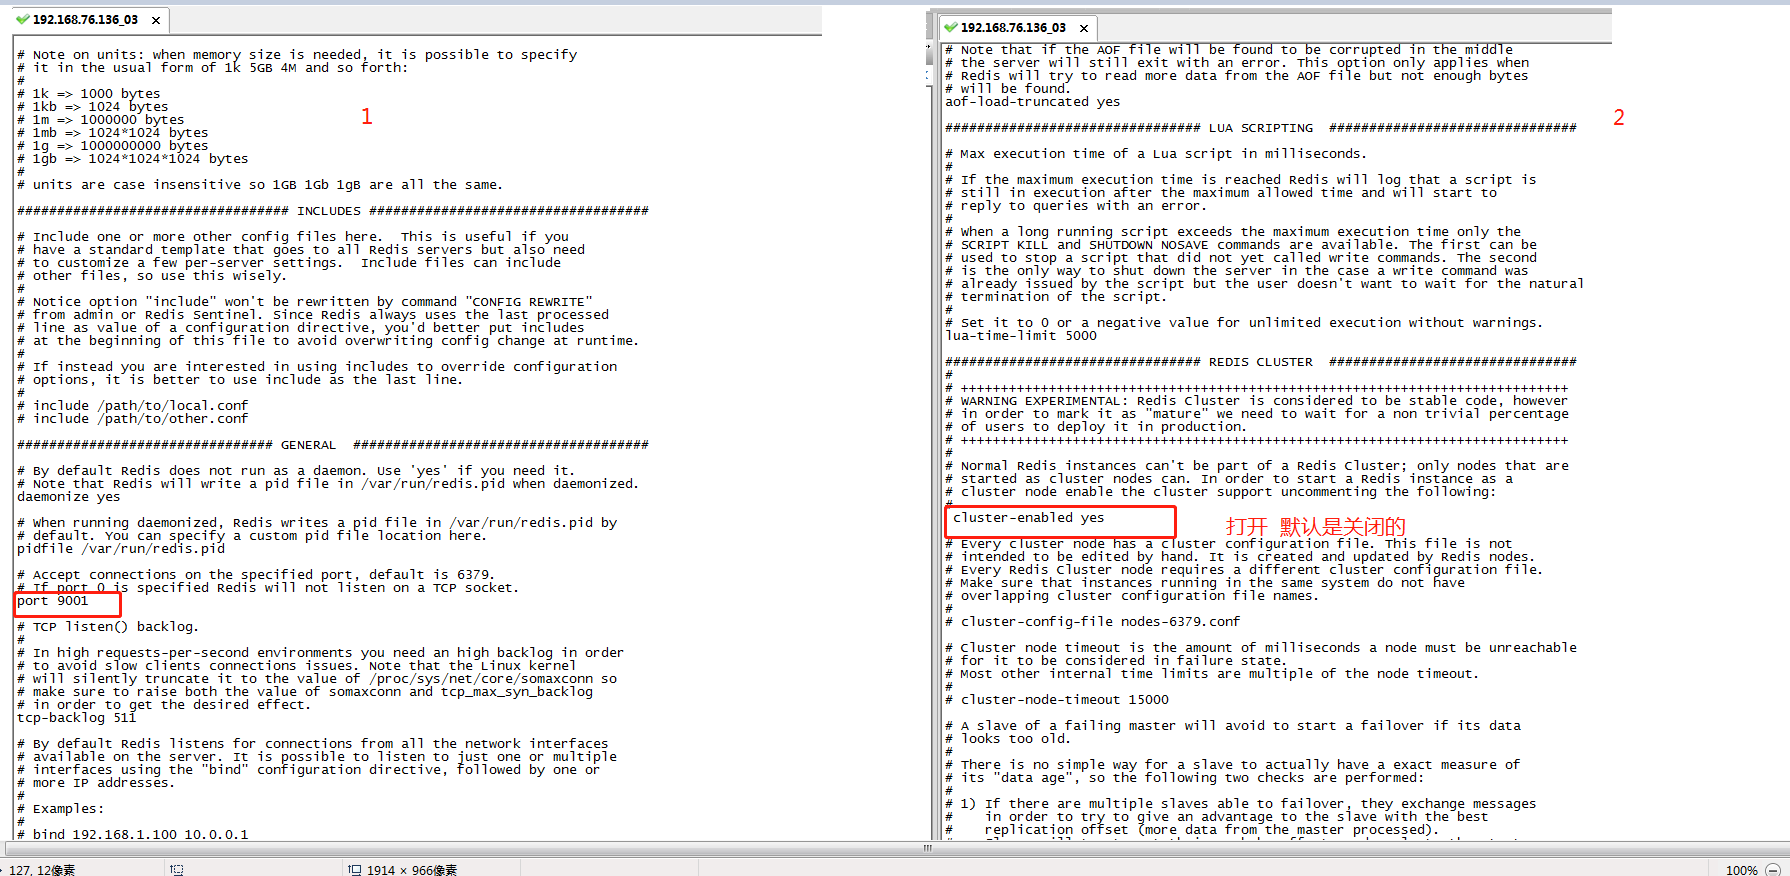
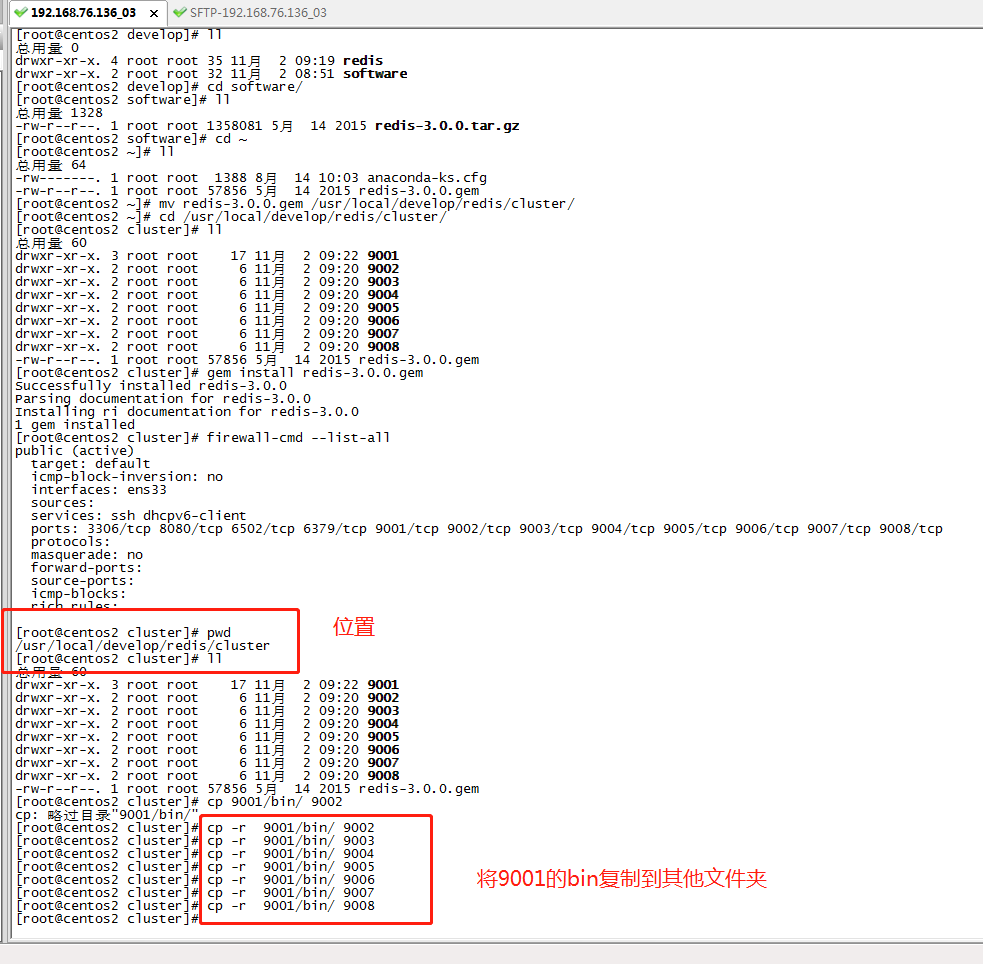
2.4 将9001的bin复制到其他7个文件夹
复制完成后将每一个配置文件的端口修改修改就行
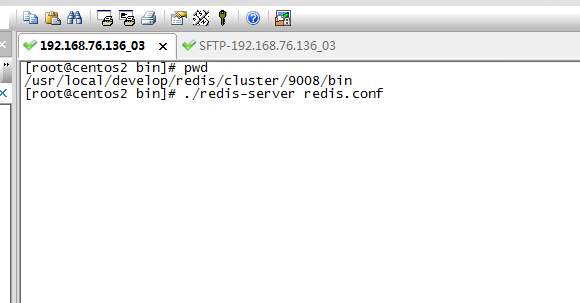
2.5 修改每一个剩下7个的端口 并启动这个8个服务
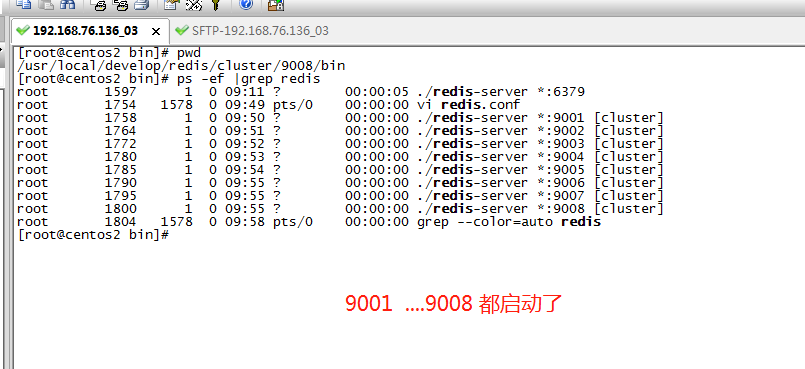
2.6 创建集群
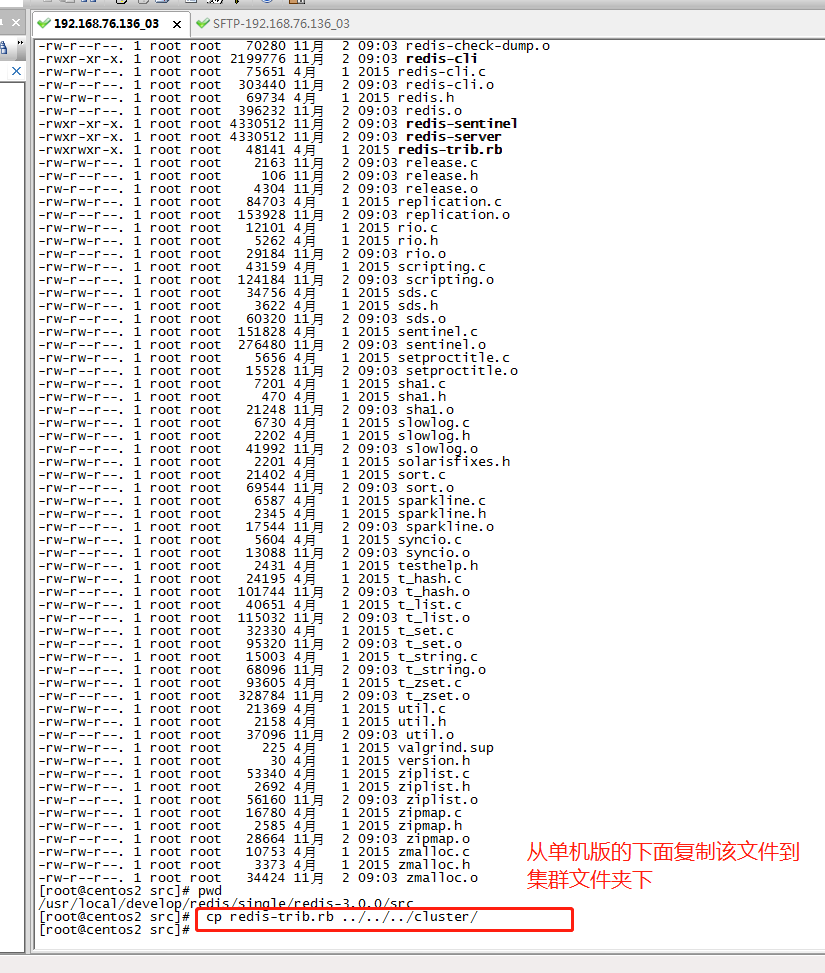
(1)复制集群启动文件
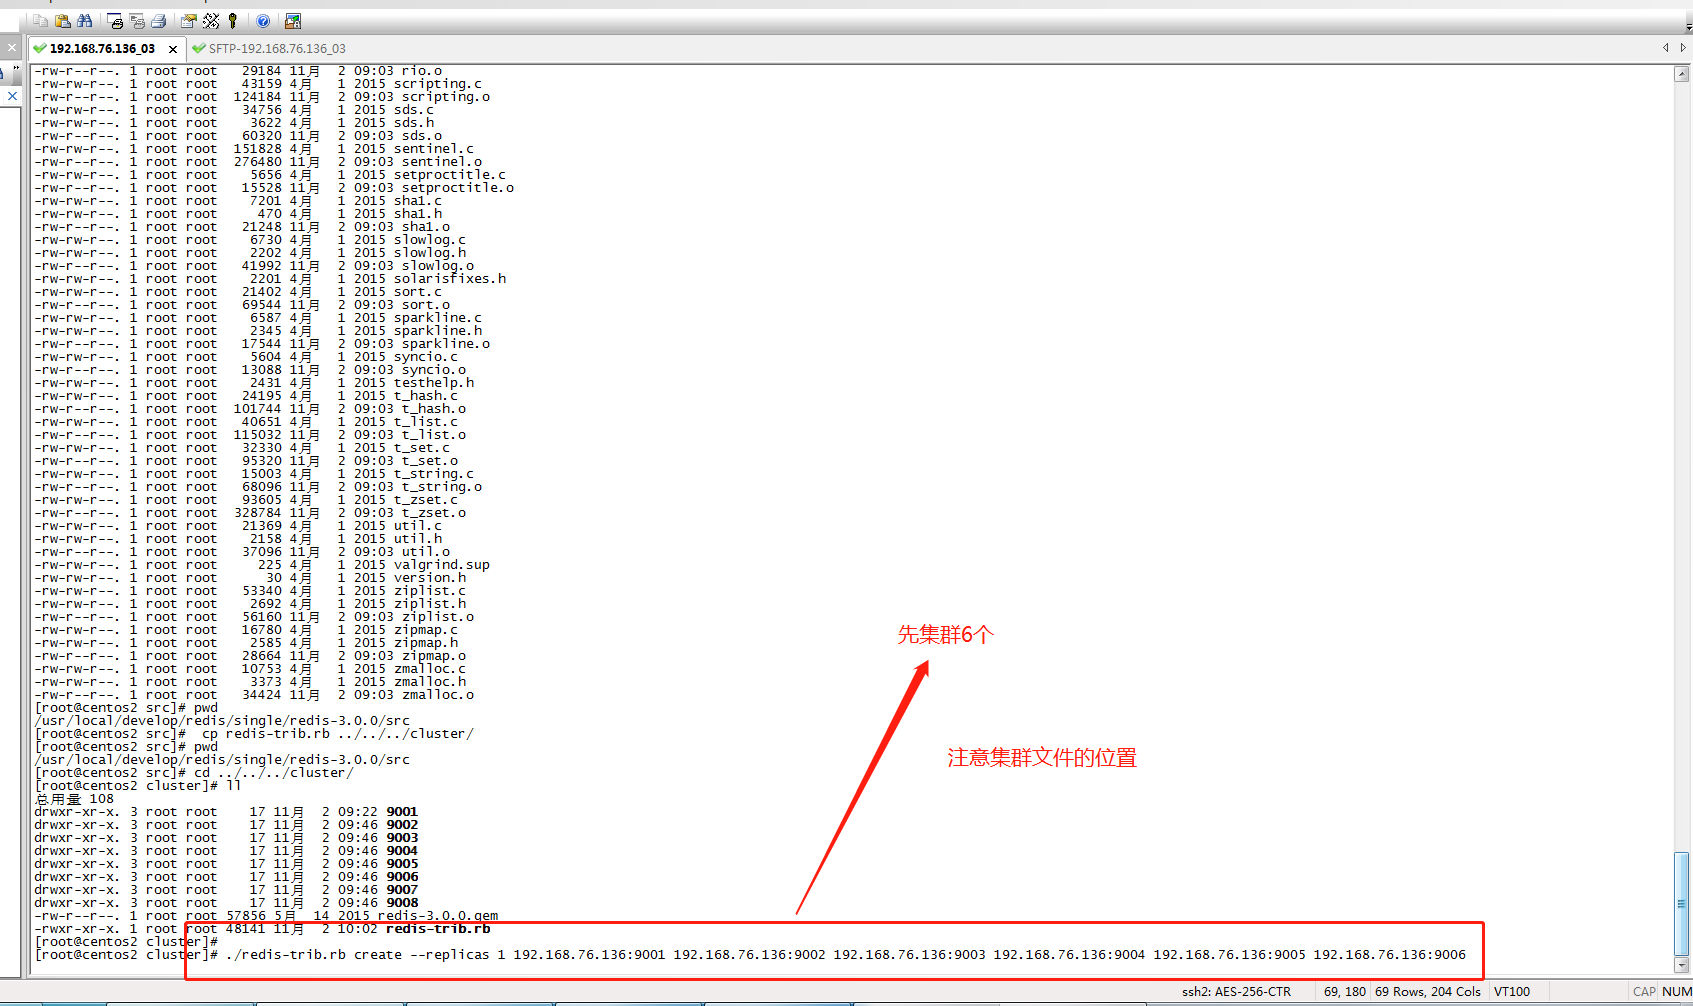
(2)创建集群
注:如果下面代码有问题 先放到text文档中,有时候发生乱码
./redis-trib.rb create --replicas 1 192.168.76.136:9001 192.168.76.136:9002 192.168.76.136:9003 192.168.76.136:9004 192.168.76.136:9005 192.168.76.136:9006
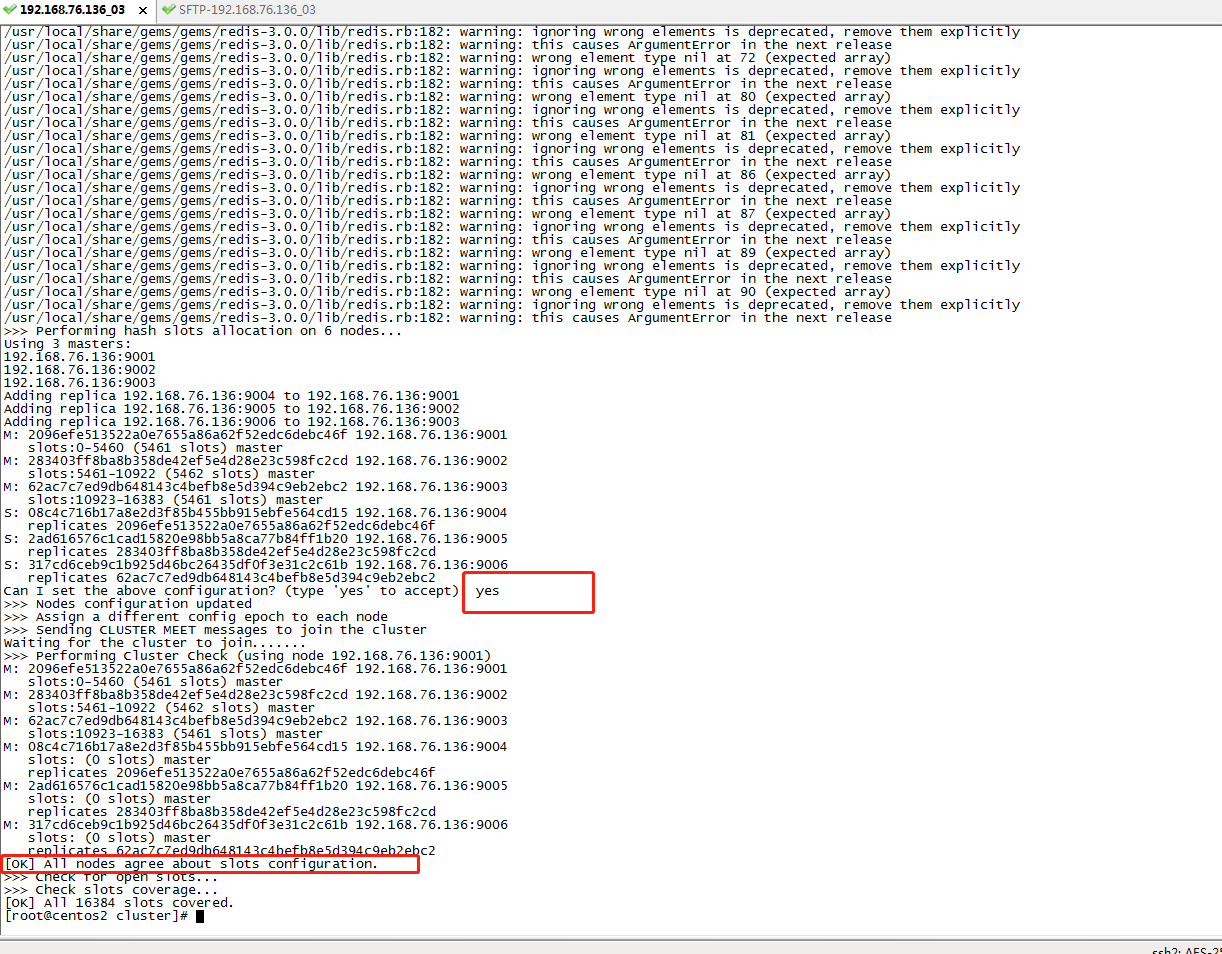
登录集群:
./redis-cli -c -h 192.168.76.136 -p 9001

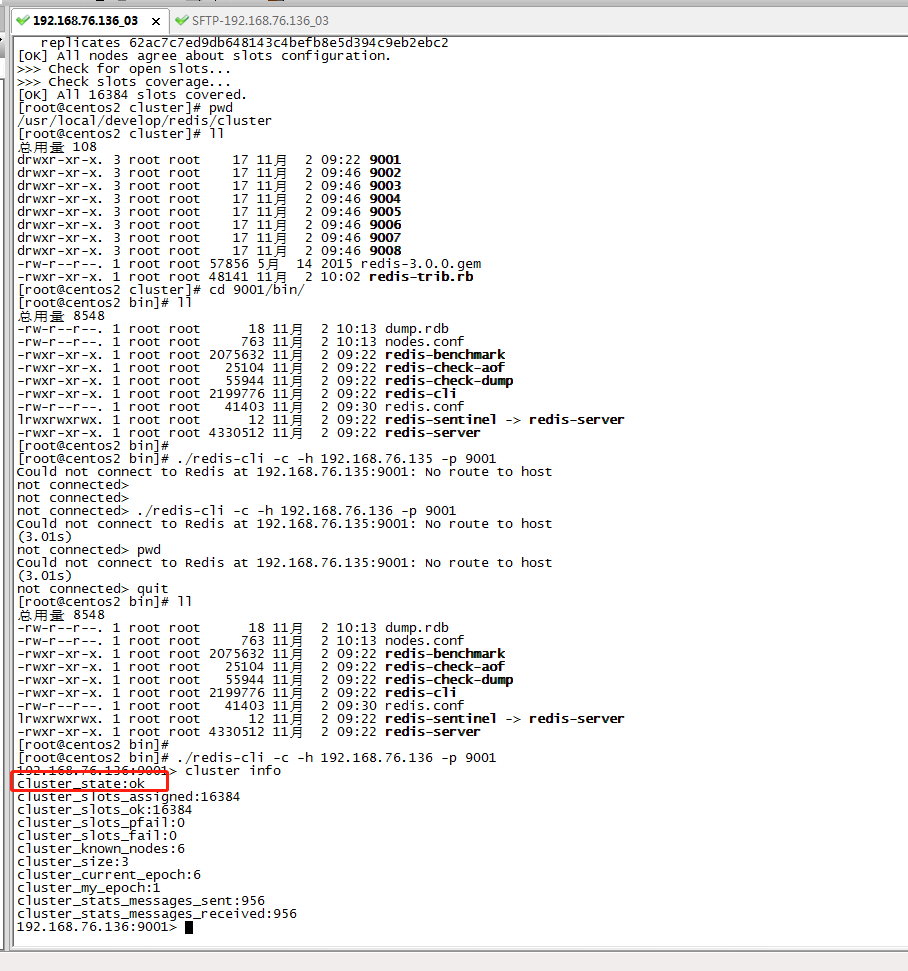
查看9001的节点状态
cluster info
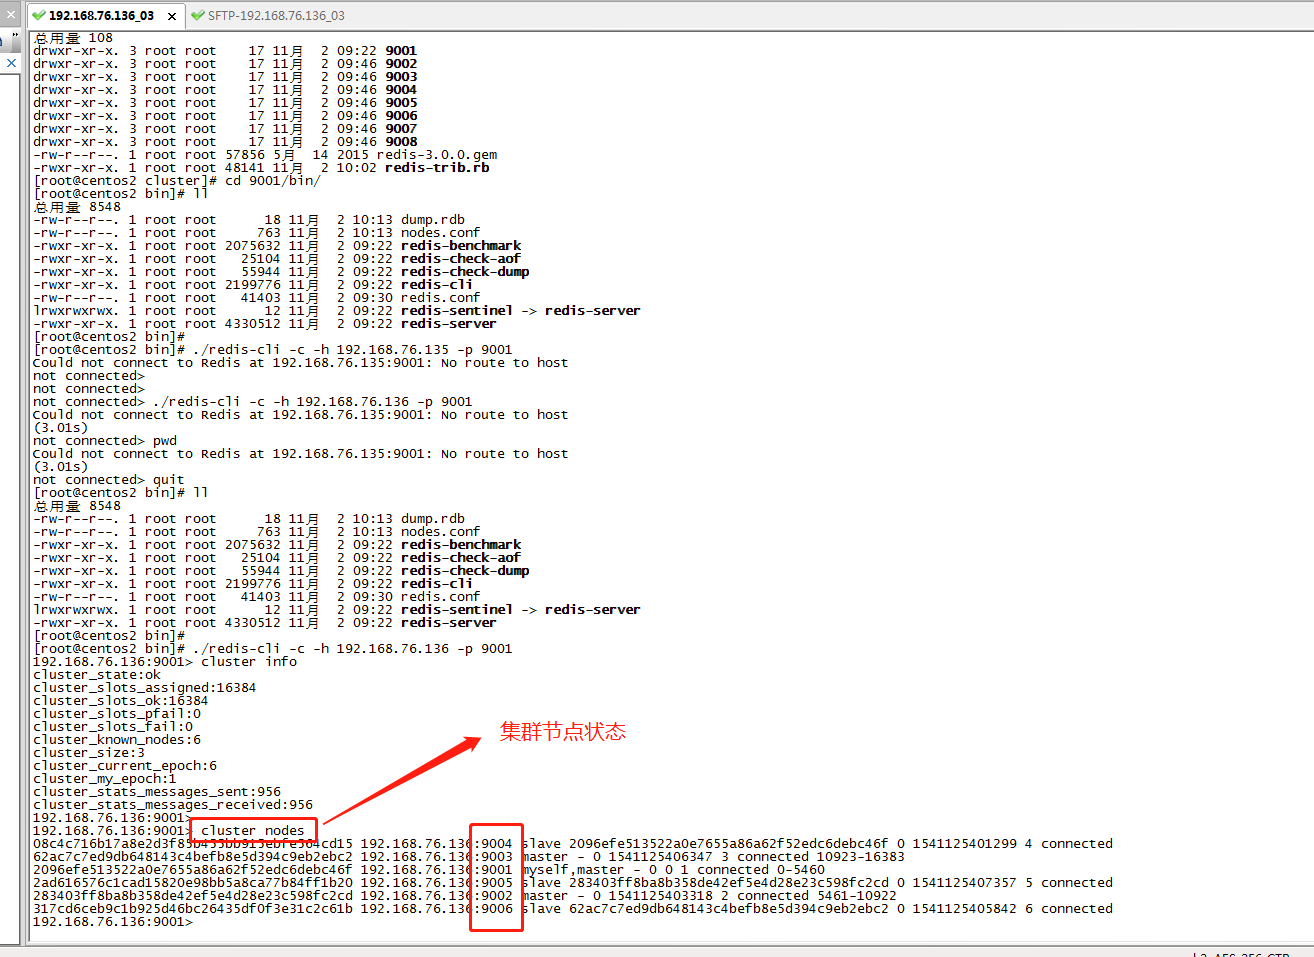
查看集群节点的关系
cluster nodes
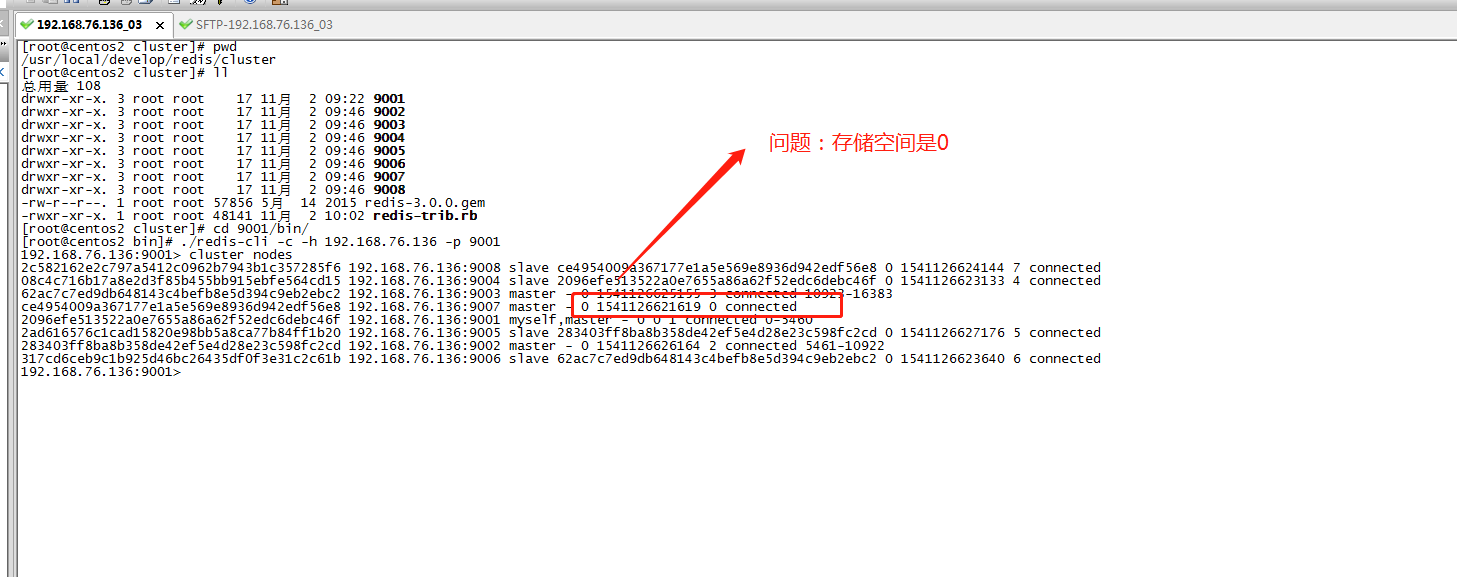
3. 动态添加节点 分类存储空间
3.1 添加节点
注:要添加的节点一定是启动状态
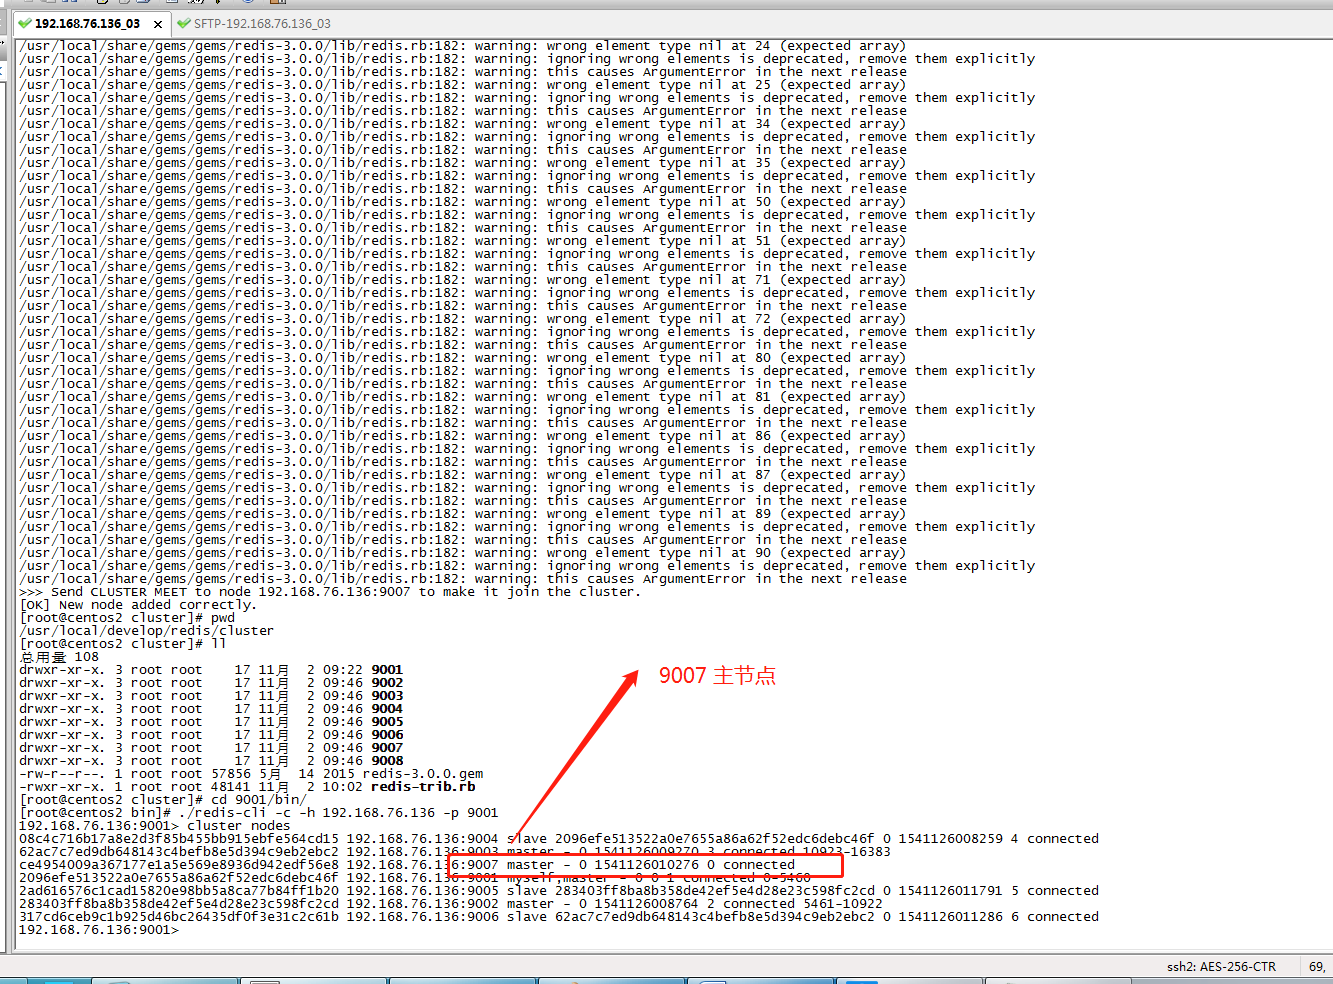
3.1.1 添加主节点
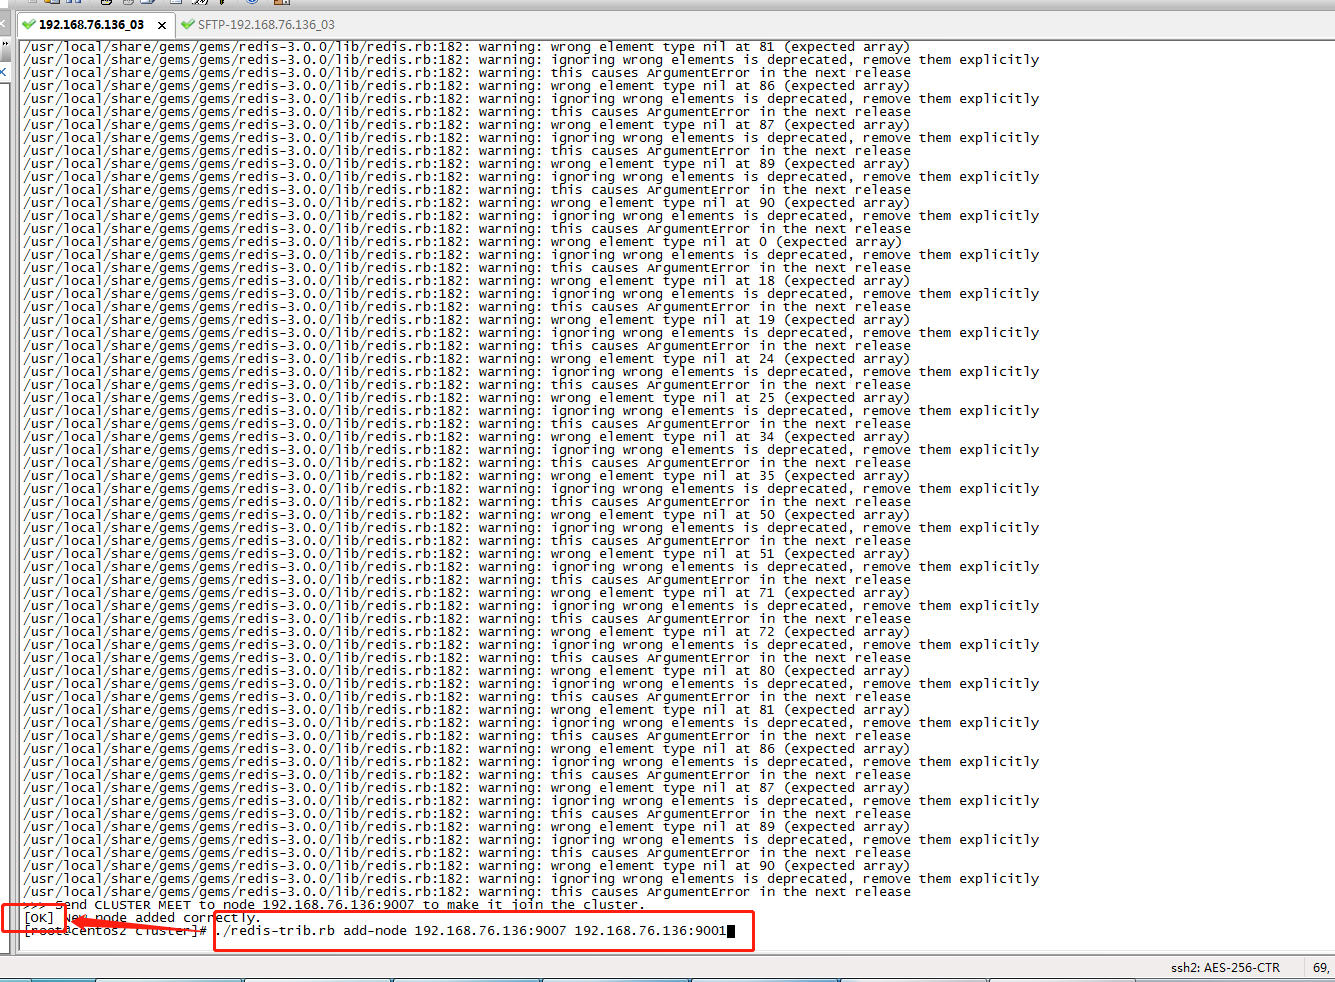
-- 参考节点,表示把9007添加到9001所在集群
./redis-trib.rb add-node 192.168.76.136:9007 192.168.76.136:9001
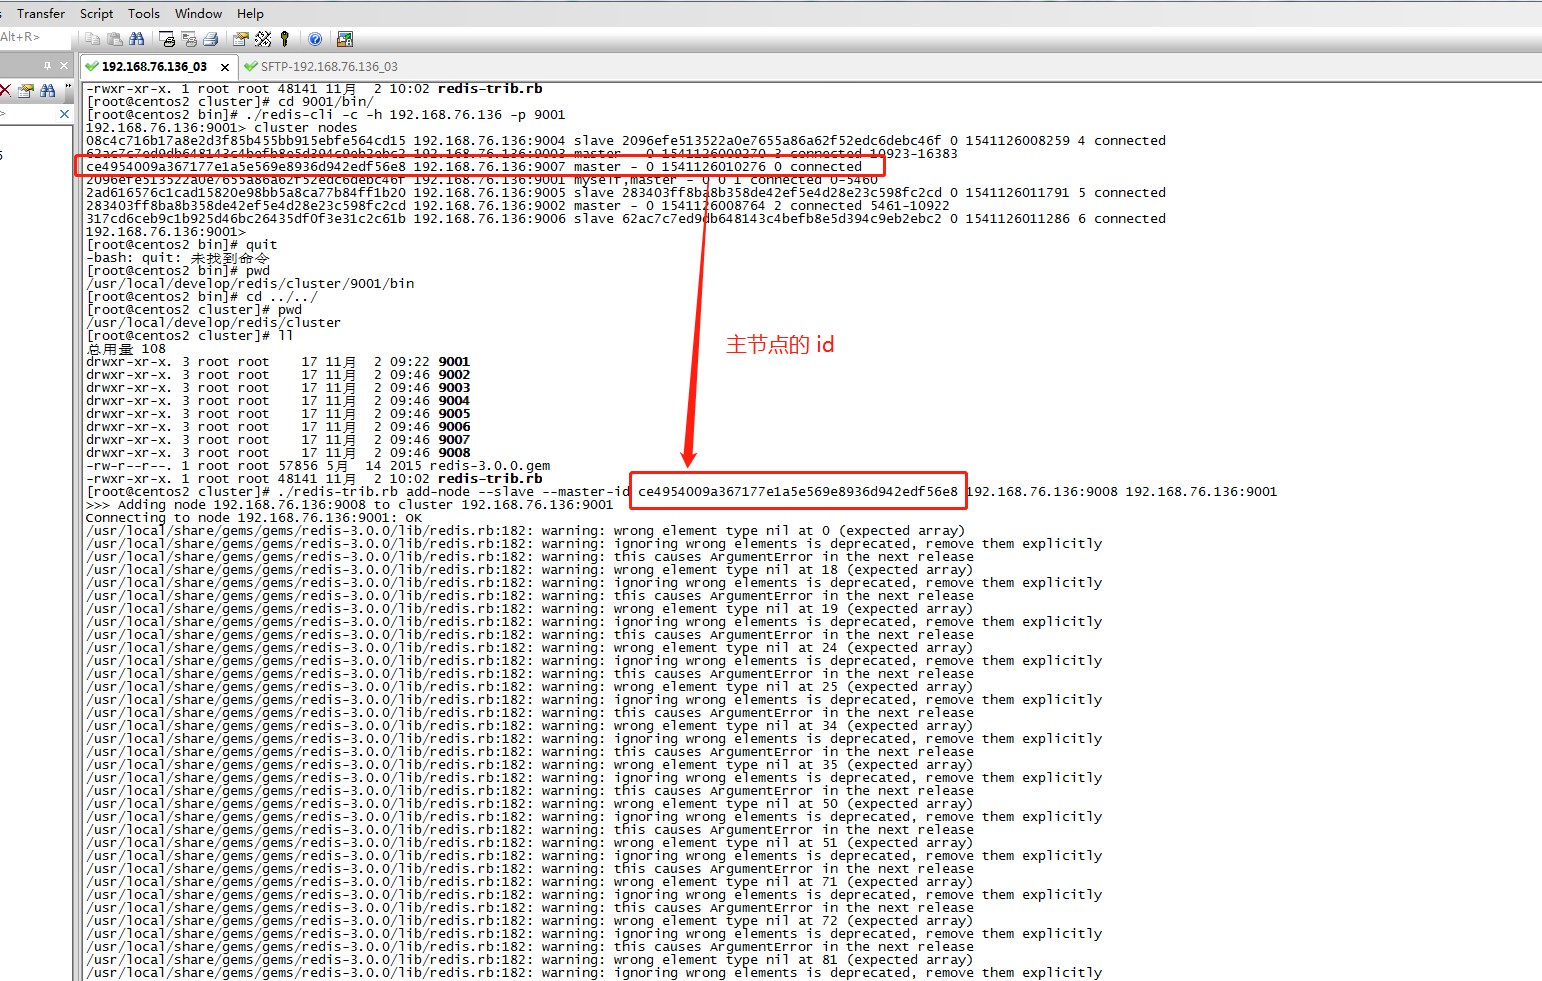
3.1.2 动态添加从节点
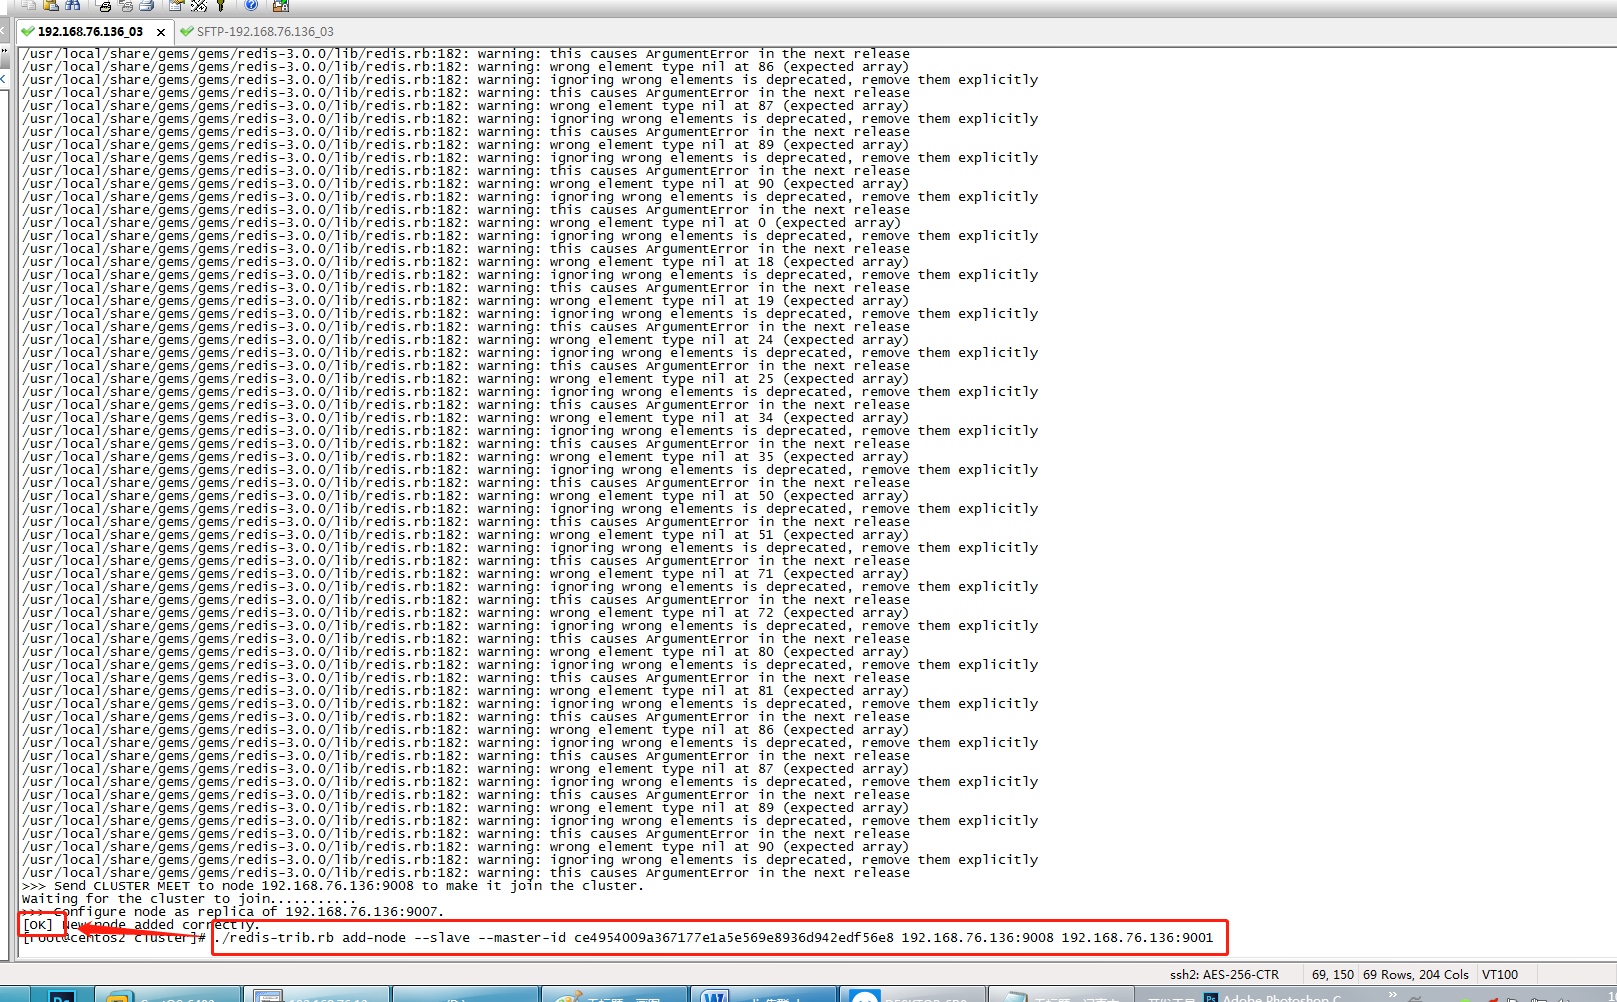
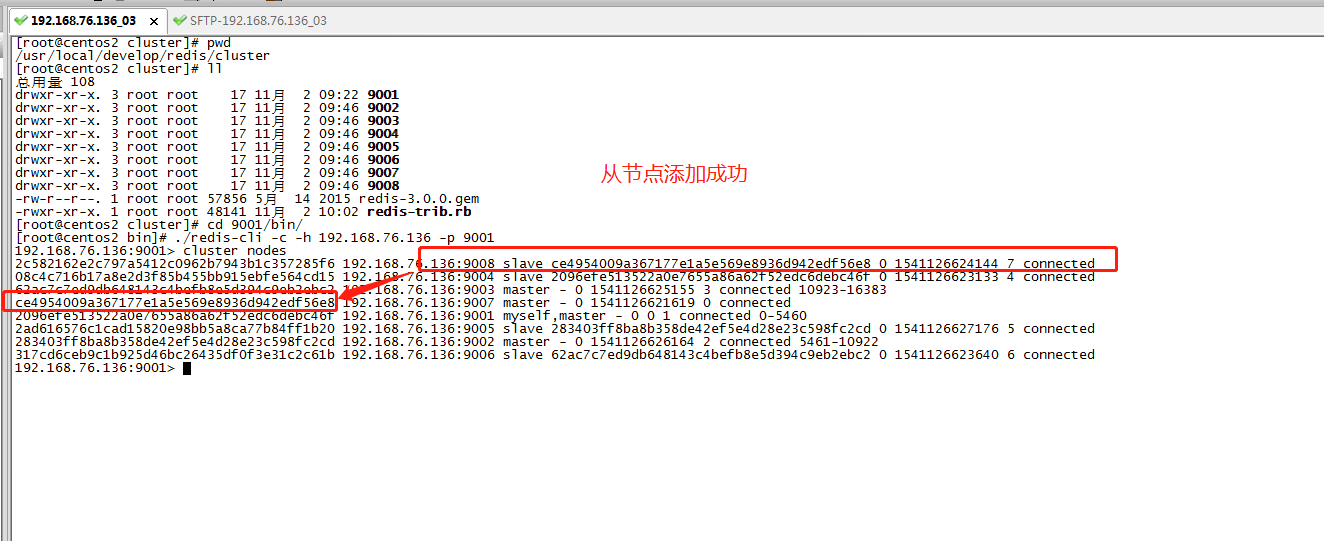
动态给主节点添加从节点:
./redis-trib.rb add-node --slave --master-id ce4954009a367177e1a5e569e8936d942edf56e8 192.168.76.136:9008 192.168.76.136:9001
add-node --slave:添加从节点
--master-id:主节点Id,表示添加从节点为那个主节点的从节点
192.168.76.136:9001:参考节点,表示把9008添加到9001所在集群
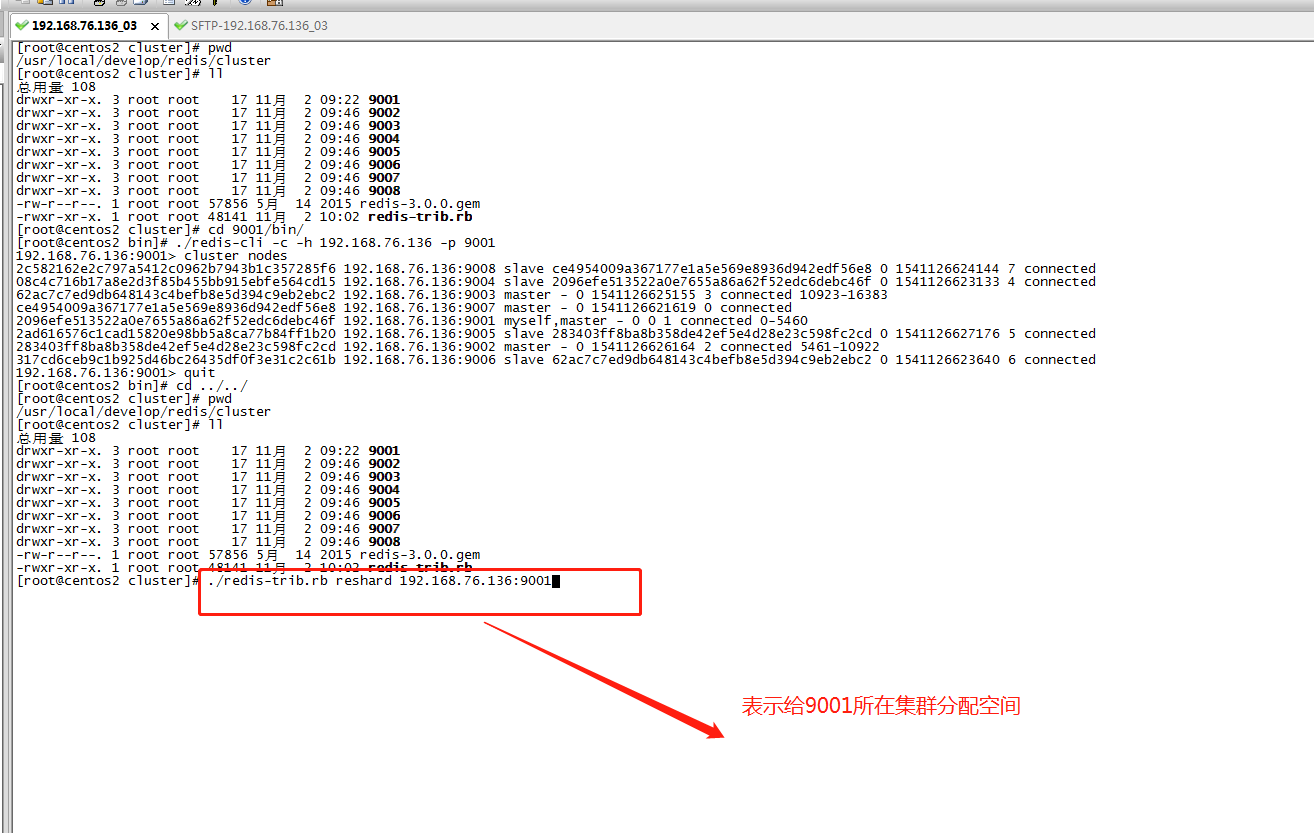
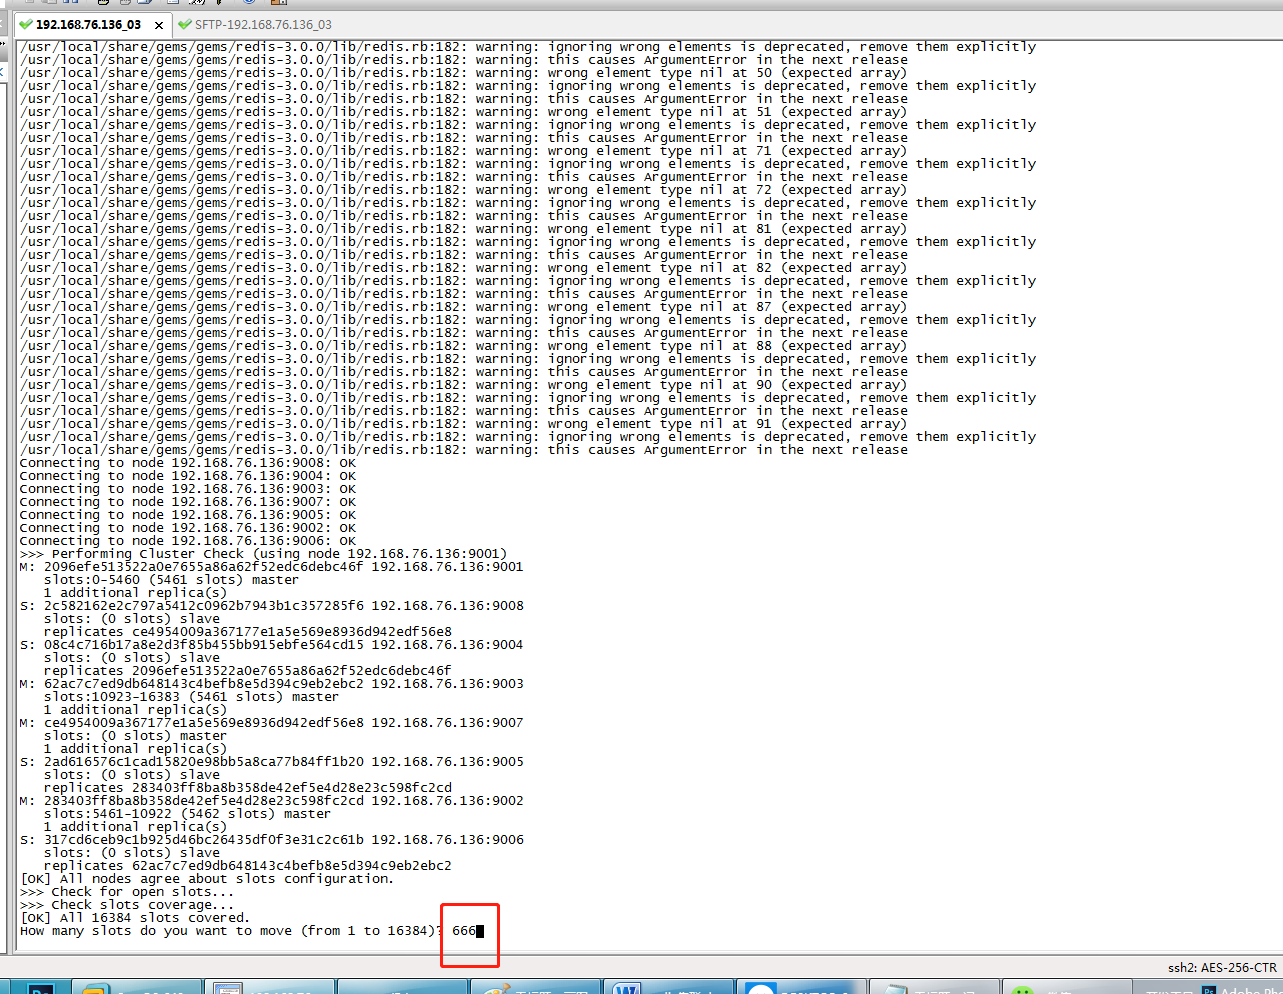
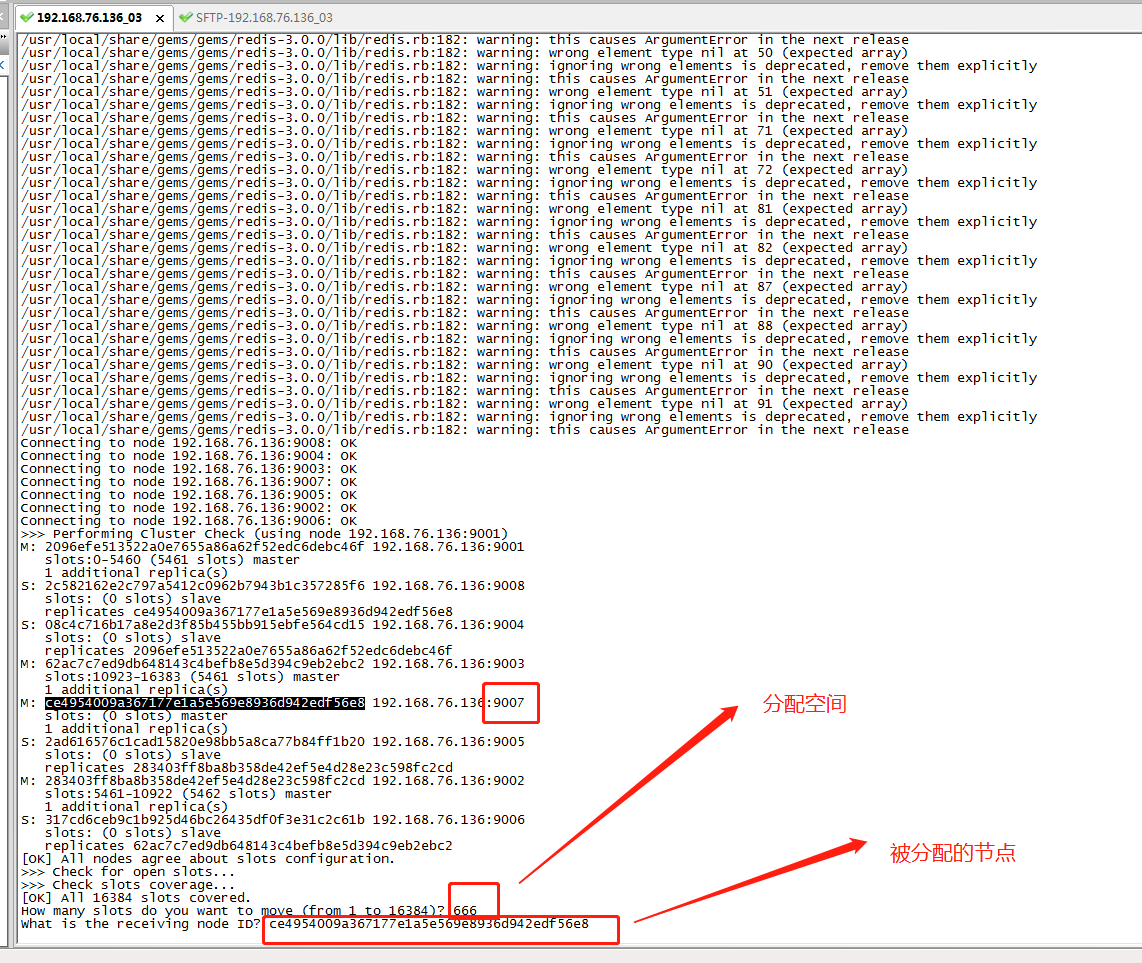
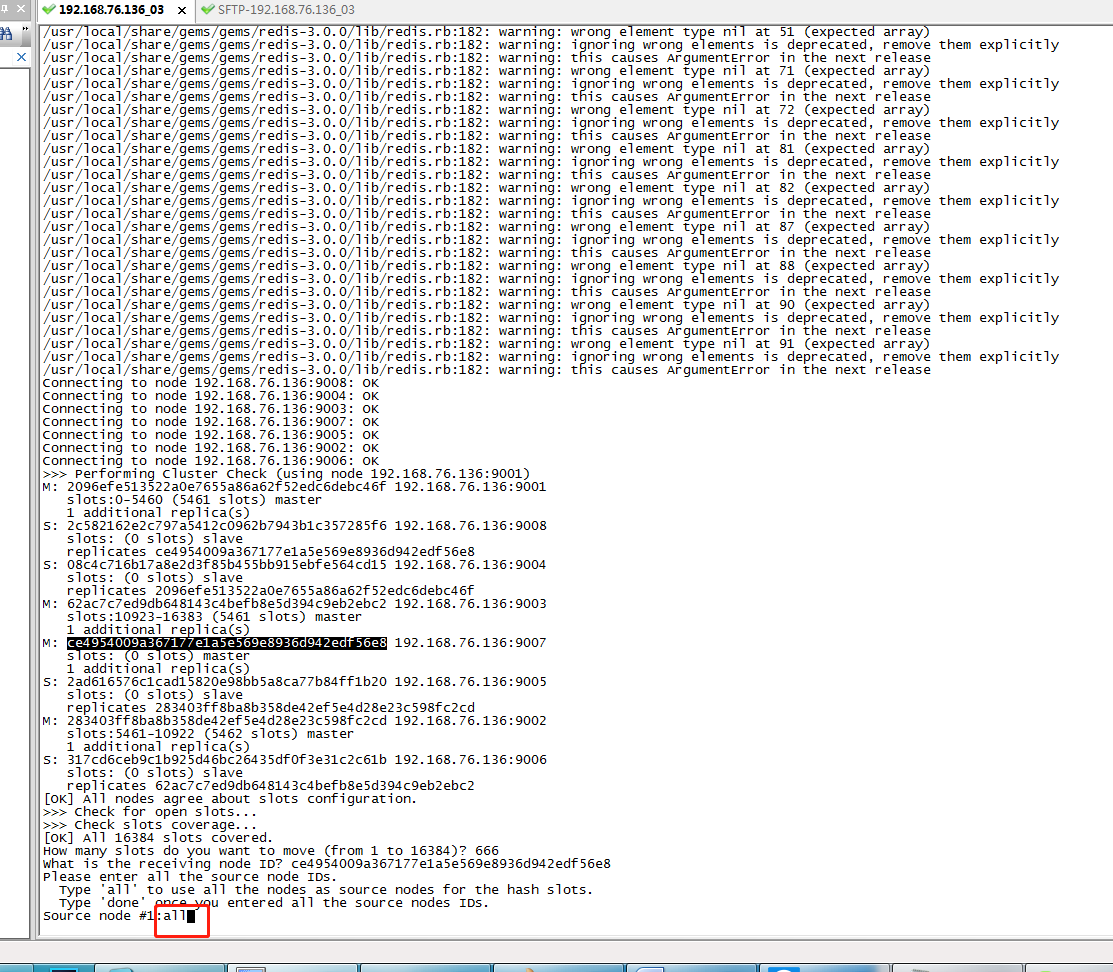
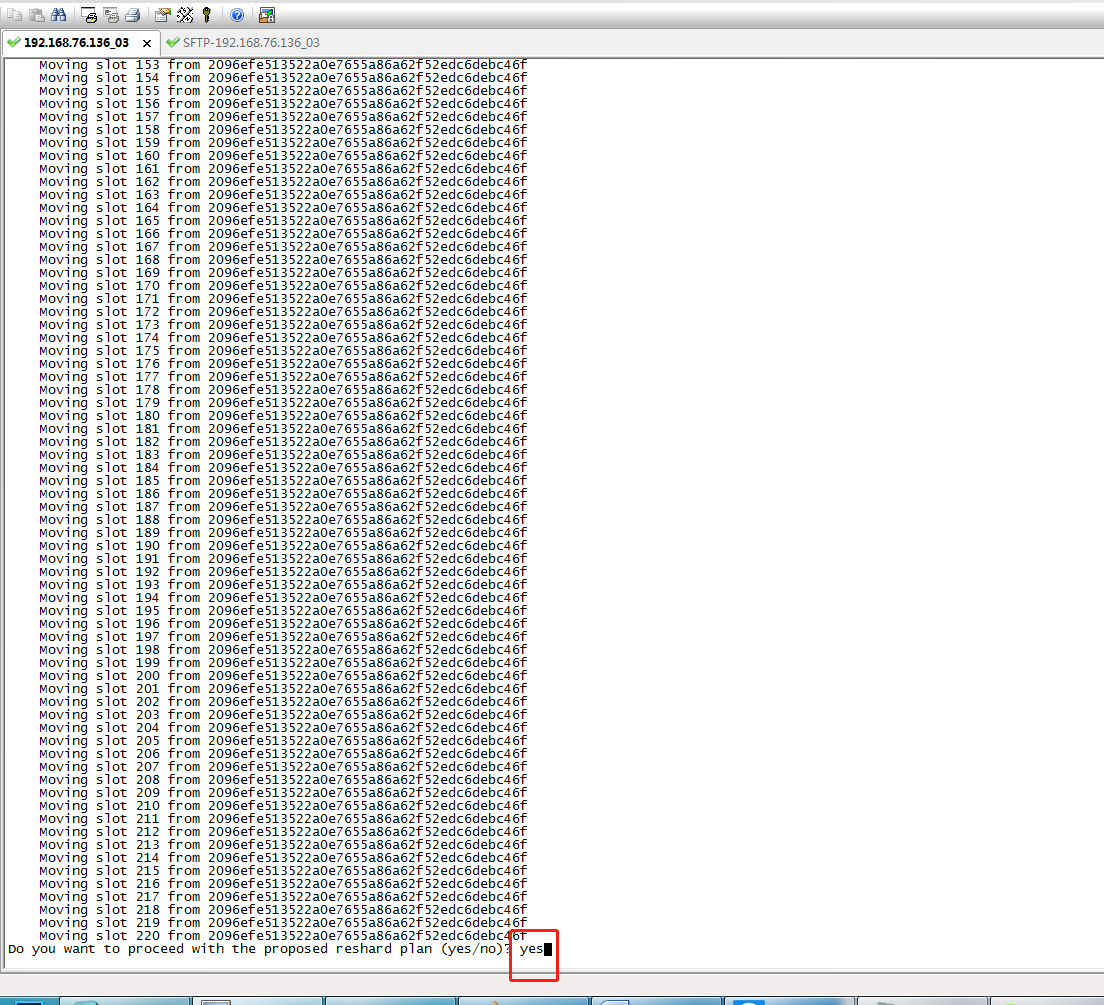
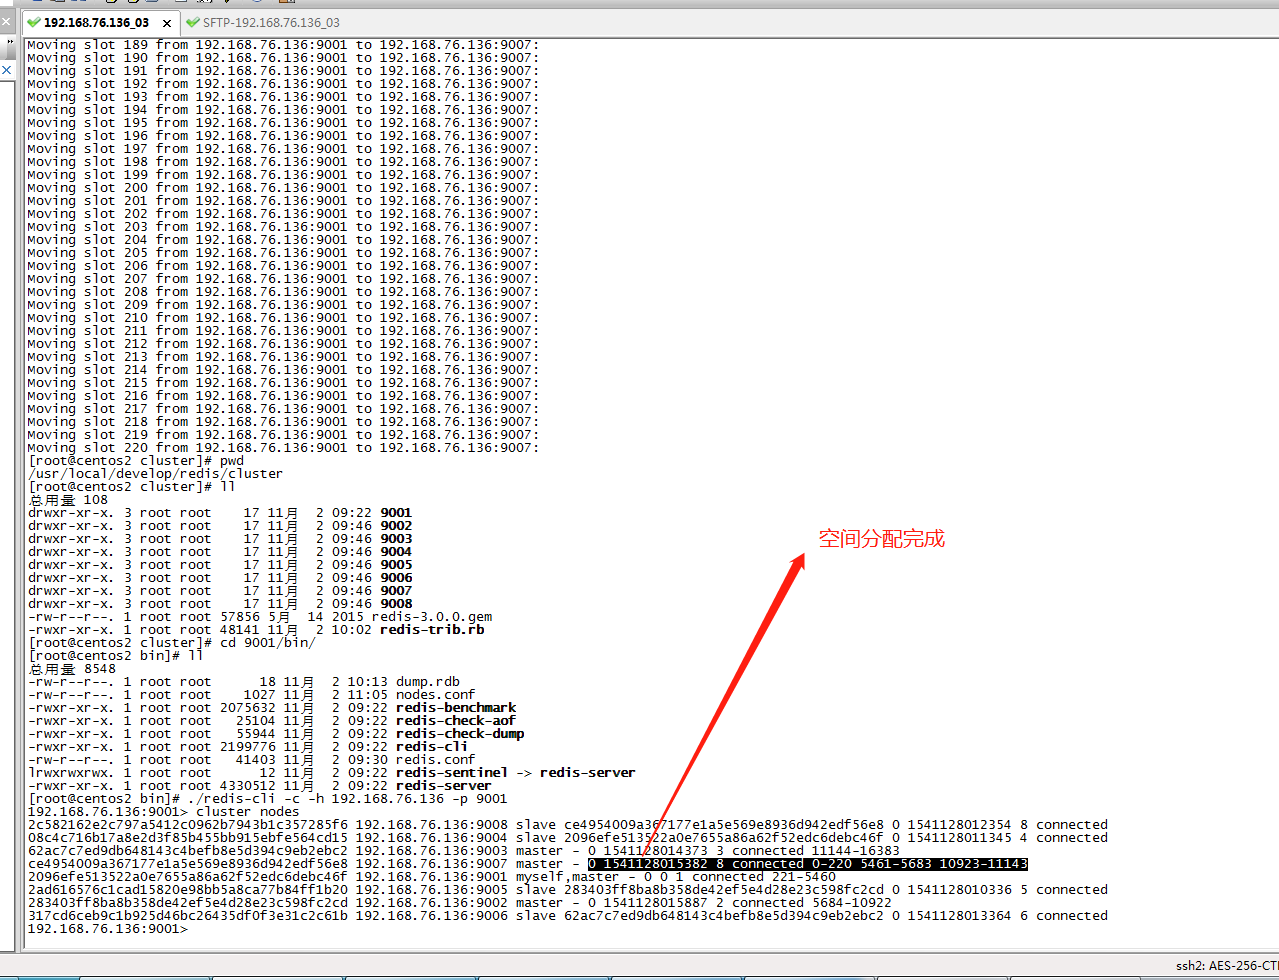
4. 给节点分配存储空间
给新添加节点分配存储空间:
./redis-trib.rb reshard 192.168.76.136:9001
5. 应用
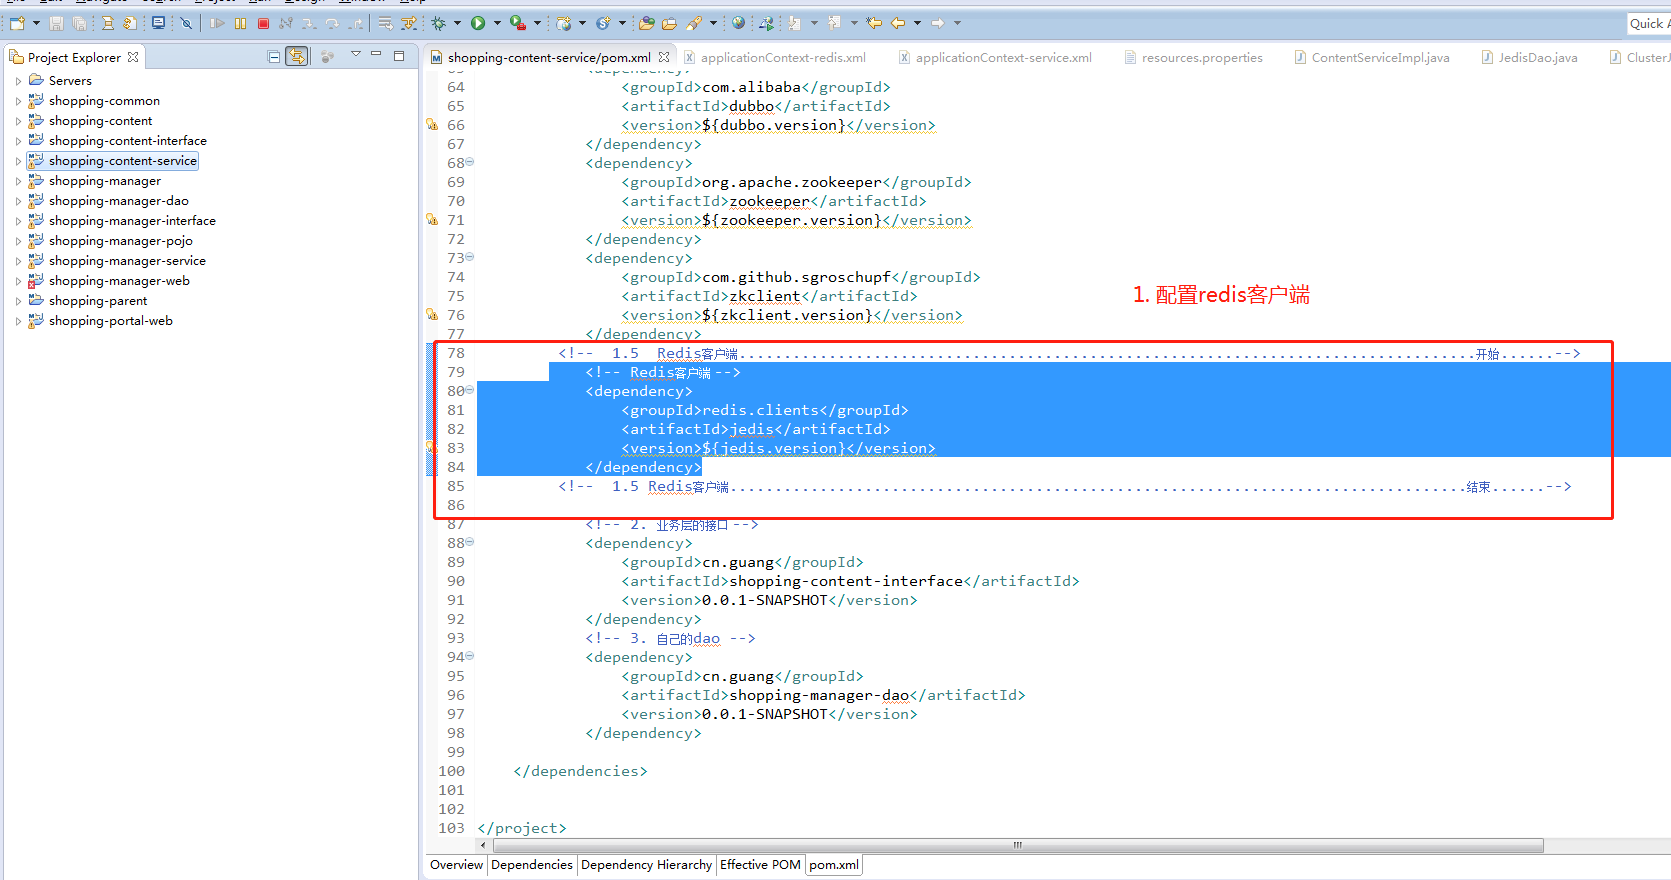
5.1 redis客户端
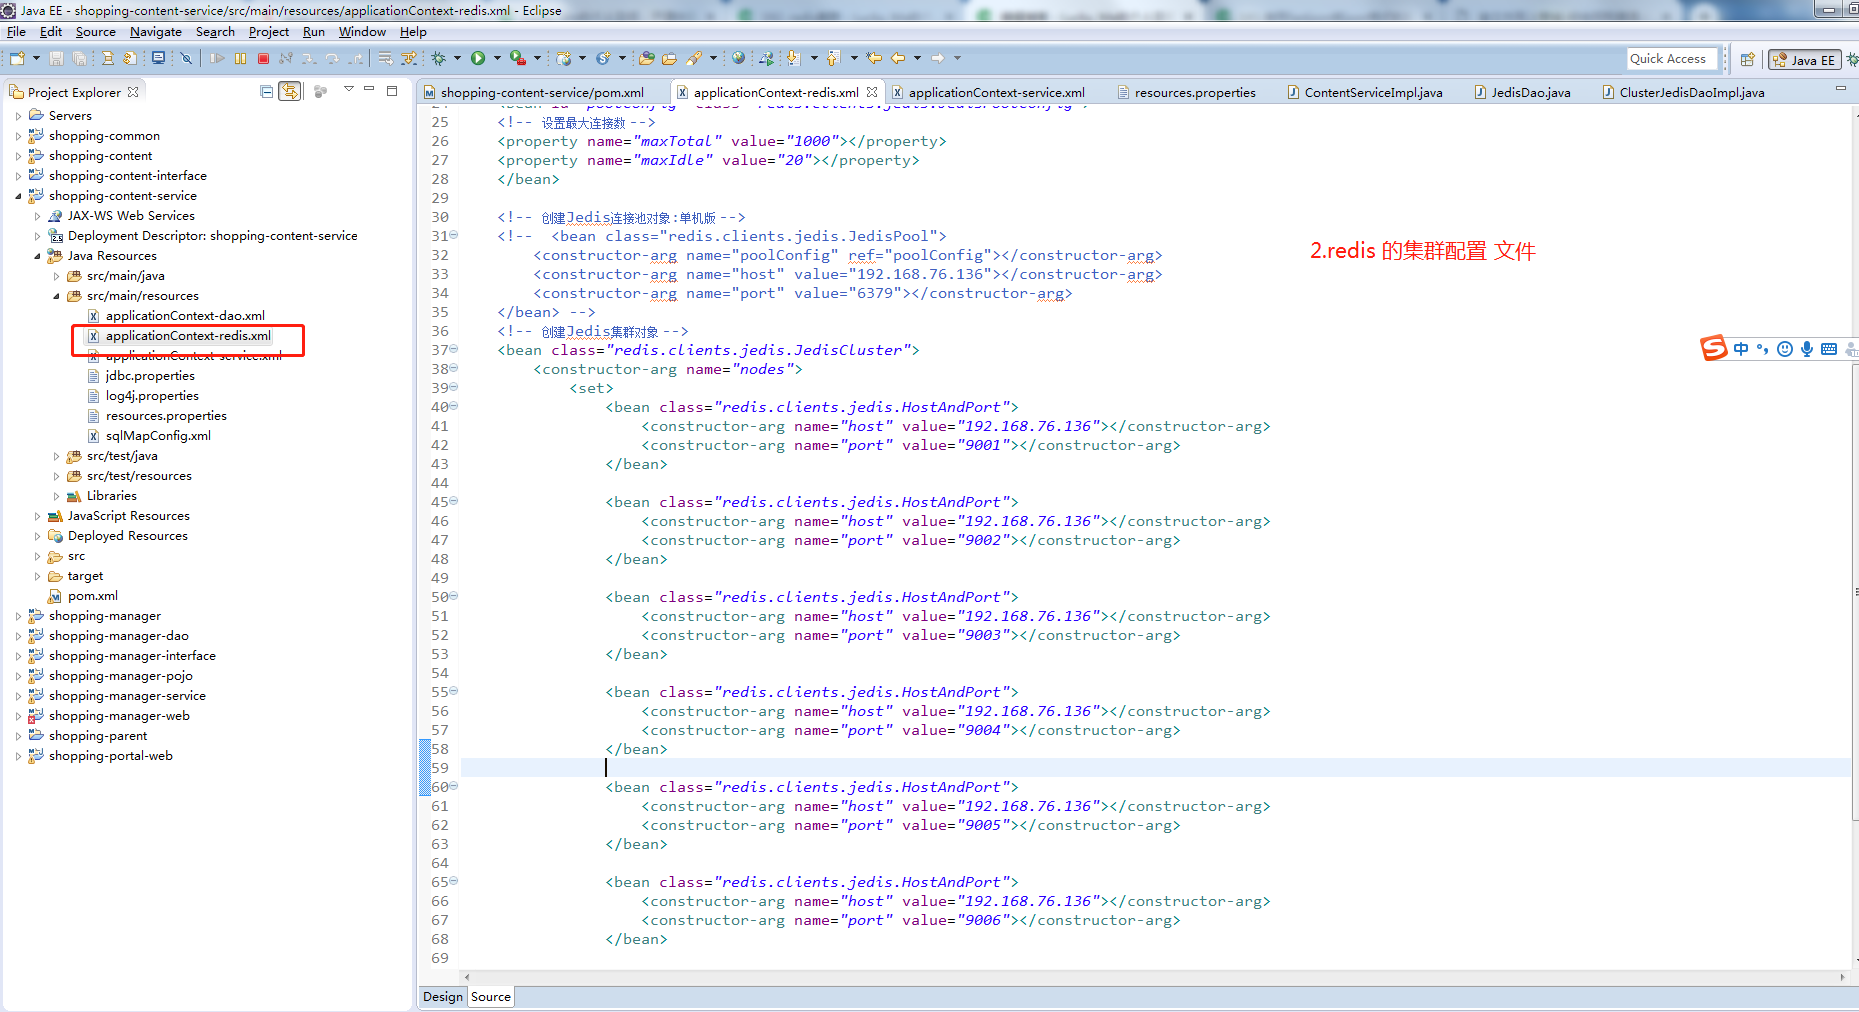
5.2 redis 配置文件
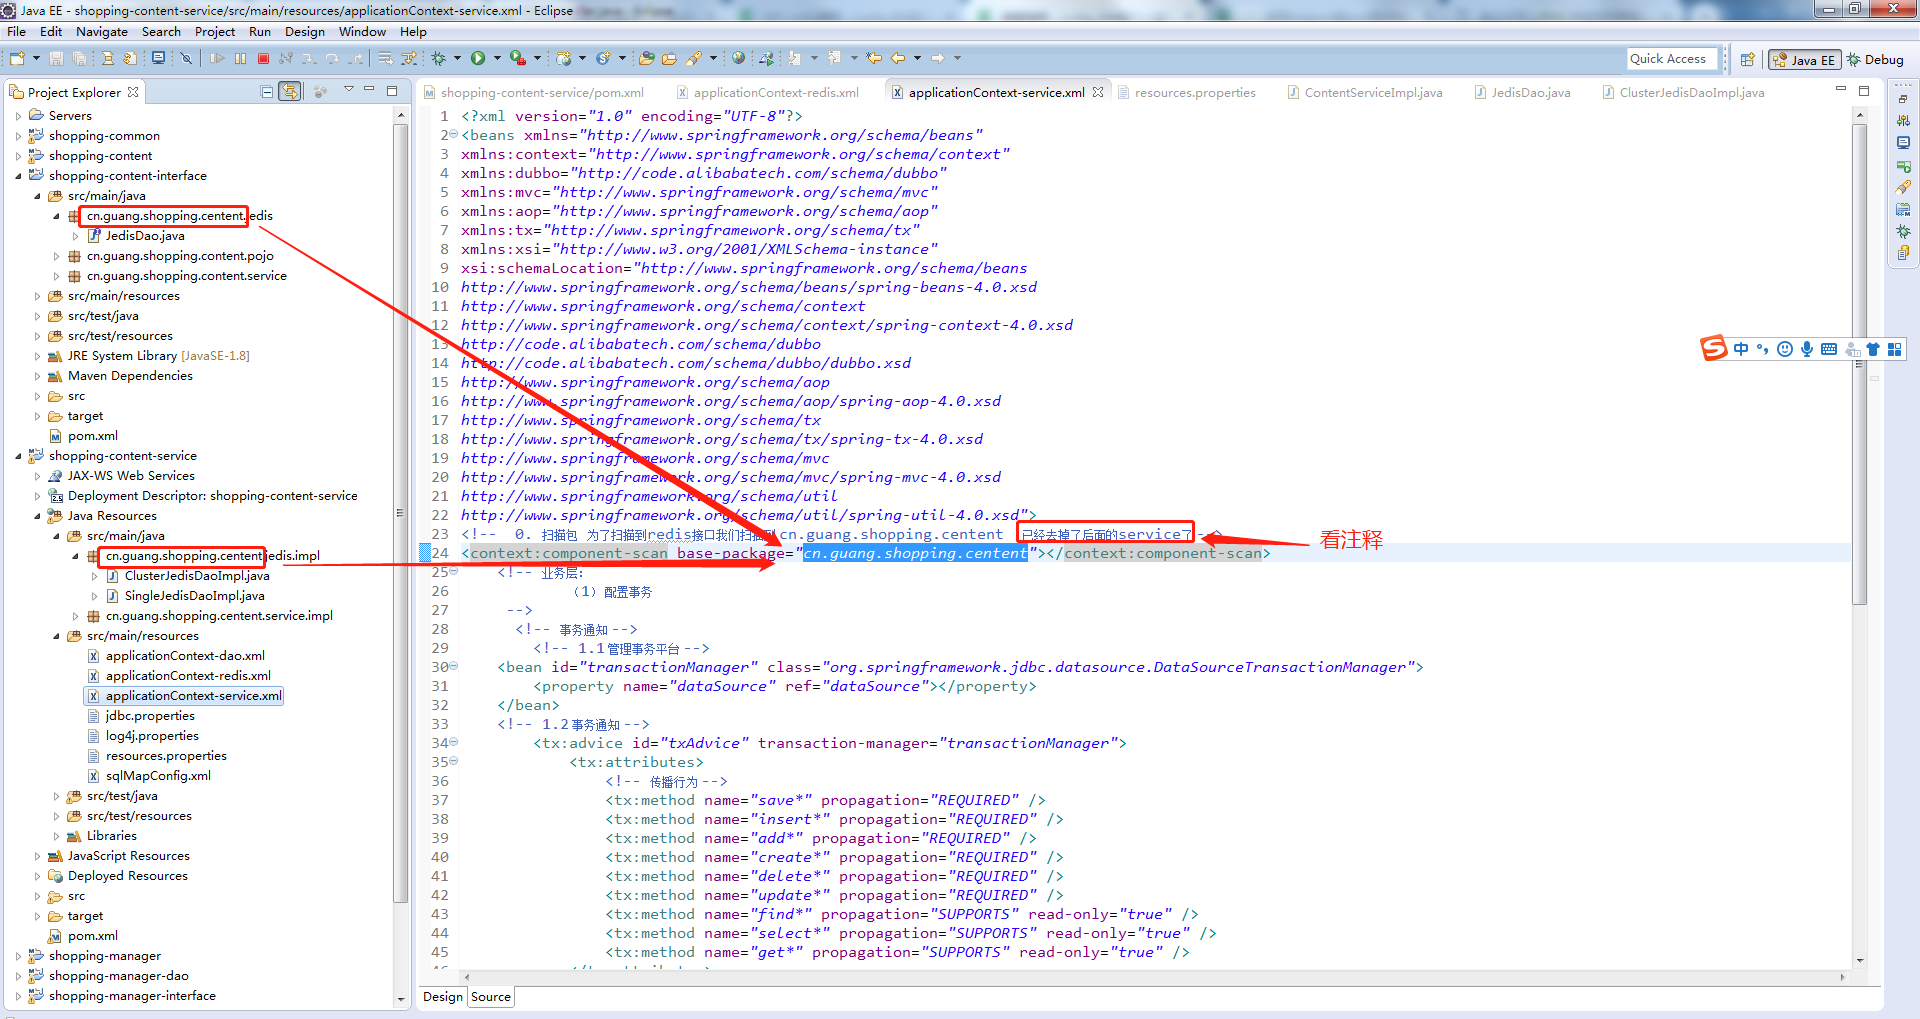
5.3 扫描接口
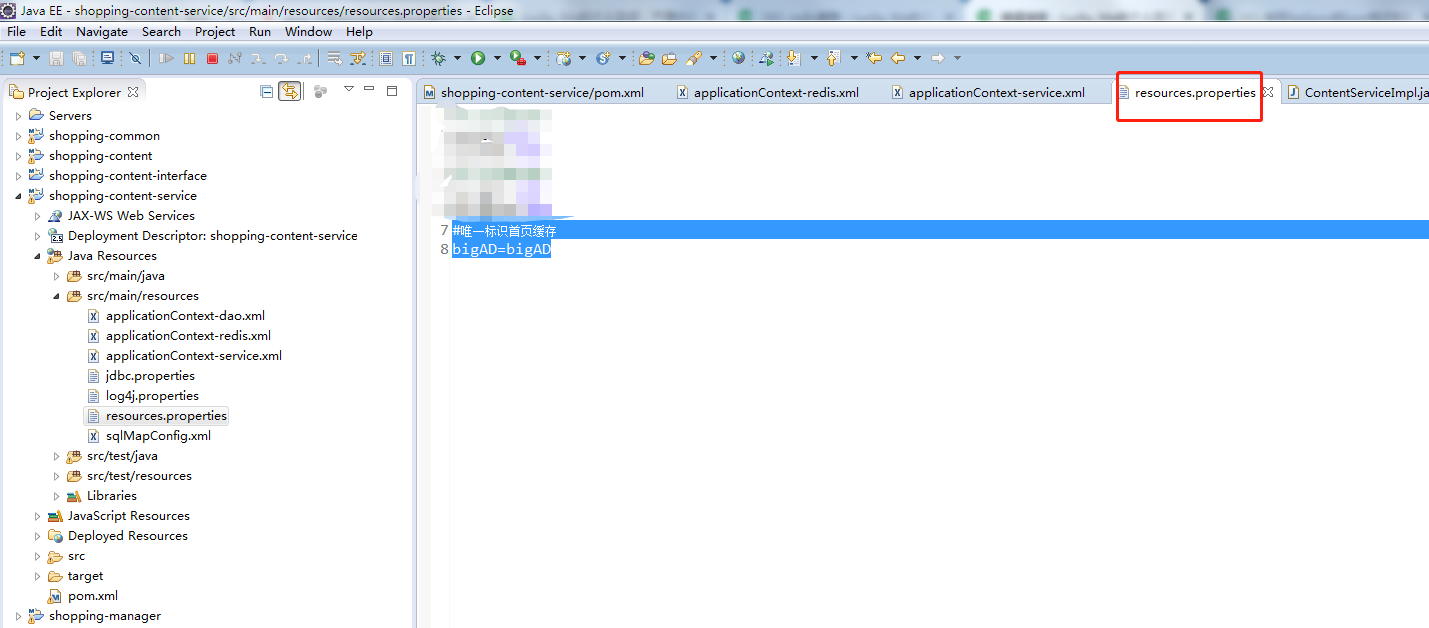
5.4 配置外部变量
为了将一些需要变化的内容写在资源文件中
参考:https://my.oschina.net/springMVCAndspring/blog/2249002
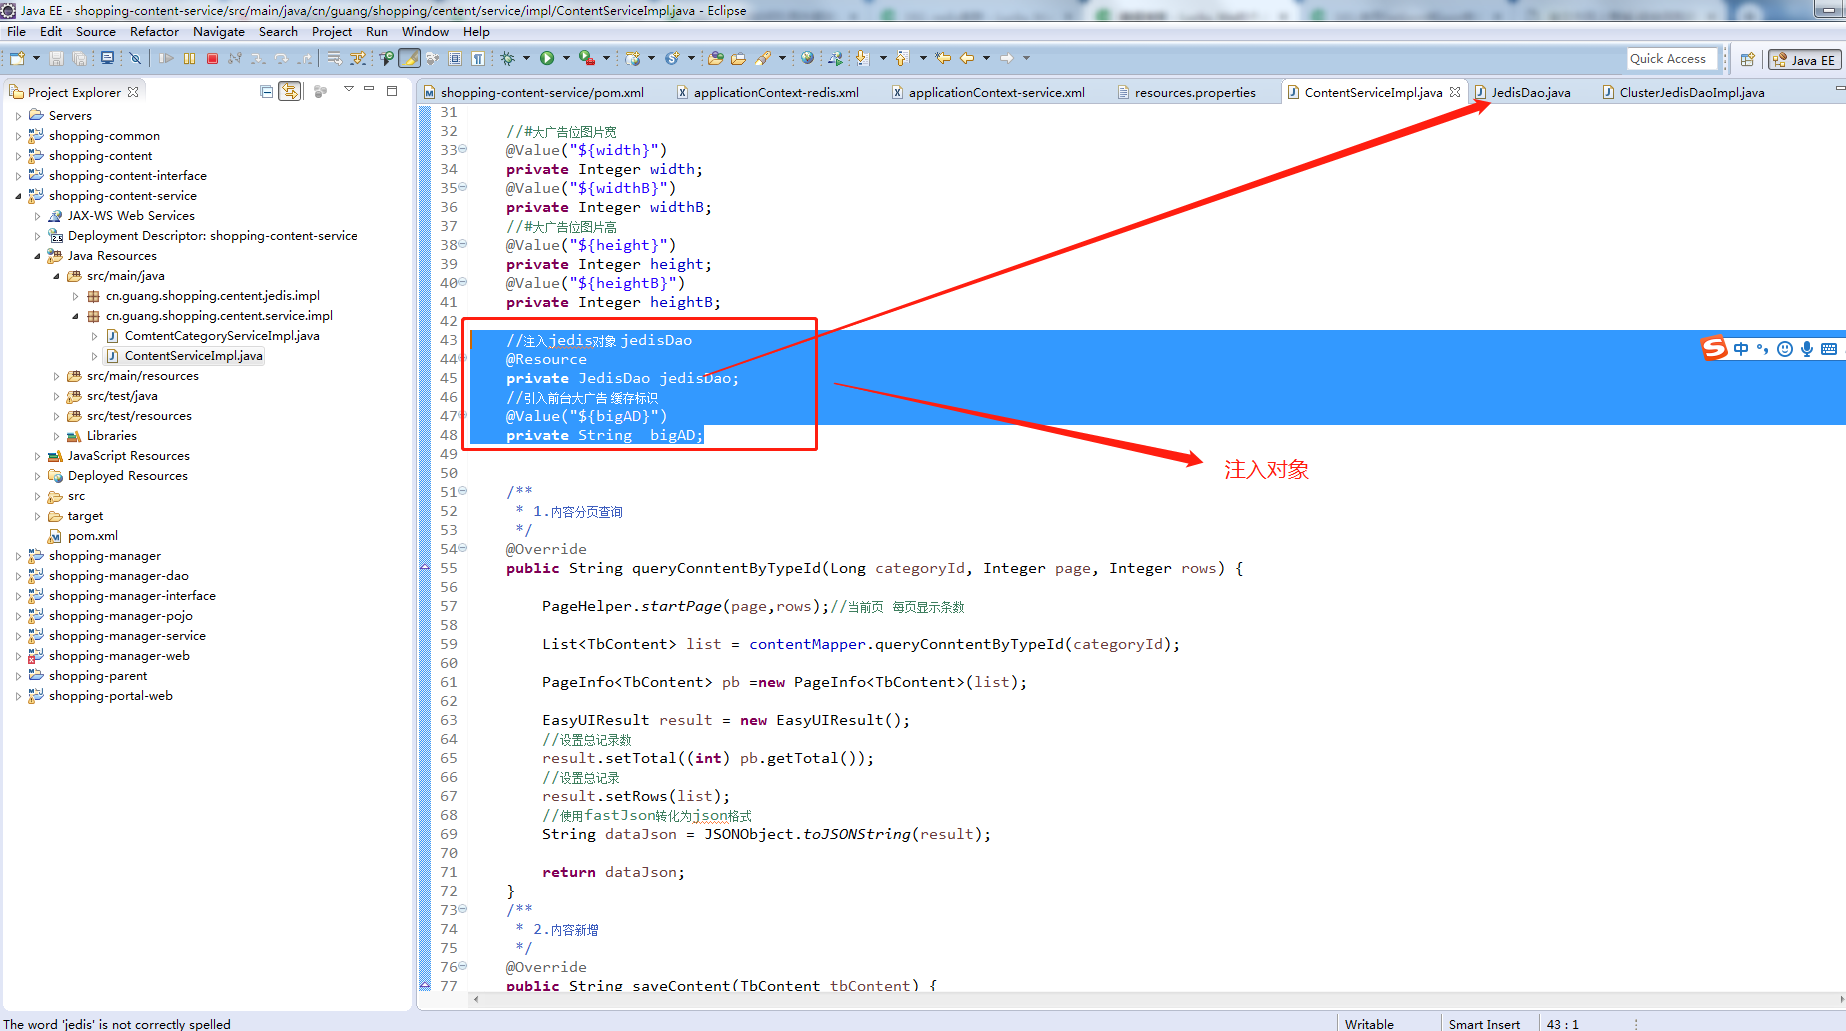
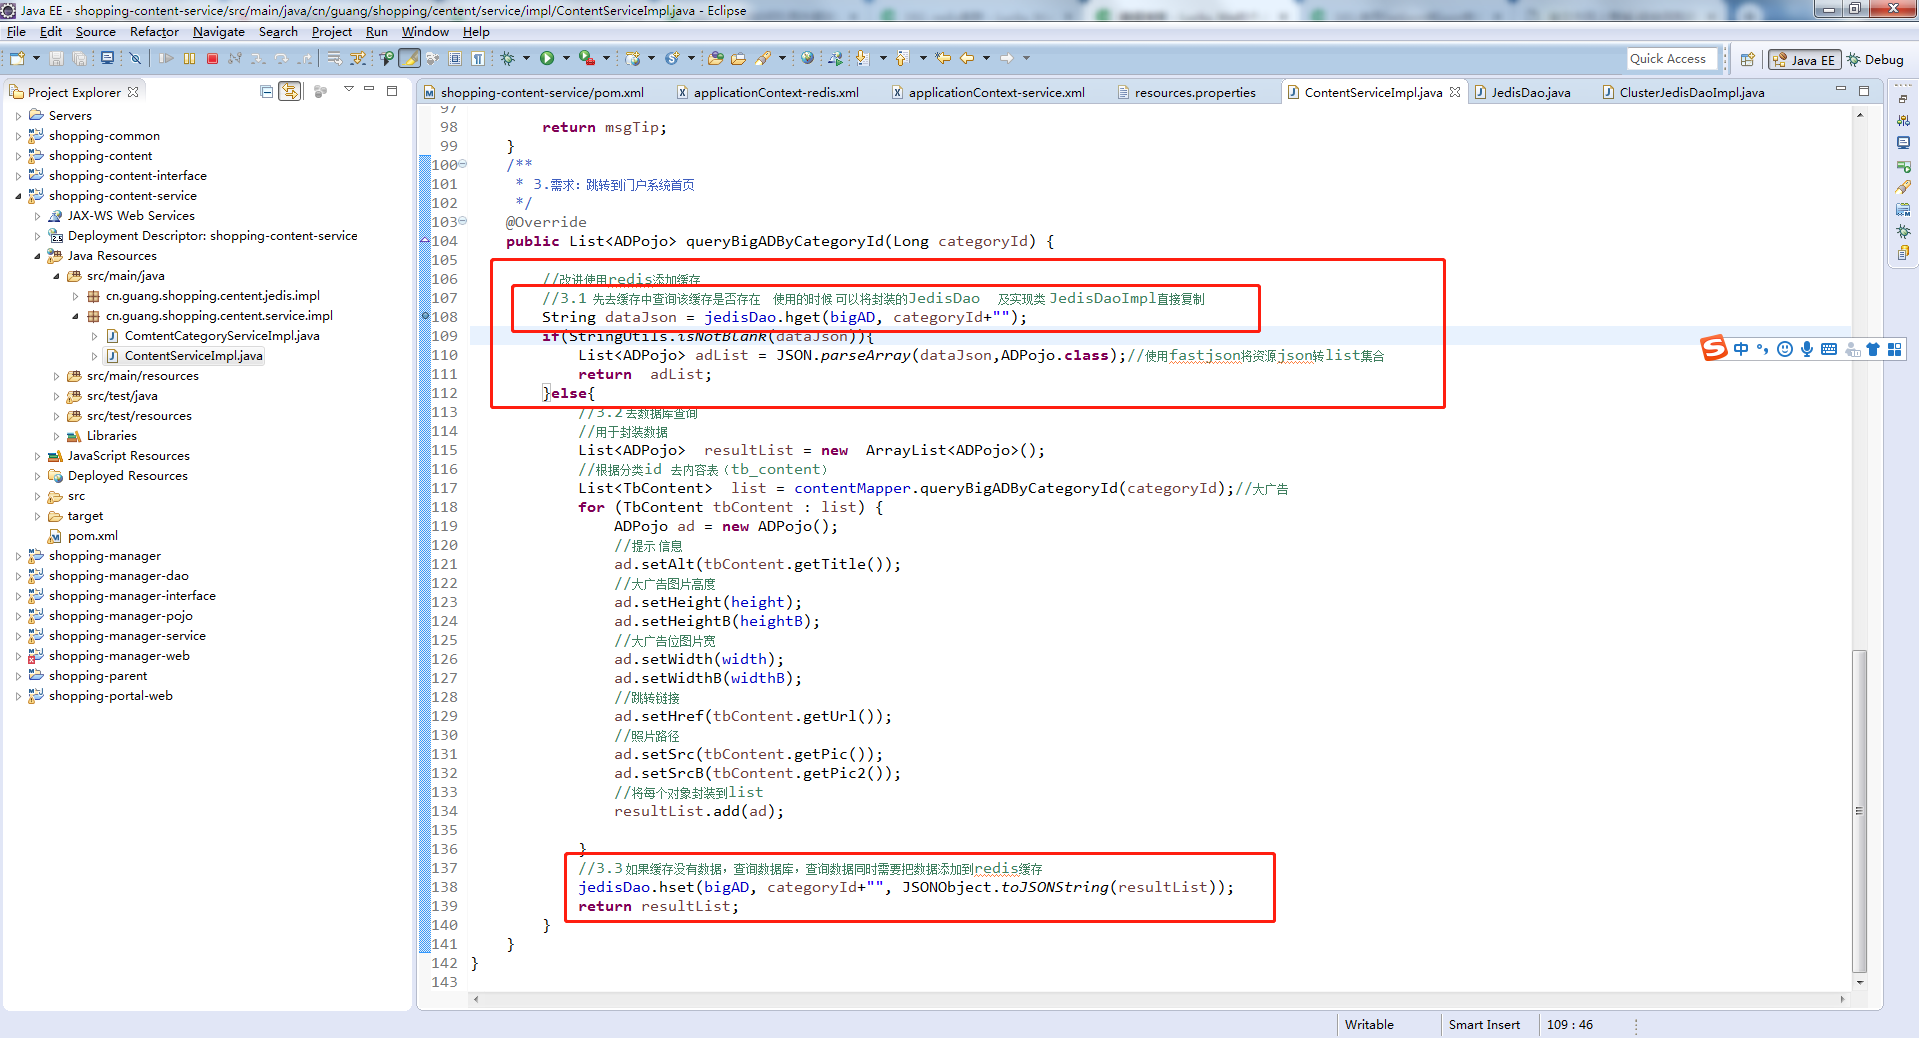
5.5 添加redis缓存
/**
* 3.需求:跳转到门户系统首页
*/
@Override
public List
//改进使用redis添加缓存
//3.1 先去缓存中查询该缓存是否存在 使用的时候 可以将封装的JedisDao 及实现类 JedisDaoImpl直接复制
String dataJson = jedisDao.hget(bigAD, categoryId+"");
if(StringUtils.isNotBlank(dataJson)){
List
return adList;
}else{
//3.2 去数据库查询
//用于封装数据
List
//根据分类id 去内容表(tb_content)
List
for (TbContent tbContent : list) {
ADPojo ad = new ADPojo();
//提示 信息
ad.setAlt(tbContent.getTitle());
//大广告图片高度
ad.setHeight(height);
ad.setHeightB(heightB);
//大广告位图片宽
ad.setWidth(width);
ad.setWidthB(widthB);
//跳转链接
ad.setHref(tbContent.getUrl());
//照片路径
ad.setSrc(tbContent.getPic());
ad.setSrcB(tbContent.getPic2());
//将每个对象封装到list
resultList.add(ad);
}
//3.3 如果缓存没有数据,查询数据库,查询数据同时需要把数据添加到redis缓存
jedisDao.hset(bigAD, categoryId+"", JSONObject.toJSONString(resultList));
return resultList;
}
}
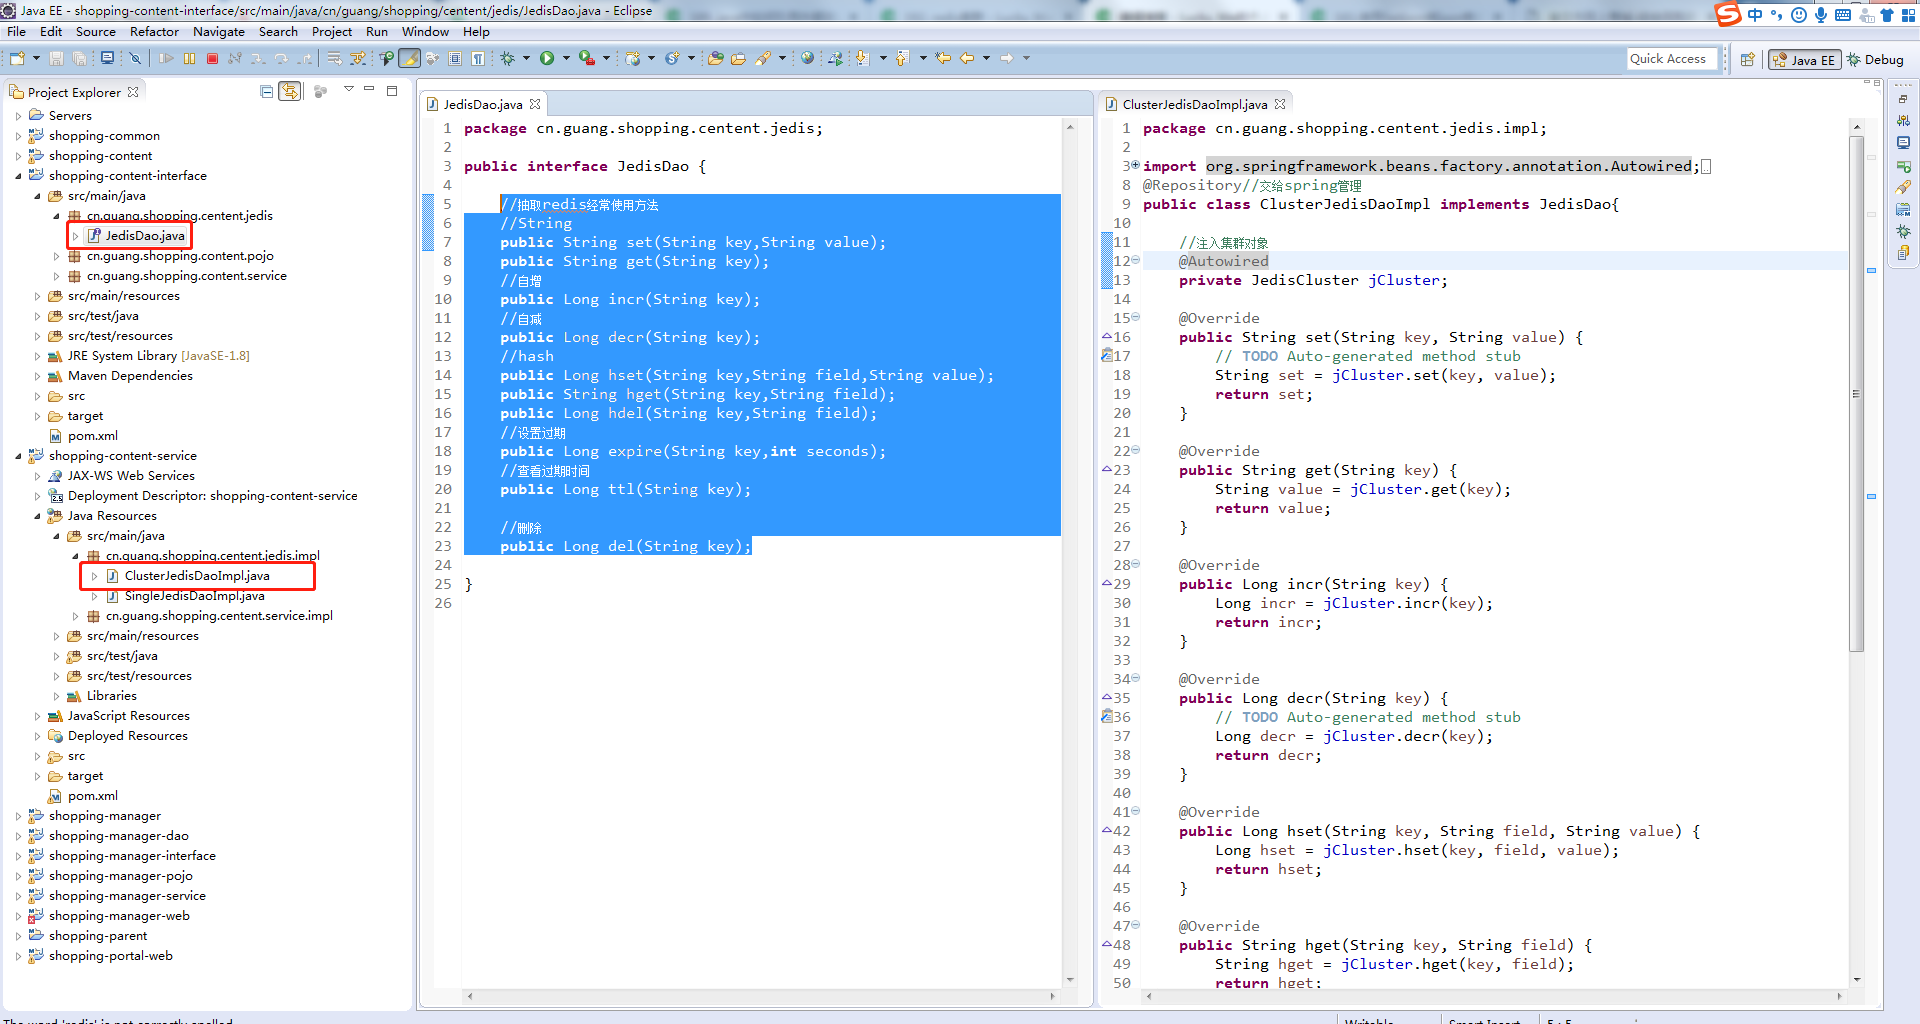
5.6 抽取的接口及实现类
package cn.guang.shopping.centent.jedis;
public interface JedisDao {
//抽取redis经常使用方法
//String
public String set(String key,String value);
public String get(String key);
//自增
public Long incr(String key);
//自减
public Long decr(String key);
//hash
public Long hset(String key,String field,String value);
public String hget(String key,String field);
public Long hdel(String key,String field);
//设置过期
public Long expire(String key,int seconds);
//查看过期时间
public Long ttl(String key);
//删除
public Long del(String key);
}
package cn.guang.shopping.centent.jedis.impl;
import org.springframework.beans.factory.annotation.Autowired;
import org.springframework.stereotype.Repository;
import cn.guang.shopping.centent.jedis.JedisDao;
import redis.clients.jedis.JedisCluster;
@Repository//交给spring管理
public class ClusterJedisDaoImpl implements JedisDao{
//注入集群对象
@Autowired
private JedisCluster jCluster;
@Override
public String set(String key, String value) {
// TODO Auto-generated method stub
String set = jCluster.set(key, value);
return set;
}
@Override
public String get(String key) {
String value = jCluster.get(key);
return value;
}
@Override
public Long incr(String key) {
Long incr = jCluster.incr(key);
return incr;
}
@Override
public Long decr(String key) {
// TODO Auto-generated method stub
Long decr = jCluster.decr(key);
return decr;
}
@Override
public Long hset(String key, String field, String value) {
Long hset = jCluster.hset(key, field, value);
return hset;
}
@Override
public String hget(String key, String field) {
String hget = jCluster.hget(key, field);
return hget;
}
@Override
public Long hdel(String key, String field) {
Long hdel = jCluster.hdel(key, field);
return hdel;
}
@Override
public Long expire(String key, int seconds) {
Long expire = jCluster.expire(key, seconds);
return expire;
}
@Override
public Long ttl(String key) {
Long ttl = jCluster.ttl(key);
return ttl;
}
@Override
public Long del(String key) {
Long del = jCluster.del(key);
return del;
}
}
6. redis5 集群搭建
6.1 常规操作
(1) 上传redis5 软件
(2)配置redis环境 执行: yum install gcc-c++
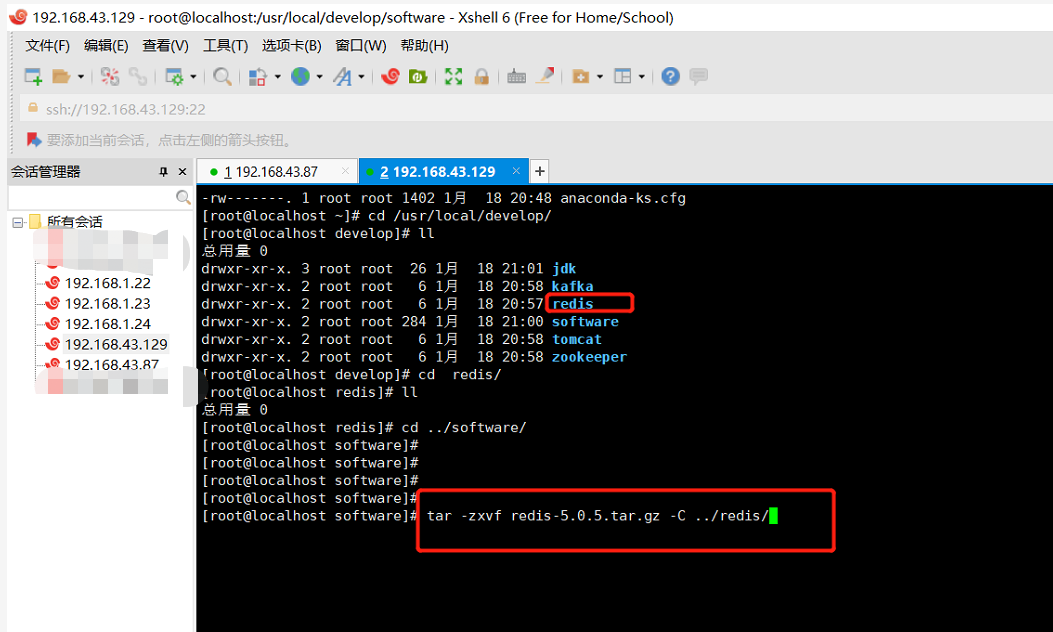
6.2 解压文件到自己习惯的位置
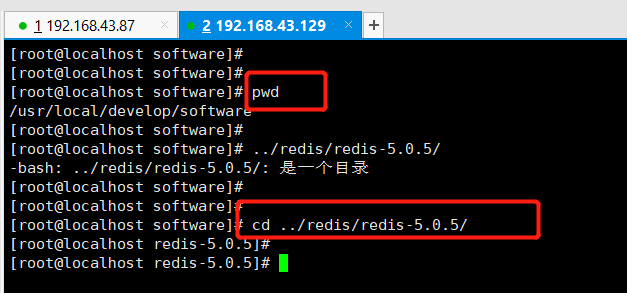
6.3 进入解压后的目录进行 编译
特别注意:解压的位置
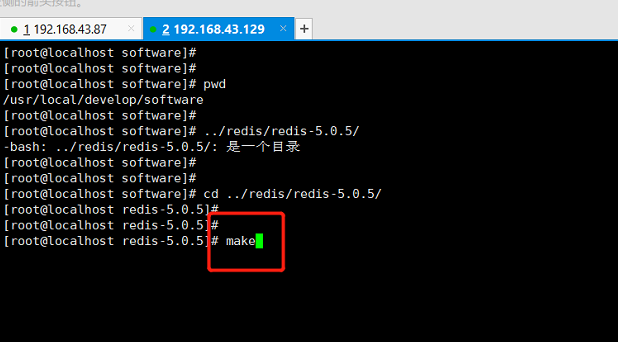
(1) make
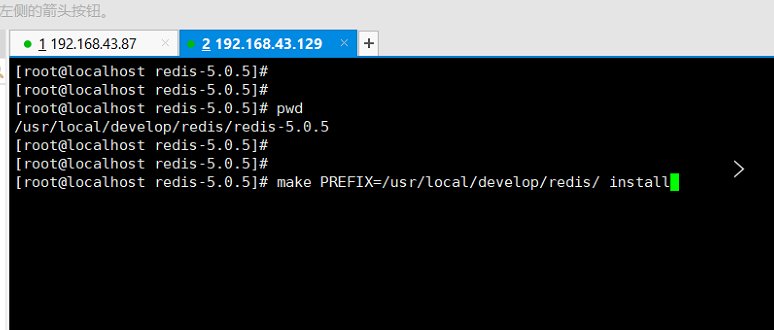
(2) make PREFIX=/usr/local/develop/redis/ install
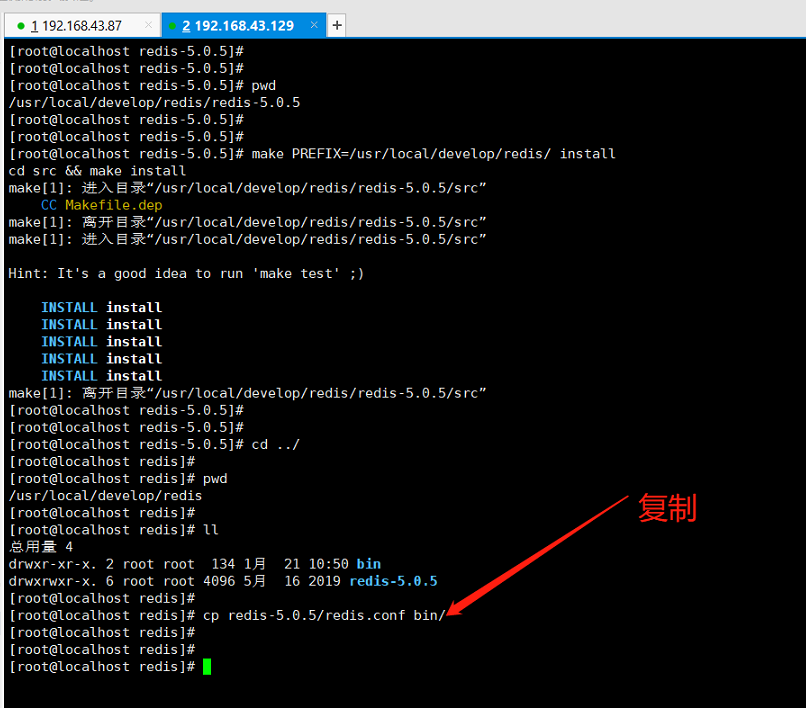
6.4 将redis.conf复制到bin文件夹下 并修改其中内容
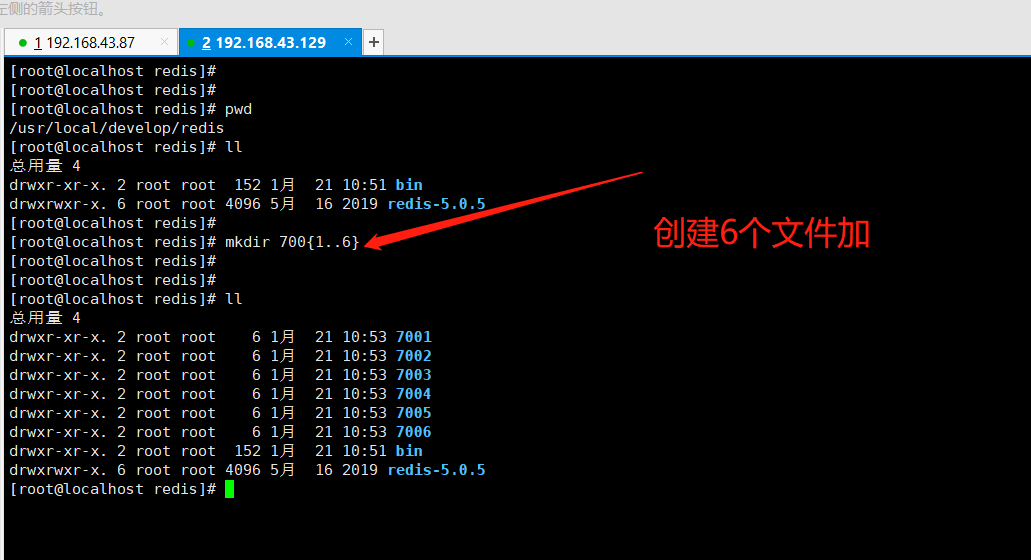
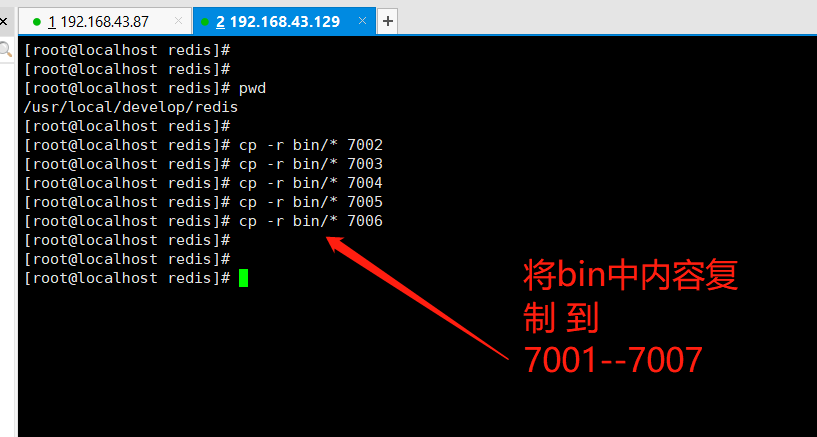
创建6个节点:将bin下的内容复制到对应的节点下
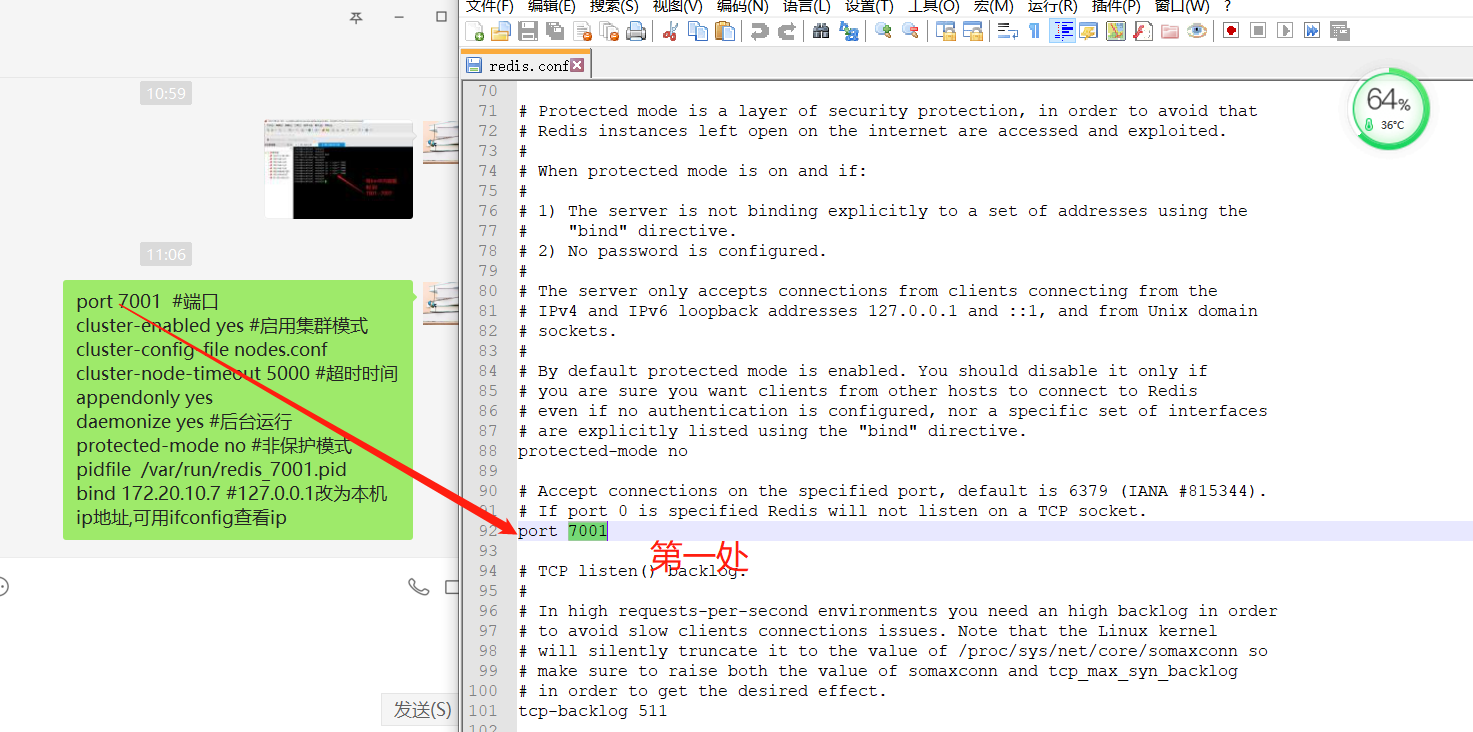
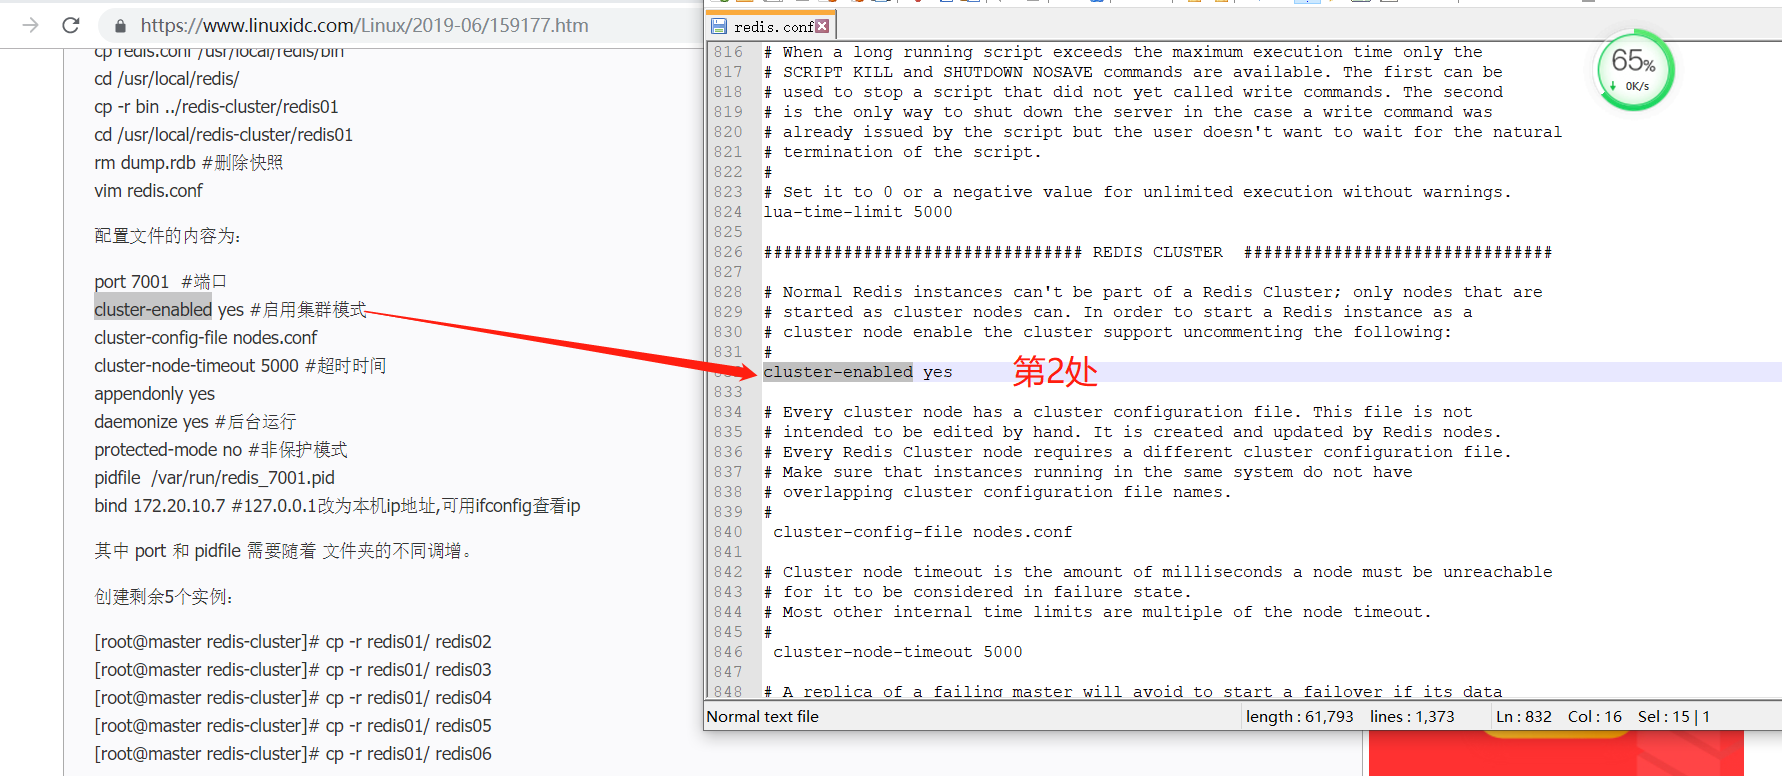
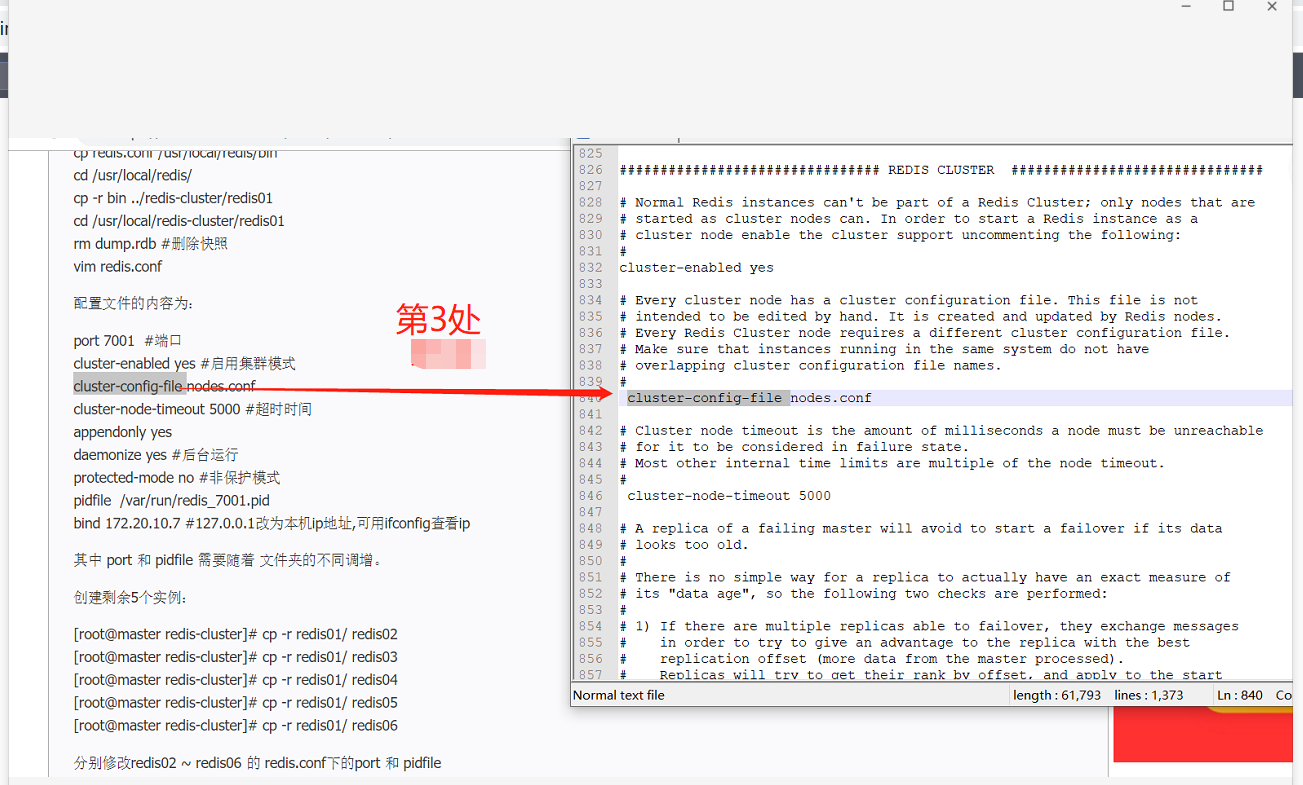
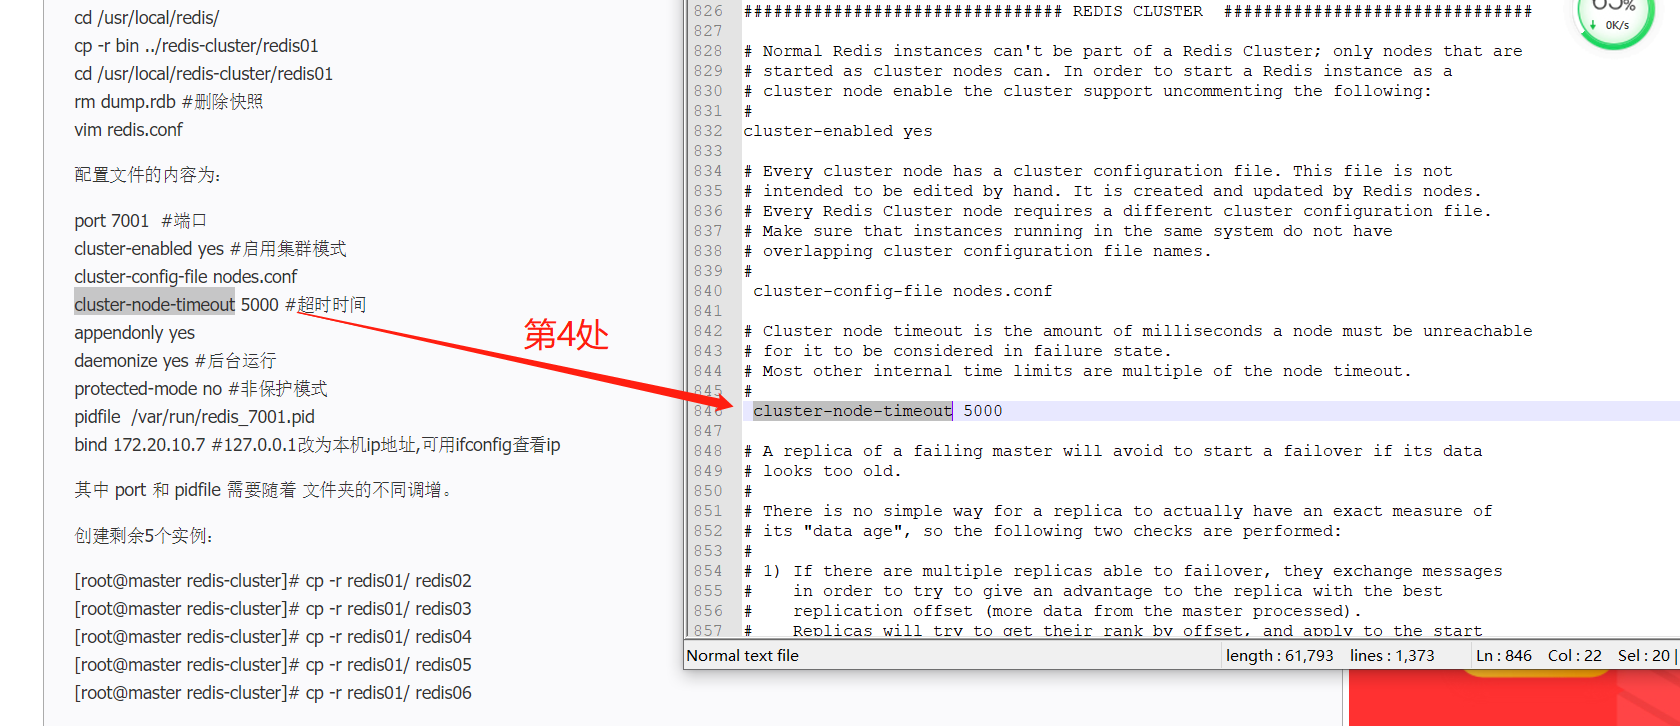
修改内容:9处
port 7001 #端口
cluster-enabled yes #启用集群模式
cluster-config-file nodes.conf
cluster-node-timeout 5000 #超时时间
appendonly yes
daemonize yes #后台运行
protected-mode no #非保护模式
pidfile /var/run/redis_7001.pid
bind 172.20.10.7 #127.0.0.1改为本机ip地址,可用ifconfig查看ip
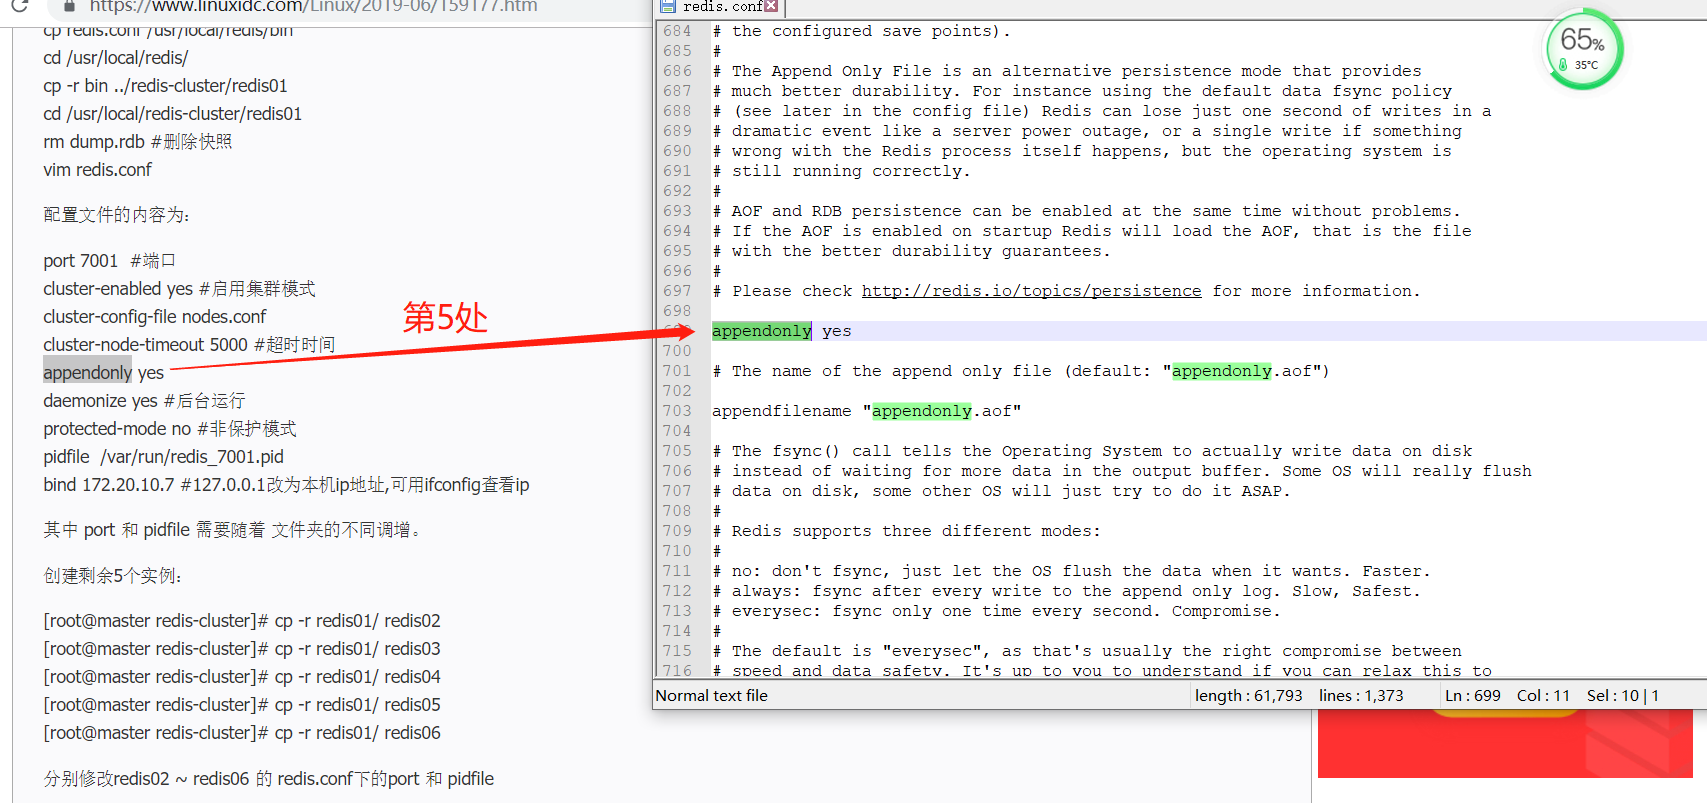
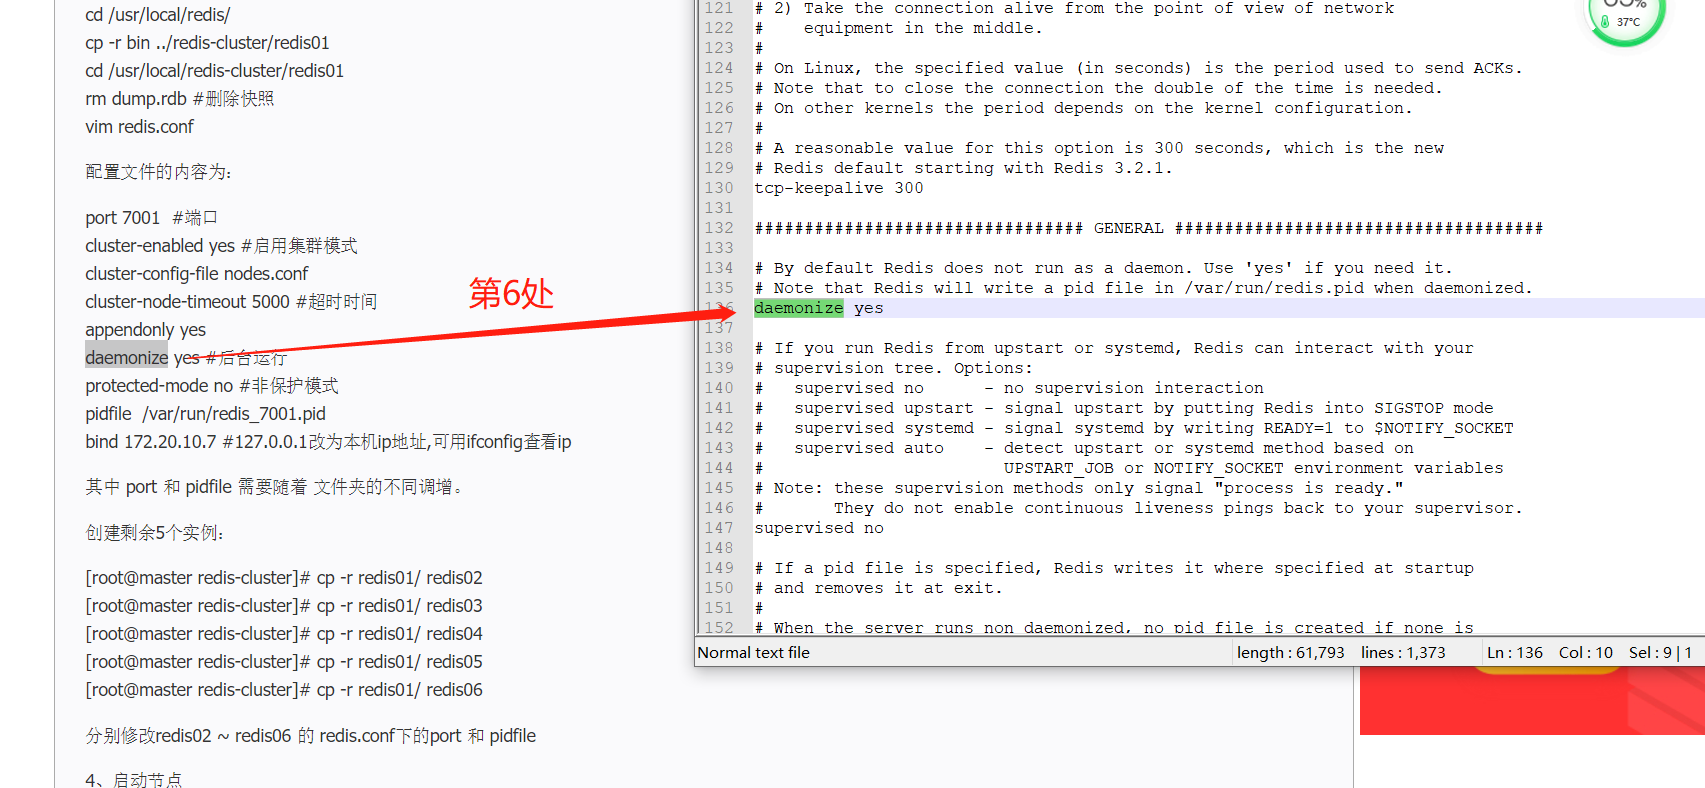
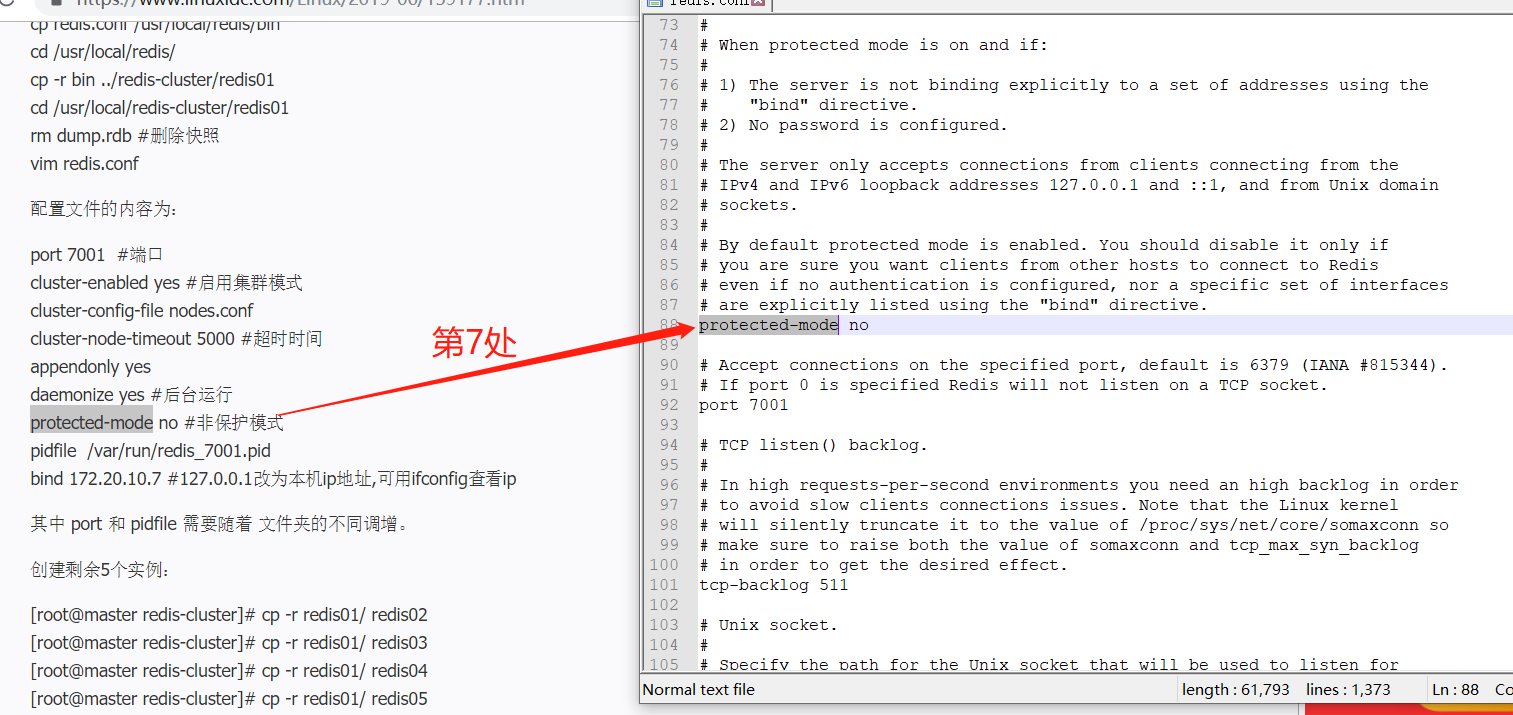
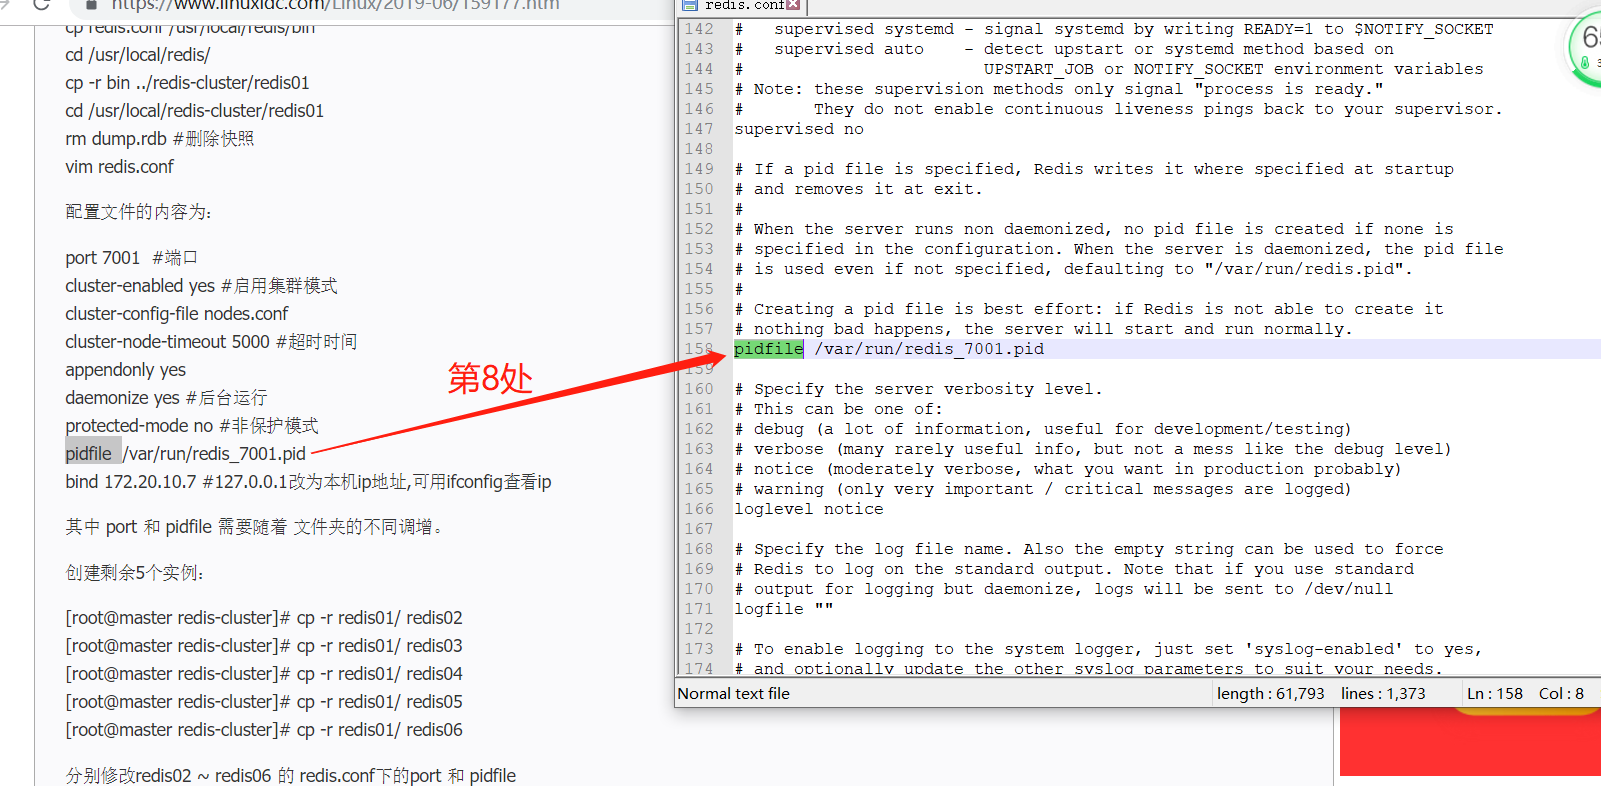
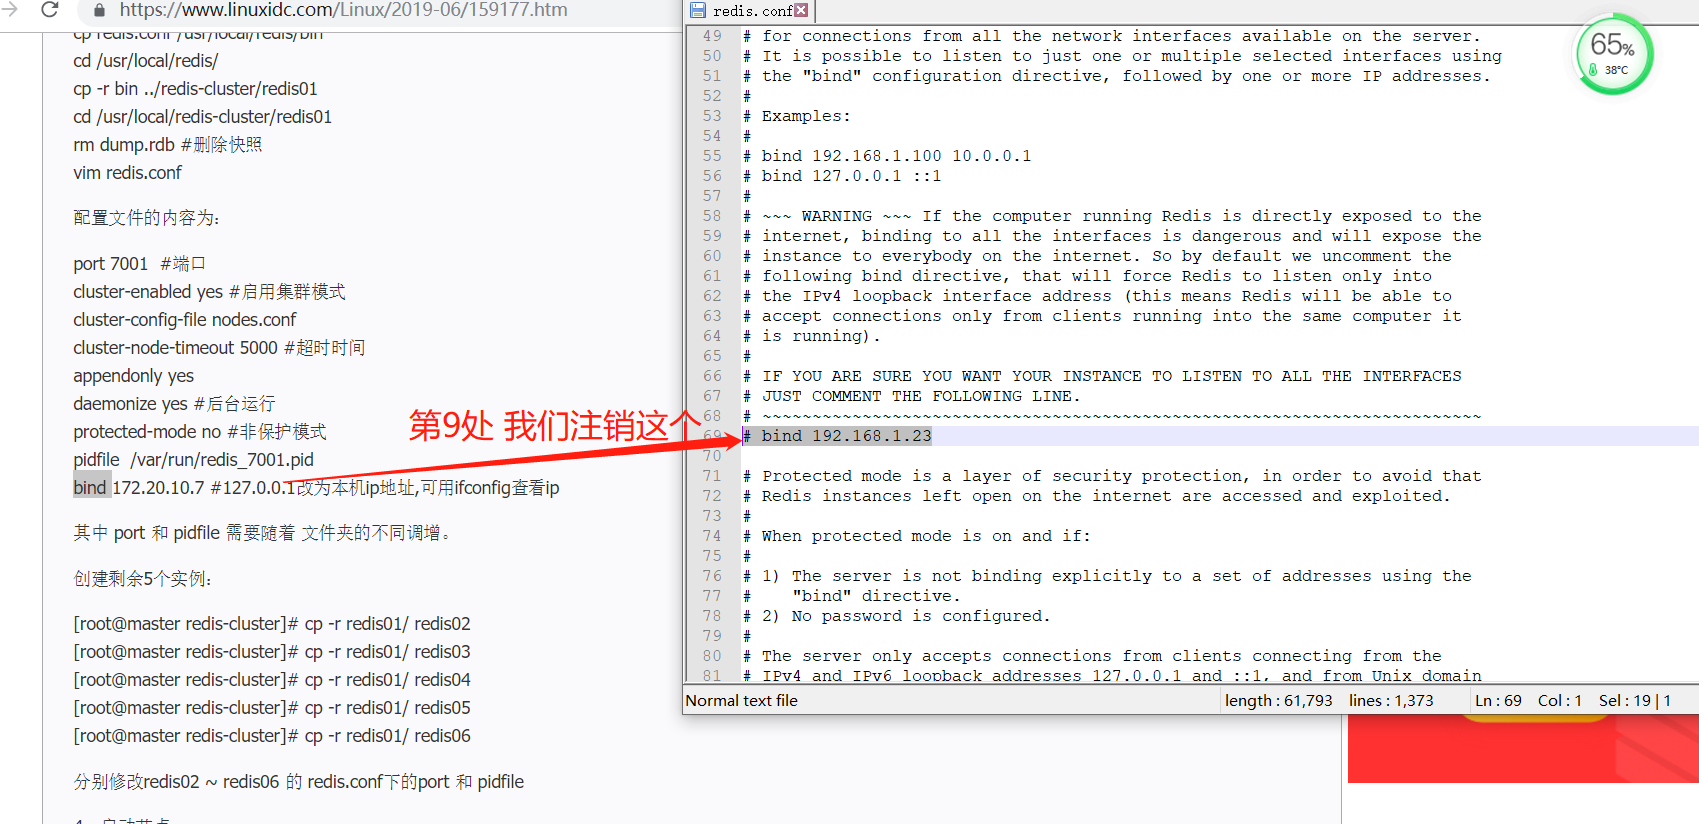
6.4 修改 redis.conf文件后将 每个节点的的都替换
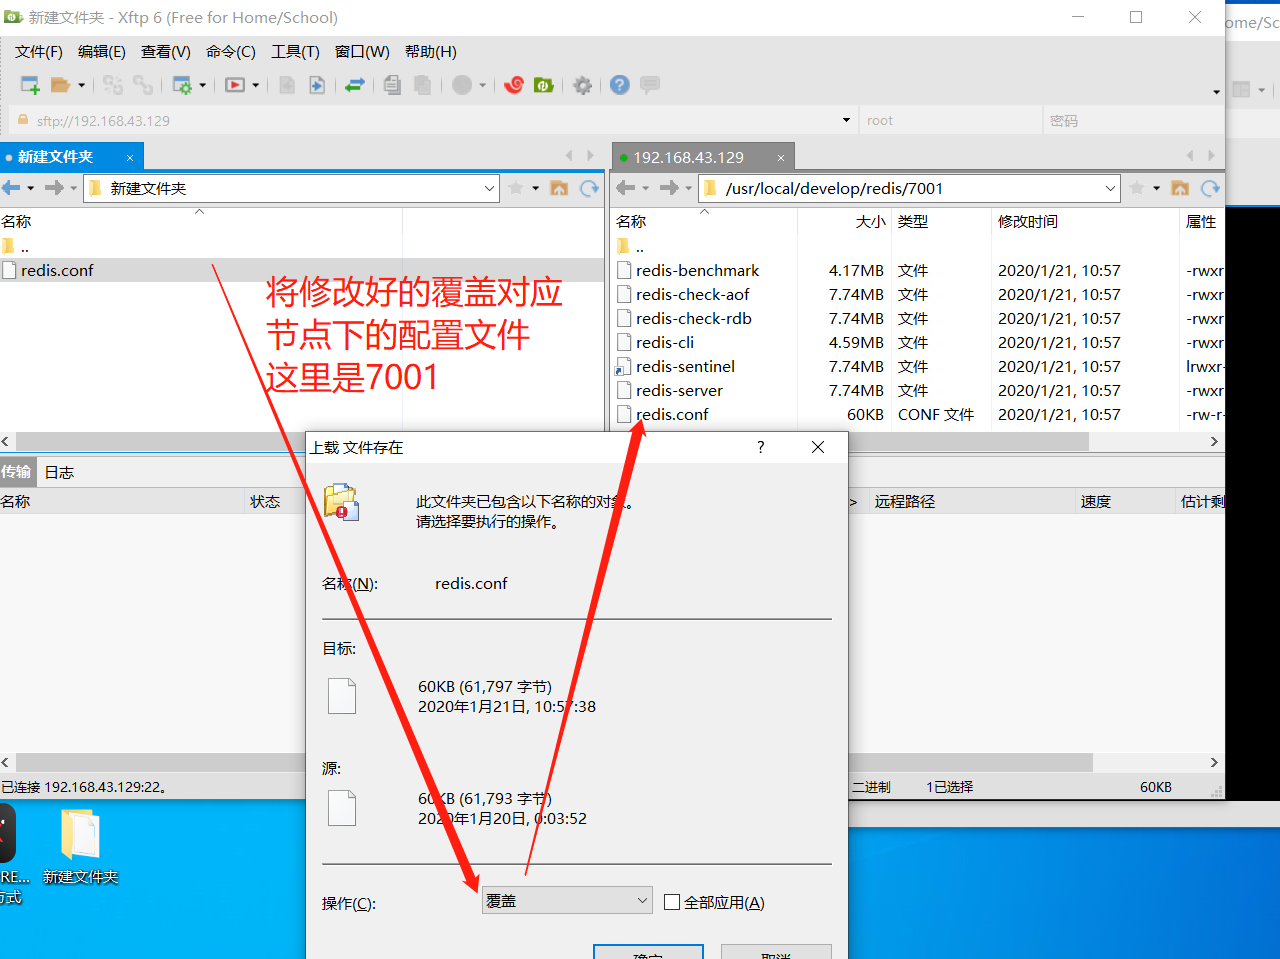
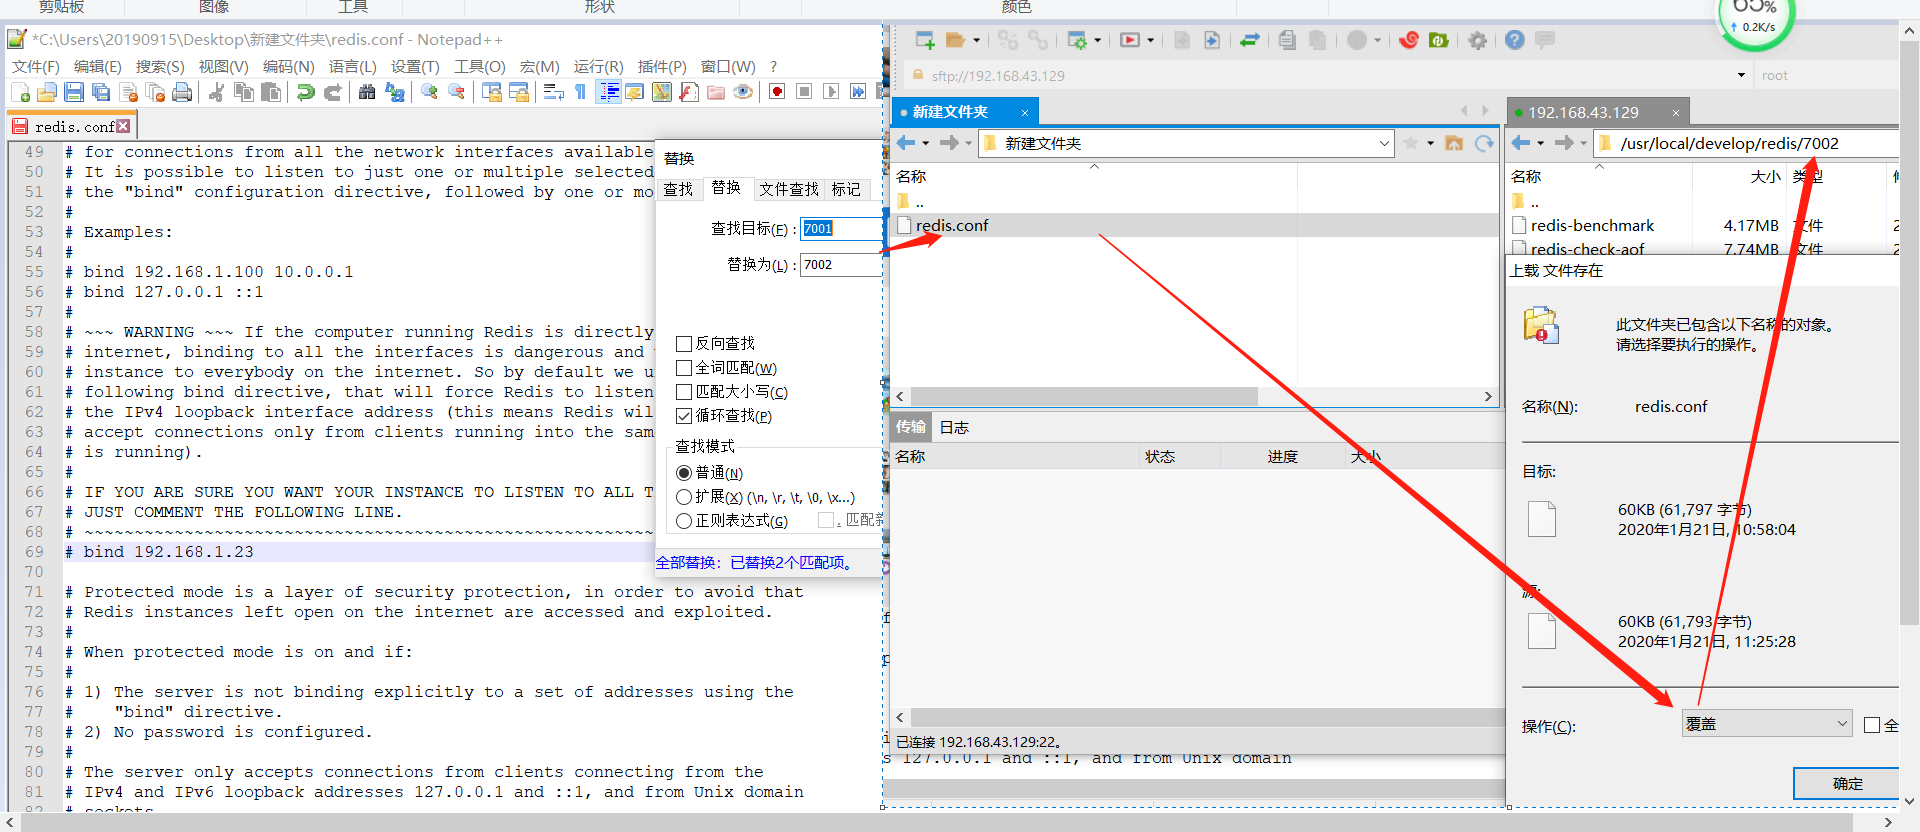
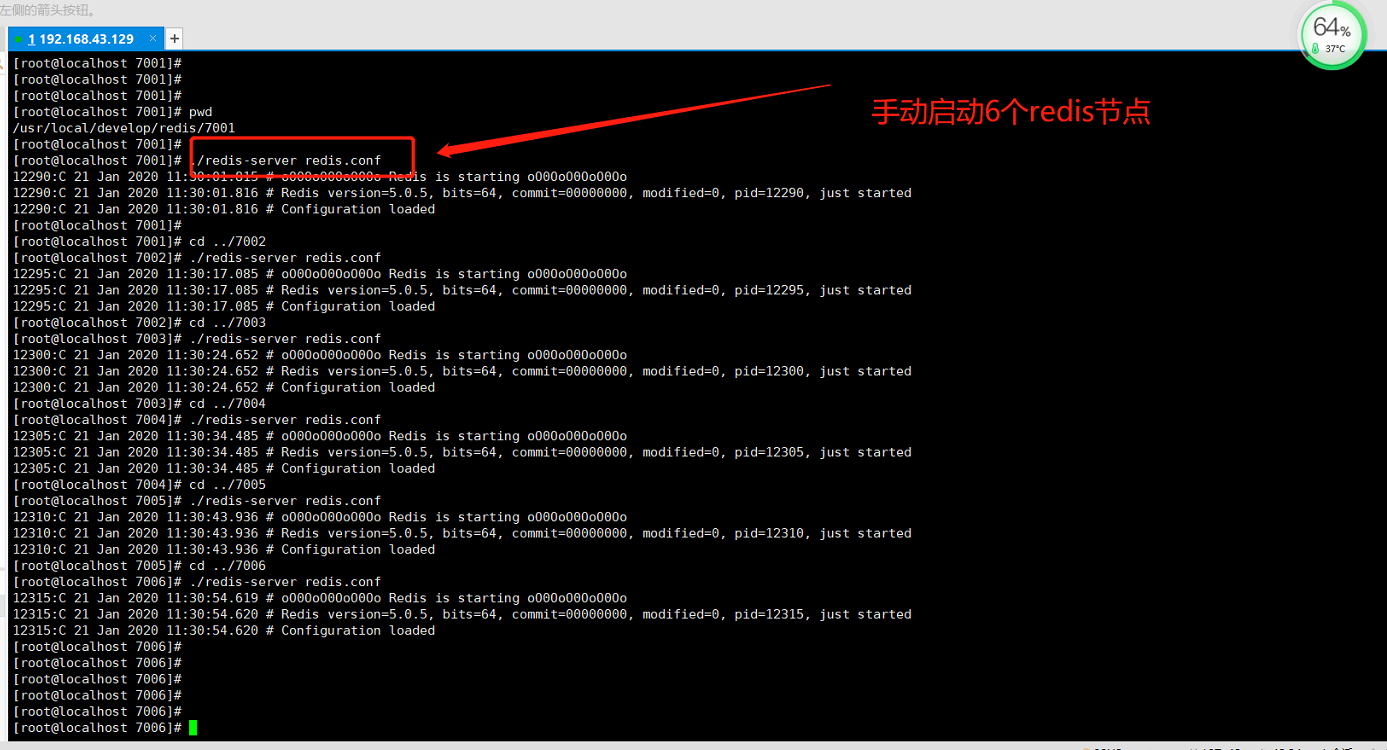
6.5 启动节点 完成集群
启动每个节点
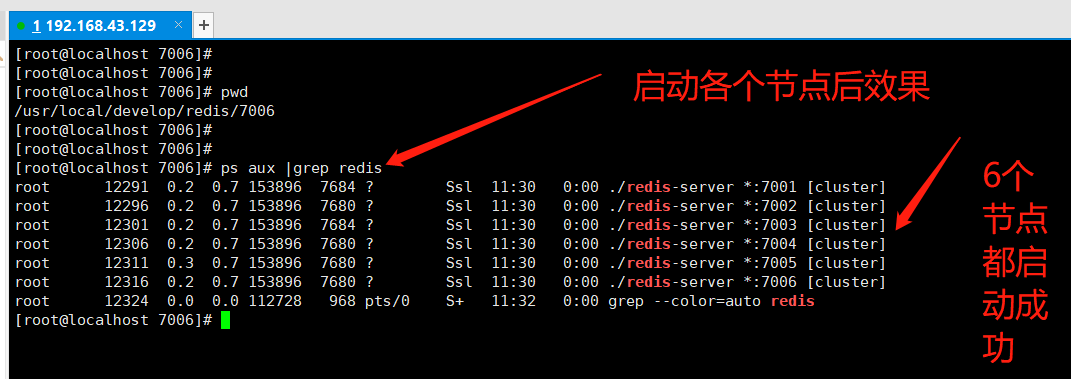
完成节点集群
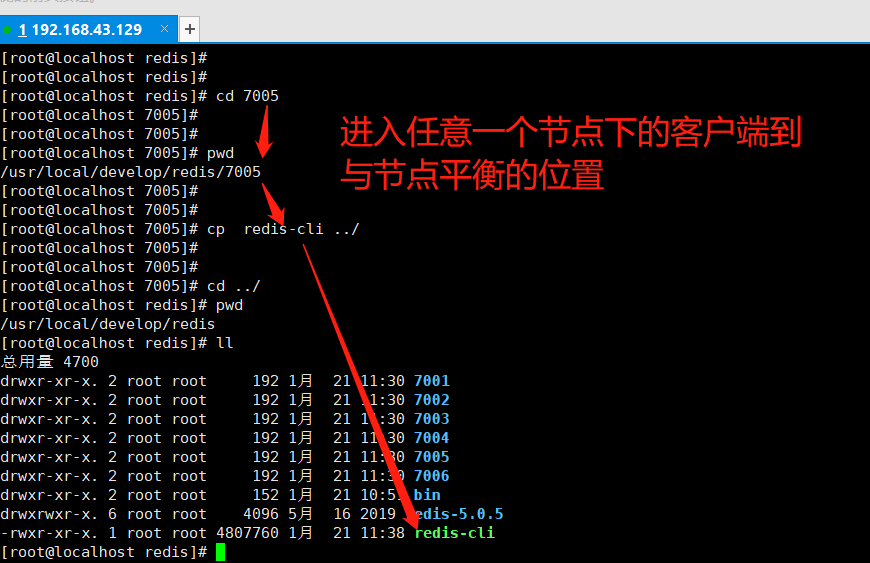
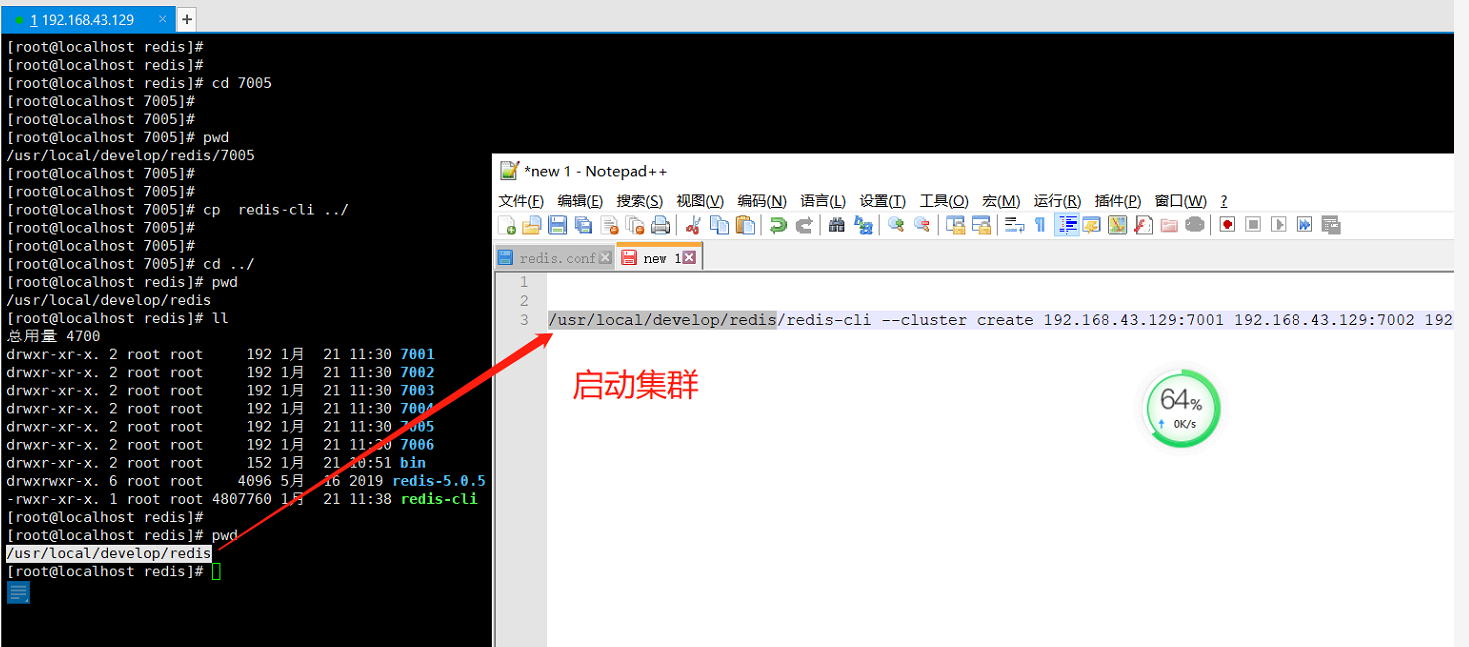
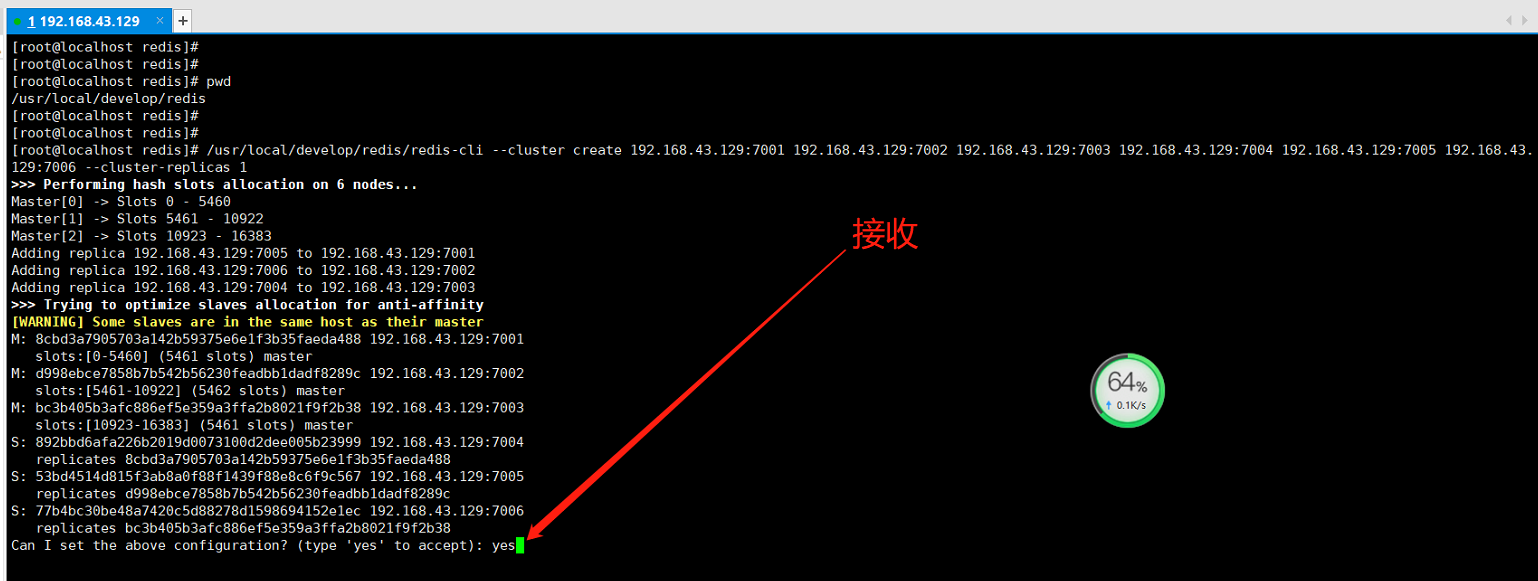
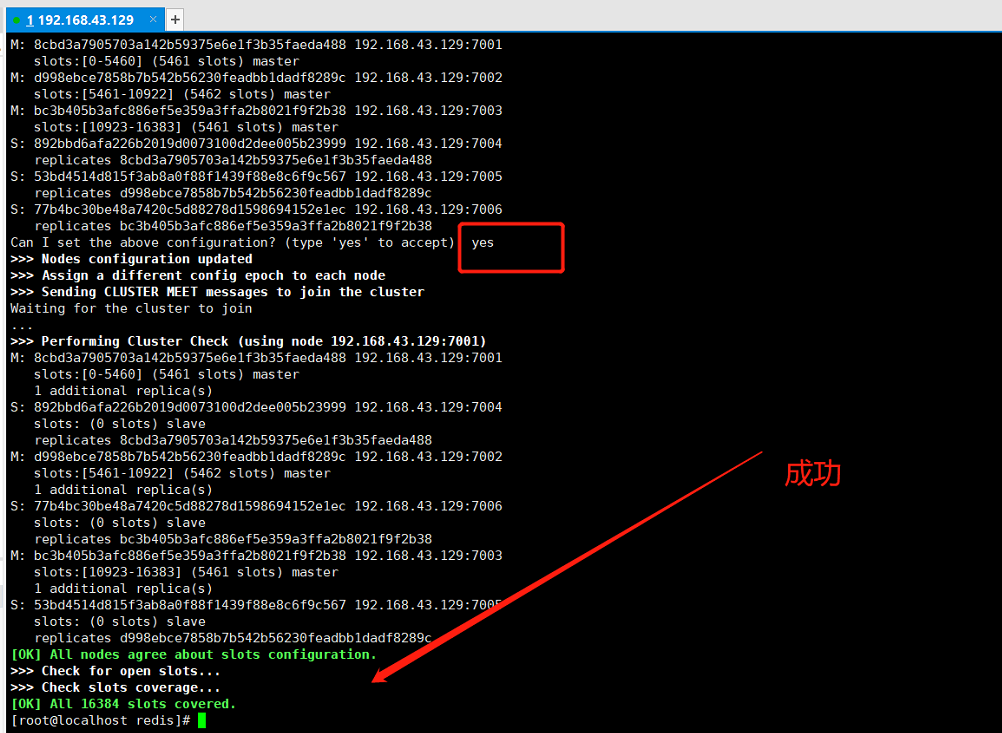
/usr/local/develop/redis/redis-cli --cluster create 192.168.43.129:7001 192.168.43.129:7002 192.168.43.129:7003 192.168.43.129:7004 192.168.43.129:7005 192.168.43.129:7006 --cluster-replicas 1
效果:
6.6 客户端连接
客户端可以选择:redisPlus
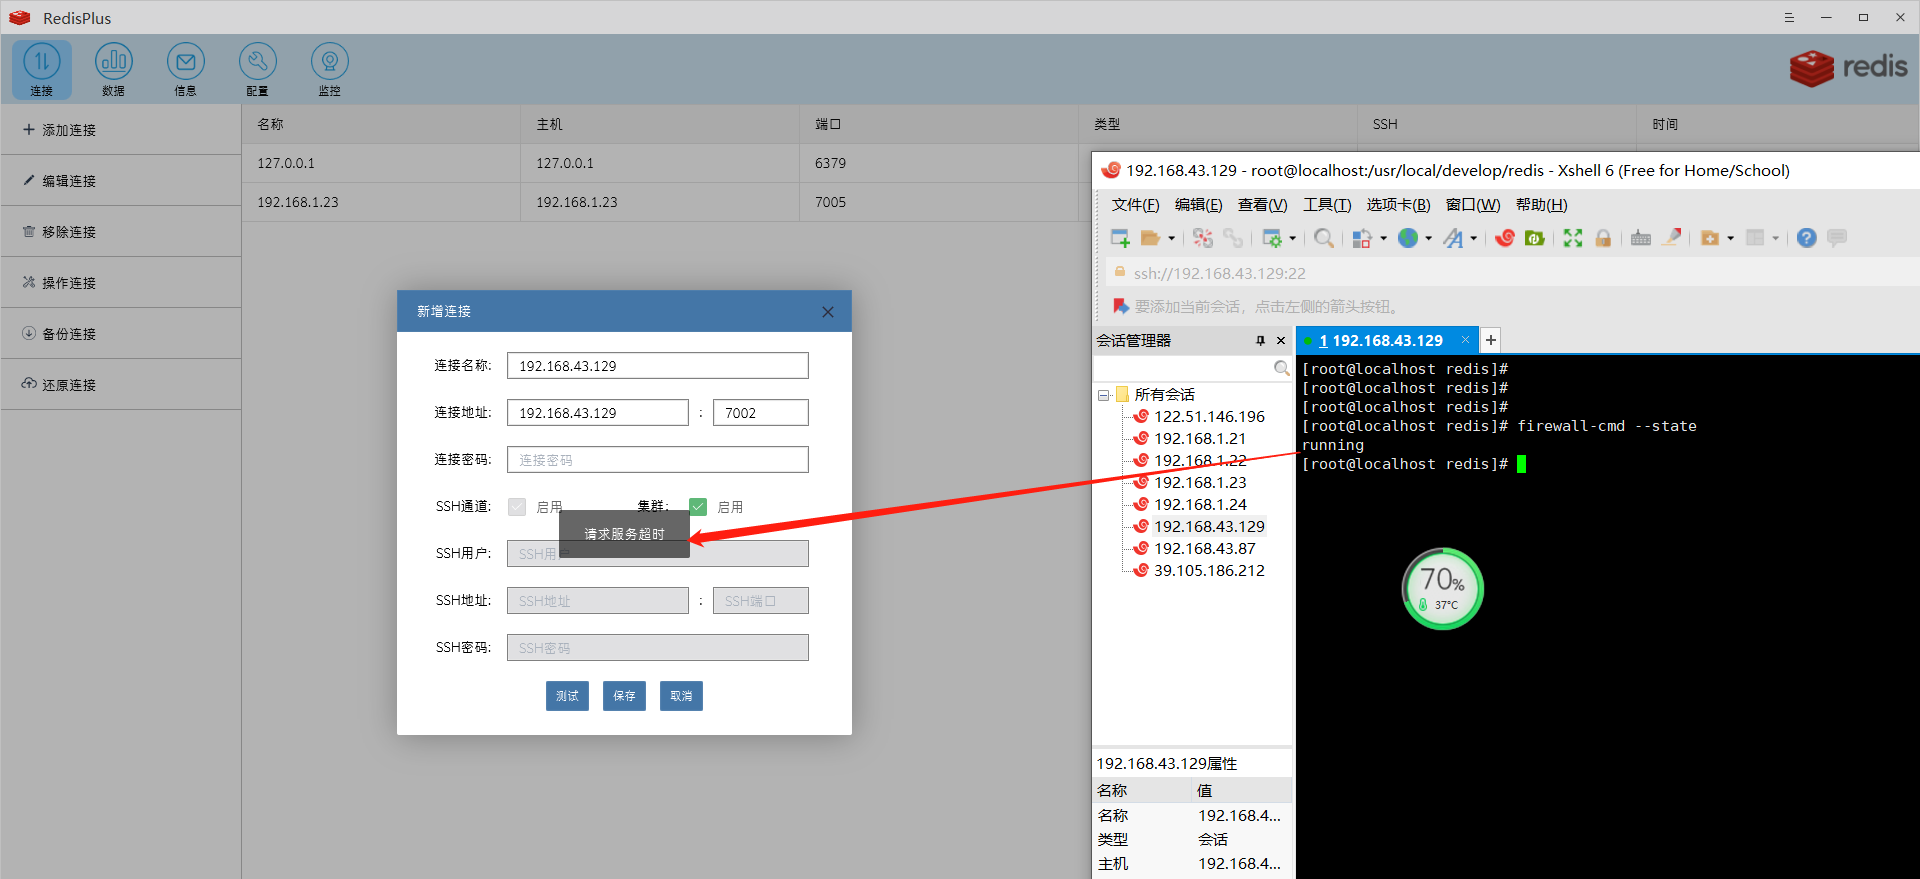
连接失败:原因 防火墙原因
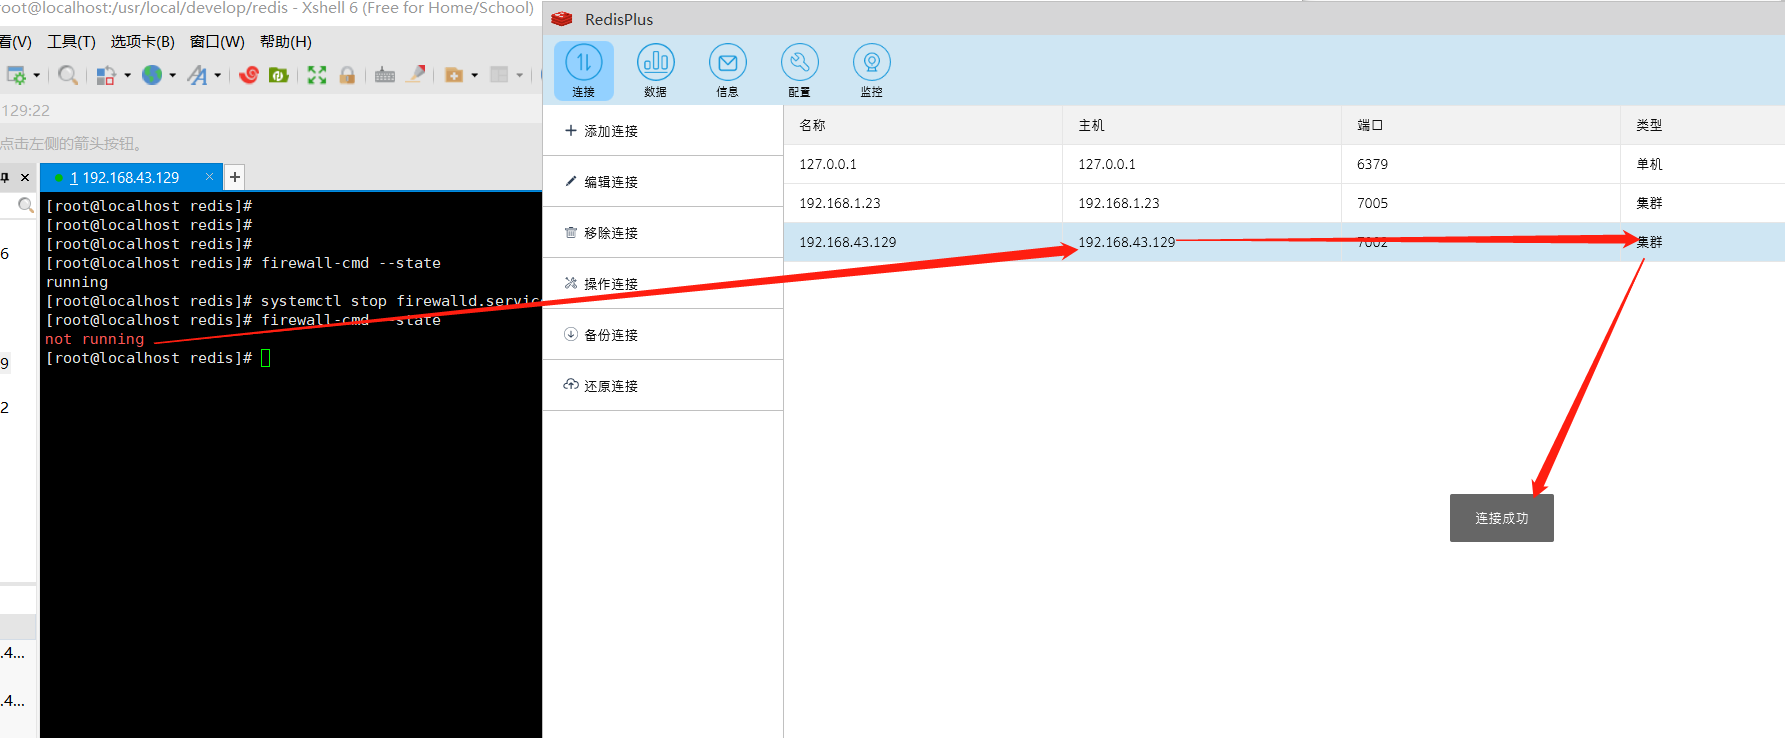
解决方案: 第1种:关闭防火墙 第二种 开通防火墙对应端口
关闭防火墙成功效果:
6.7 整合springboot
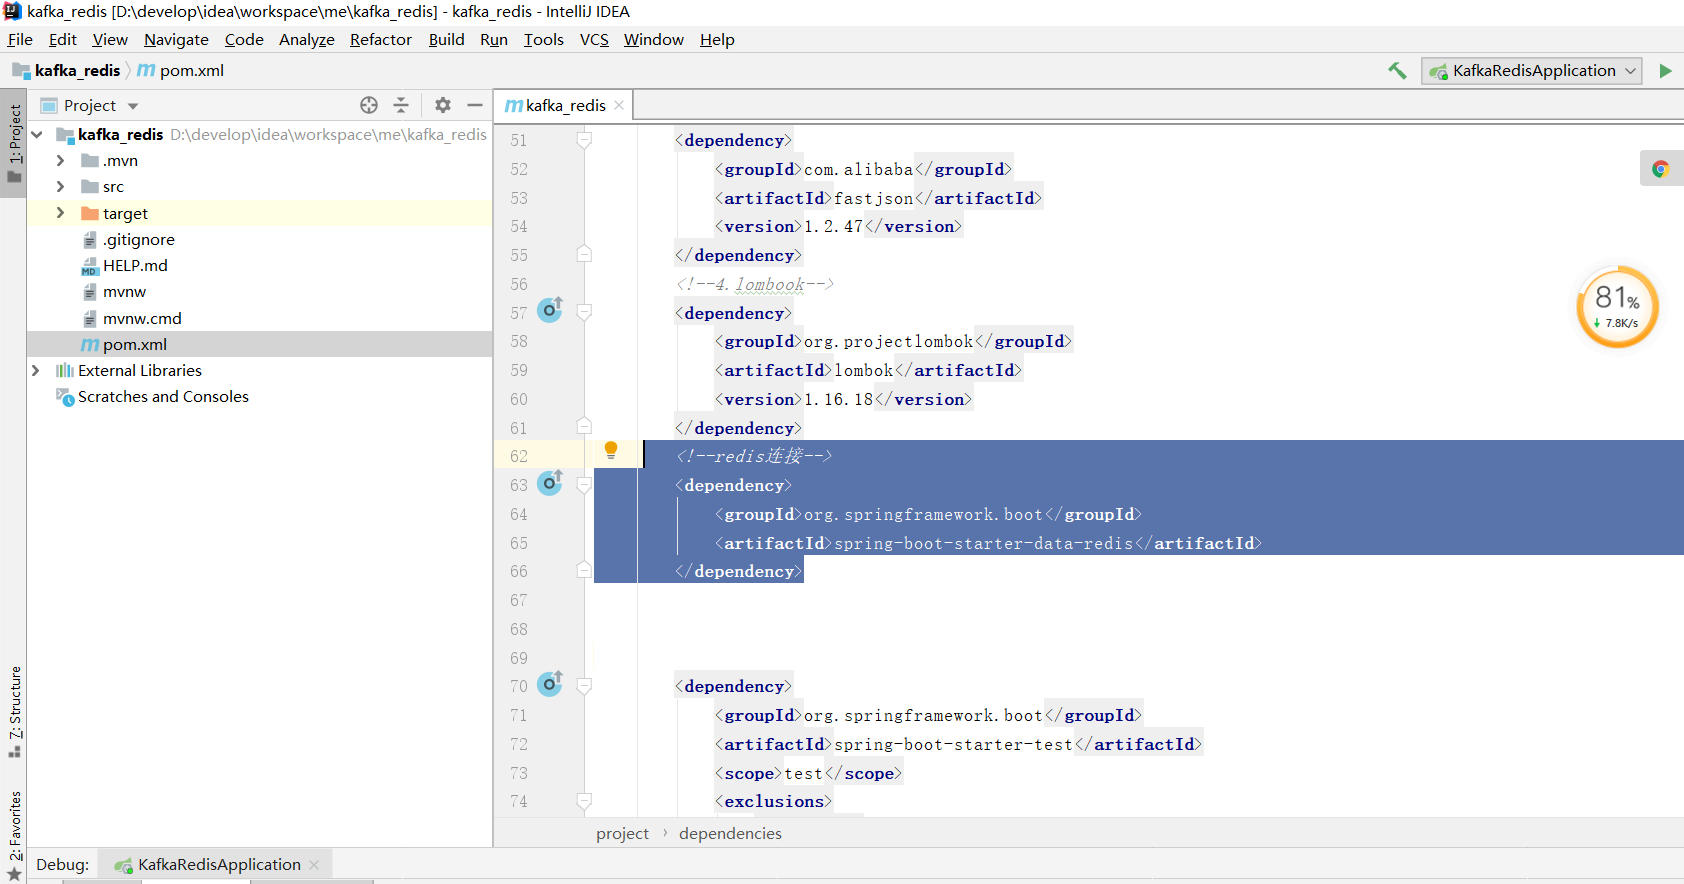
6.7.1 导入jar
<**dependency**> <**groupId**>org.springframework.boot</**groupId**> <**artifactId**>spring-boot-starter-data-redis</**artifactId**> </**dependency**>
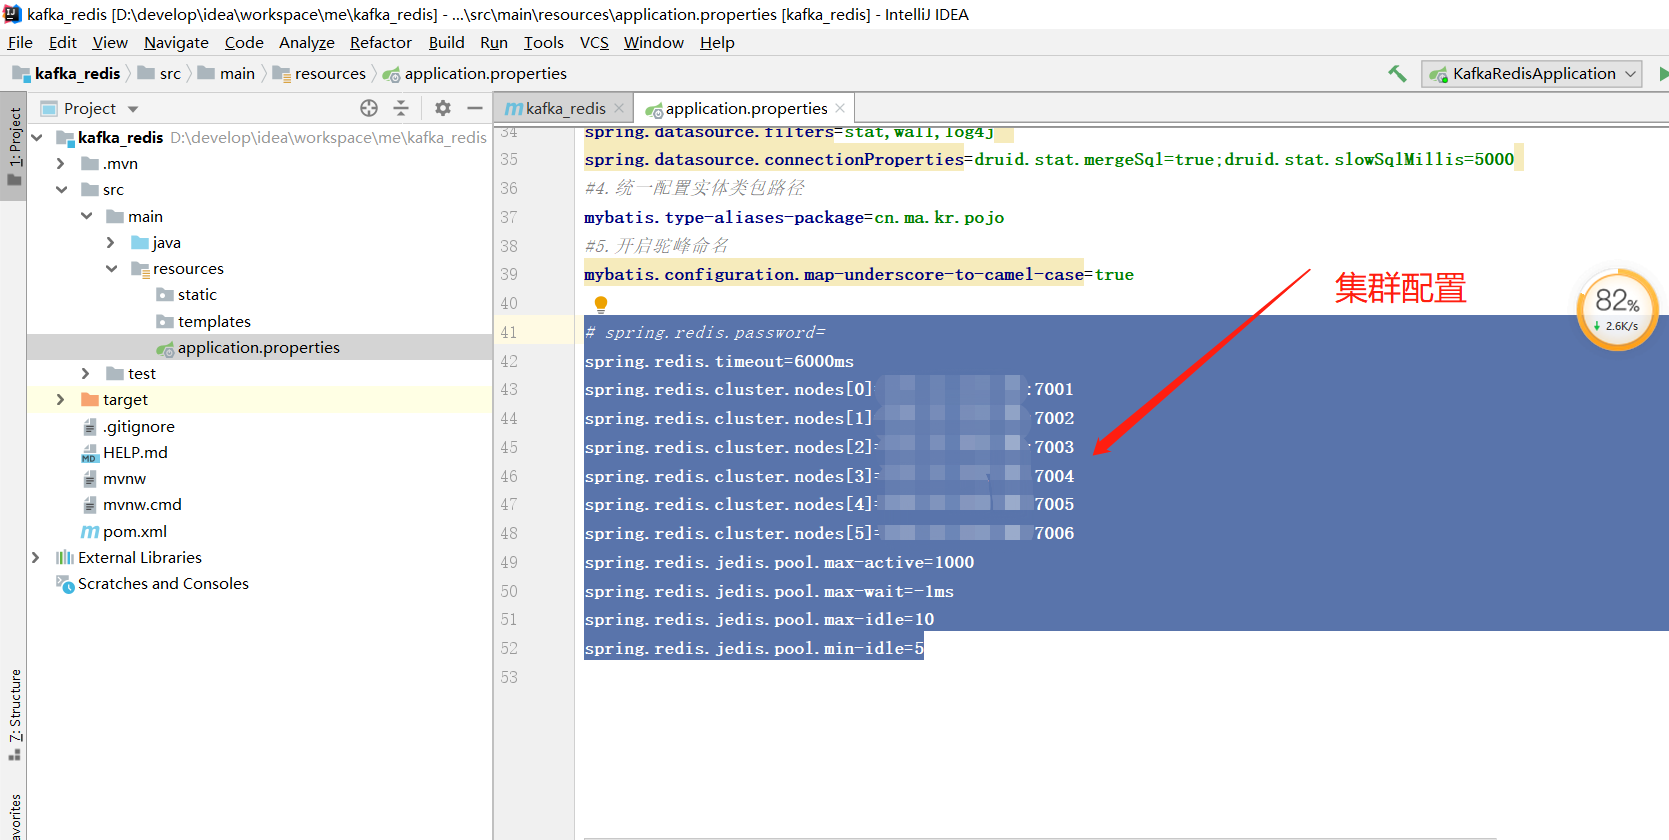
6.7.2 配置文件
# spring.redis.password=
spring.redis.timeout=6000ms
spring.redis.cluster.nodes[0]=localhost:7001
spring.redis.cluster.nodes[1]=localhost:7002
spring.redis.cluster.nodes[2]=localhost:7003
spring.redis.cluster.nodes[3]=localhost:7004
spring.redis.cluster.nodes[4]=localhost:7005
spring.redis.cluster.nodes[5]=localhost:7006
spring.redis.jedis.pool.max-active=1000
spring.redis.jedis.pool.max-wait=-1ms
spring.redis.jedis.pool.max-idle=10
spring.redis.jedis.pool.min-idle=5
6.7.3 工具类
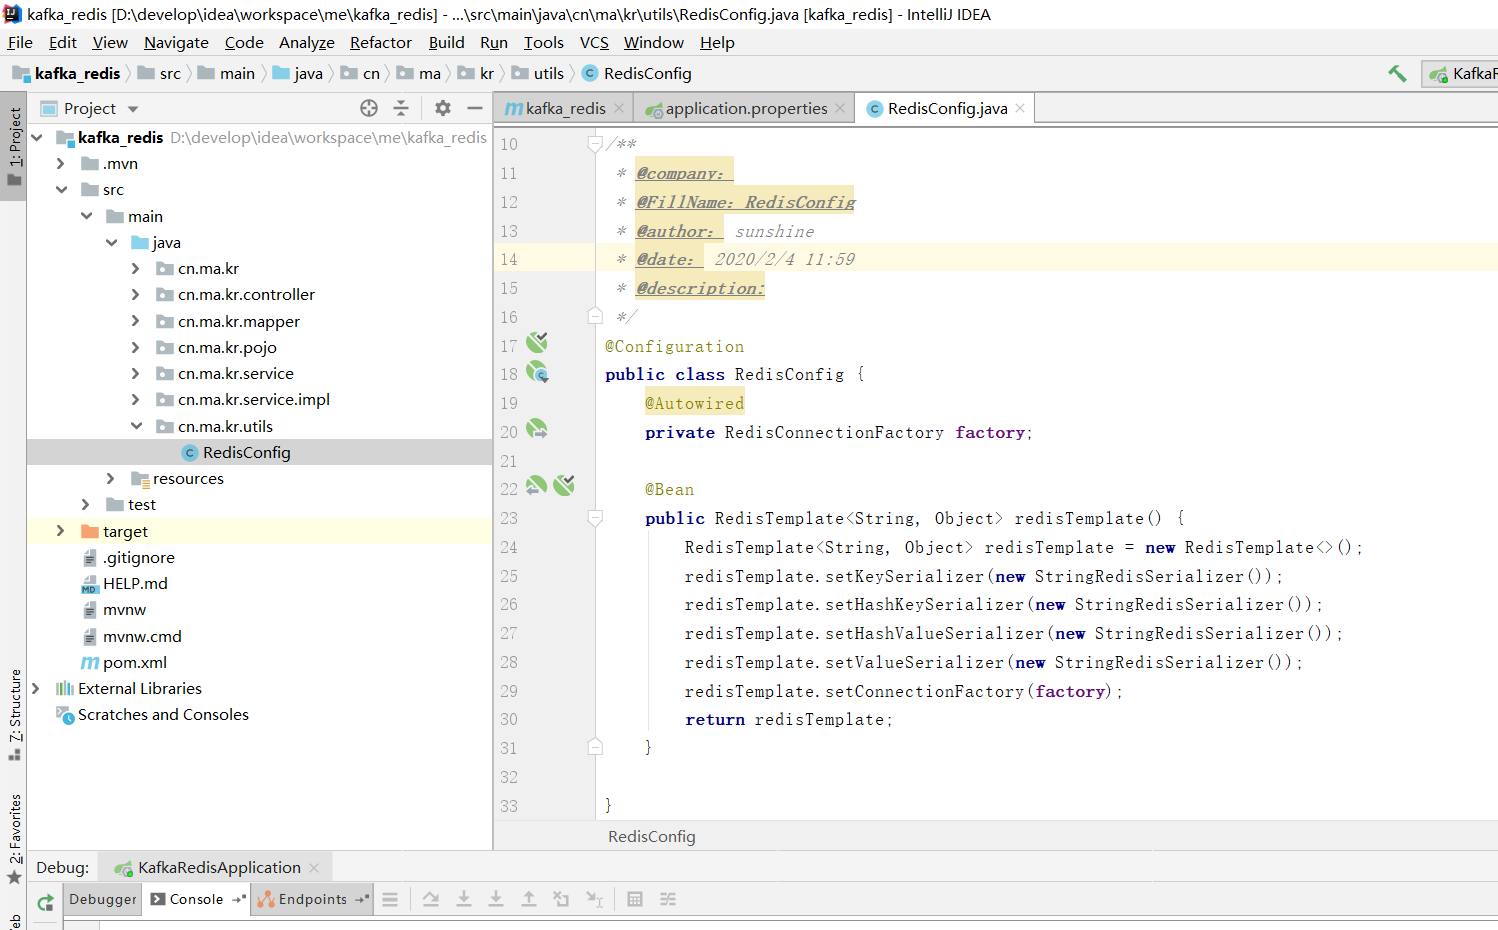
package cn.ma.kr.utils;
import org.springframework.beans.factory.annotation.Autowired; import org.springframework.context.annotation.Bean; import org.springframework.context.annotation.Configuration; import org.springframework.data.redis.connection.RedisConnectionFactory; import org.springframework.data.redis.core.RedisTemplate; import org.springframework.data.redis.serializer.StringRedisSerializer;
_/** _ * _@company: _ * _@FillName:RedisConfig _ * @author: _sunshine _ * @date: _2020/2/4 11:59 _ * _@description: _ */ @Configuration public class RedisConfig { @Autowired private RedisConnectionFactory factory;
@Bean
public RedisTemplate<String, Object> redisTemplate() { RedisTemplate<String, Object> redisTemplate = new RedisTemplate<>(); redisTemplate.setKeySerializer(new StringRedisSerializer()); redisTemplate.setHashKeySerializer(new StringRedisSerializer()); redisTemplate.setHashValueSerializer(new StringRedisSerializer()); redisTemplate.setValueSerializer(new StringRedisSerializer()); redisTemplate.setConnectionFactory(factory); return redisTemplate; }
}
6.7.4 应用
参考: https://www.jianshu.com/p/19e851a3edba
package cn.ma.kr.controller;
import cn.ma.kr.pojo.User; import cn.ma.kr.service.RedisKafkaService; import org.springframework.beans.factory.annotation.Autowired; import org.springframework.data.redis.core.RedisTemplate; import org.springframework.stereotype.Controller; import org.springframework.web.bind.annotation.RequestMapping; import org.springframework.web.bind.annotation.ResponseBody;
import javax.annotation.Resource; import java.util.HashMap; import java.util.Map; import java.util.concurrent.TimeUnit;
_/** _ * @company: _马氏集团 _ * _@FillName:RedisKafkaController _ * @author: _sunshine _ * @date: _2020/2/3 18:35 _ * @description: _对redis集群操作API:https://www.jianshu.com/p/19e851a3edba _ */ @Controller public class RedisKafkaController { @Autowired private RedisTemplate<String, Object> redisTemplate;
_//1.设置string类型
_ @RequestMapping("/redisString") @ResponseBody public HashMap<Object, Object> redisString() { redisTemplate.opsForValue().set("stu", "zhangsan", 10L, TimeUnit.SECONDS); Object stu = redisTemplate.opsForValue().get("stu"); HashMap<Object, Object> map = new HashMap<>(); map.put("result", stu); return map;
}

_//设置 hash类型
_ @RequestMapping("/redisHash") @ResponseBody public Map<Object, Object> redisHash() { HashMap<Object, Object> map = new HashMap<>(); map.put("data", Math.random() + ""); redisTemplate.opsForHash().putAll("addHash", map); _//缓存失效方法 _ expire("addHash", 12); Map<Object, Object> hash = redisTemplate.opsForHash().entries("addHash"); return hash; }
_/\*\*
_ * 指定缓存失效时间 * * @param key _键 _ * @param time _时间(秒) _ * _@return _ _*/ _ public boolean expire(String key, long time) { try { if (time > 0) { redisTemplate.expire(key, time, TimeUnit.SECONDS); } return true; } catch (Exception e) { e.printStackTrace(); return false; } }
}
