1 Solr部署
1.1 环境准备:
系统环境:CentOS Linux release 7.2.1511 (Core)
软件环境: Hadoop环境已搭建,其中包括了java以及zookeeper
Java version "1.7.0_79"
Zookeeper 3.4.5-cdh5.2.0
Apache-tomcat-7.0.47.tar.gz
Solr-4.10.3.tgz
##1.2 安装单机Solr ###1.2.1 安装tomcat
 tar -zxvf apache-tomcat-7.0.47.tar.gz
 mv apache-tomcat-7.0.47 /opt/beh/core/tomcat
 chown -R hadoop:hadoop /opt/beh/core/tomcat/
###1.2.2 添加solr.war至tomcat
1、从solr的example里复制solr.war到tomcat的webapps目录下
 tar -zxvf solr-4.10.3.tgz
 chown -R hadoop:hadoop solr-4.10.3
 cp solr-4.10.3/example/webapps/solr.war /opt/beh/core/tomcat/webapps/
 mv solr-4.10.3 /opt/
2、启动tomcat,自动解压solr.war
su – hadoop
sh /opt/beh/core/tomcat/bin/startup.sh
Using CATALINA_BASE:   /opt/beh/core/tomcat
Using CATALINA_HOME:   /opt/beh/core/tomcat
Using CATALINA_TMPDIR: /opt/beh/core/tomcat/temp
Using JRE_HOME:        /opt/beh/core/jdk
Using CLASSPATH:       /opt/beh/core/tomcat/bin/bootstrap.jar:/opt/beh/core/tomcat/bin/tomcat-juli.jar
Tomcat started.
3、删除war包,关闭tomcat
$ cd /opt/beh/core/tomcat/webapps/
$ rm -f solr.war
$ jps
10596 Bootstrap
$ kill 10596
###1.2.3 添加solr服务的依赖jar包 有5个依赖jar包,拷贝到tomcat下的solr的lib下(原有45个包)
$ cd /opt/solr-4.10.3/example/lib/ext/
$ ls
jcl-over-slf4j-1.7.6.jar  jul-to-slf4j-1.7.6.jar  log4j-1.2.17.jar  slf4j-api-1.7.6.jar  slf4j-log4j12-1.7.6.jar
$ cp * /opt/beh/core/tomcat/webapps/solr/WEB-INF/lib/
###1.2.4 添加log4j.properties
$ cd /opt/beh/core/tomcat/webapps/solr/WEB-INF/
$ mkdir classes
$ cp /opt/solr-4.10.3/example/resources/log4j.properties classes/
###1.2.5 创建SolrCore 从solr的example里拷贝一份core到solr目录
$ mkdir -p /opt/beh/core/solr
$ cp -r /opt/solr-4.10.3/example/solr/* /opt/beh/core/solr
$ ls
bin  collection1  README.txt  solr.xml  zoo.cfg
拷贝solr的扩展jar
$ cd /opt/beh/core/solr
$ cp -r /opt/solr-4.10.3/contrib .
$ cp -r /opt/solr-4.10.3/dist/ .
配置使用contrib和dist
$ cd collection1/conf/
$ vi solrconfig.xml
  <lib dir="${solr.install.dir:..}/contrib/extraction/lib" regex=".*\.jar" />
  <lib dir="${solr.install.dir:..}/dist/" regex="solr-cell-\d.*\.jar" />

  <lib dir="${solr.install.dir:..}/contrib/clustering/lib/" regex=".*\.jar" />
  <lib dir="${solr.install.dir:..}/dist/" regex="solr-clustering-\d.*\.jar" />

  <lib dir="${solr.install.dir:..}/contrib/langid/lib/" regex=".*\.jar" />
  <lib dir="${solr.install.dir:..}/dist/" regex="solr-langid-\d.*\.jar" />

  <lib dir="${solr.install.dir:..}/contrib/velocity/lib" regex=".*\.jar" />
  <lib dir="${solr.install.dir:..}/dist/" regex="solr-velocity-\d.*\.jar" />
###1.2.6 加载SolrCore 修改tomcat中的solr配置文件web.xml,指定加载solrcore
$ cd /opt/beh/core/tomcat/webapps/solr/WEB-INF
$ vi web.xml
修改<env-entry-value>/put/your/solr/home/here</env-entry-value>
为  <env-entry-value>/opt/beh/core/solr</env-entry-value>
###1.2.7 启动tomcat
$ cd /opt/beh/core/tomcat
$ ./bin/startup.sh
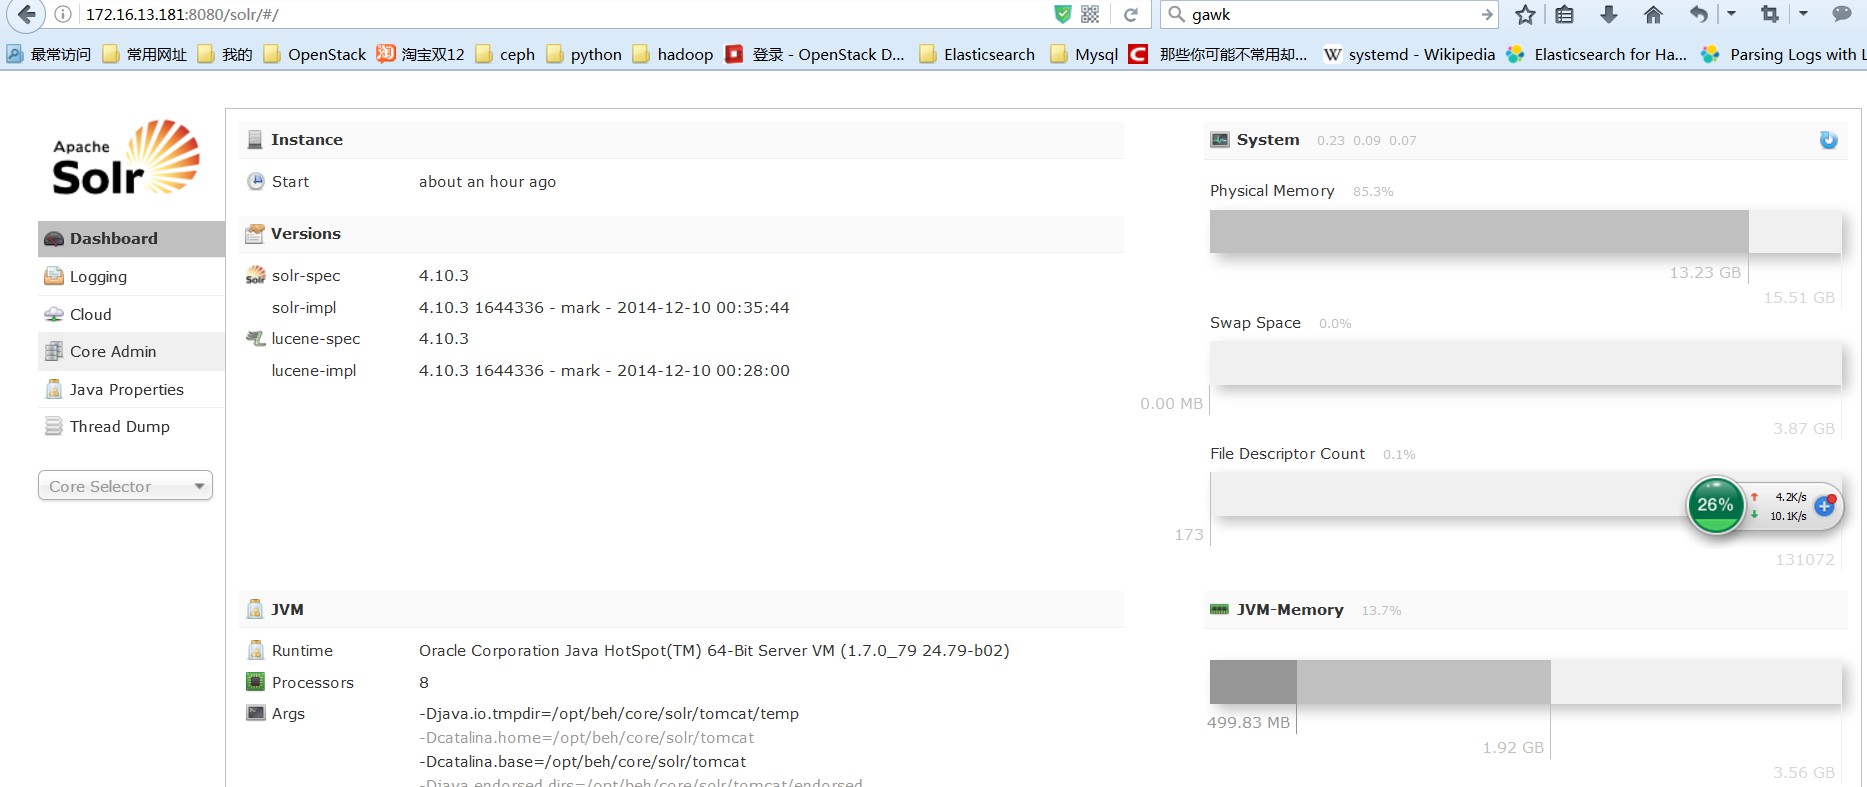
查看web页面 http://172.16.13.181:8080/solr 
##1.3 配置Solrcloud ###1.3.1 系统环境配置 三台机器
主机 IP
Solr001 172.16.13.180 10.10.1.32
Solr002 172.16.13.181 10.10.1.33
Solr003 172.16.13.182 10.10.1.34
###1.3.2 配置zookeeper
$ cd $ZOOKEEPER_HOME
$ vi zoo.cfg
# The number of milliseconds of each tick
tickTime=2000
# The number of ticks that the initial
# synchronization phase can take
initLimit=10
# The number of ticks that can pass between
# sending a request and getting an acknowledgement
syncLimit=5
# the directory where the snapshot is stored.
# do not use /tmp for storage, /tmp here is just
# example sakes.
dataDir=/opt/beh/data/zookeeper
# the port at which the clients will connect
clientPort=2181
#
# Be sure to read the maintenance section of the
# administrator guide before turning on autopurge.
#
# http://zookeeper.apache.org/doc/current/zookeeperAdmin.html#sc_maintenance
#
# The number of snapshots to retain in dataDir
autopurge.snapRetainCount=3
# Purge task interval in hours
# Set to "0" to disable auto purge feature
autopurge.purgeInterval=1
maxClientCnxns=0

server.1=solr001:2888:3888
server.2=solr002:2888:3888
server.3=solr003:2888:3888
设置myid,三台机器对应分别修改为数字1、2、3 分别启动zookeeper
$ zkServer.sh start
查看zookeeper状态
$ zkServer.sh status
JMX enabled by default
Using config: /opt/beh/core/zookeeper/bin/../conf/zoo.cfg
Mode: follower
1.3.3 配置tomcat
把单机版配置好的tomcat分别拷贝到每台机器上
$ scp -r tomcat solr002:/opt/beh/core/
$ scp -r tomcat solr003:/opt/beh/core/
1.3.4 拷贝SolrCore
$ scp -r solr solr002:/opt/beh/core/
$ scp -r solr solr003:/opt/beh/core/
使用zookeeper统一管理配置文件
$ cd /opt/solr-4.10.3/example/scripts/cloud-scripts
$ ./zkcli.sh -zkhost 10.10.1.32:2181,10.10.1.33:2181,10.10.1.34:2181 -cmd upconfig -confdir /opt/beh/core/solr/collection1/conf -confname solrcloud
登录zookeeper可以看到新建了solrcloud的文件夹
$ zkCli.sh
[zk: localhost:2181(CONNECTED) 1] ls /
[configs, zookeeper]
[zk: localhost:2181(CONNECTED) 2] ls /configs
[solrcloud]
修改每个节点上的tomcat配置文件,加入DzkHost指定zookeeper服务器地址
$ cd /opt/beh/core/tomcat/bin
$ vi catalina.sh
JAVA_OPTS="-DzkHost=10.10.1.32:2181,10.10.1.33:2181,10.10.1.34:2181"

同时也在这里修改启动的jvm内存
JAVA_OPTS="-server -Xmx4096m -Xms2048m -DzkHost=10.10.1.32:2181,10.10.1.33:2181,10.10.1.34:2181"
修改solrcloud的web配置,每台机器修改成自己的IP地址
$ cd /opt/beh/core/solr
$ vi solr.xml
<solrcloud>
    <str name="host">${host:10.10.1.32}</str>
    <int name="hostPort">${jetty.port:8080}</int>
###1.3.5 启动tomcat
每台机器都要启动
$ cd /opt/beh/core/tomcat
$ ./bin/startup.sh
登录web端口查看
http://172.16.13.181:8080/solr
任意一个都可以
###1.3.6 添加节点 Solrcloud添加节点较为方便,
配置该节点的jdk
从配置好的节点拷贝tomcat整个目录
从配置好的节点拷贝solr整个目录
修改/opt/beh/core/solr/solr.xml配置文件,修改为本机的ip地址
删除collection1下面的data目录
启动tomcat
通过查看tomcat的日志,来看是否成功启动 $ tail –f /opt/beh/core/tomcat/logs/catalina.out 十一月 30, 2016 4:46:03 下午 org.apache.coyote.AbstractProtocol init 信息: Initializing ProtocolHandler ["ajp-bio-8009"] 十一月 30, 2016 4:46:03 下午 org.apache.catalina.startup.Catalina load 信息: Initialization processed in 868 ms 十一月 30, 2016 4:46:03 下午 org.apache.catalina.core.StandardService startInternal 信息: Starting service Catalina 十一月 30, 2016 4:46:03 下午 org.apache.catalina.core.StandardEngine startInternal 信息: Starting Servlet Engine: Apache Tomcat/7.0.47 十一月 30, 2016 4:46:03 下午 org.apache.catalina.startup.HostConfig deployDirectory 信息: Deploying web application directory /opt/beh/core/tomcat/webapps/ROOT 可能会卡在这里几分钟 。。。 信息: Server startup in 332872 ms 6133 [coreZkRegister-1-thread-1] INFO org.apache.solr.cloud.ZkController – We are http://10.10.1.36:8080/solr/collection1/ and leader is http://10.10.1.33:8080/solr/collection1/ 6134 [coreZkRegister-1-thread-1] INFO org.apache.solr.cloud.ZkController – No LogReplay needed for core=collection1 baseURL=http://10.10.1.36:8080/solr 6134 [coreZkRegister-1-thread-1] INFO org.apache.solr.cloud.ZkController – Core needs to recover:collection1 6134 [coreZkRegister-1-thread-1] INFO org.apache.solr.update.DefaultSolrCoreState – Running recovery - first canceling any ongoing recovery 6139 [RecoveryThread] INFO org.apache.solr.cloud.RecoveryStrategy – Starting recovery process. core=collection1 recoveringAfterStartup=true 6140 [RecoveryThread] INFO org.apache.solr.cloud.RecoveryStrategy – ###### startupVersions=[] 6140 [RecoveryThread] INFO org.apache.solr.cloud.RecoveryStrategy – Publishing state of core collection1 as recovering, leader is http://10.10.1.33:8080/solr/collection1/ and I am http://10.10.1.36:8080/solr/collection1/ 6141 [RecoveryThread] INFO org.apache.solr.cloud.ZkController – publishing core=collection1 state=recovering collection=collection1 6141 [RecoveryThread] INFO org.apache.solr.cloud.ZkController – numShards not found on descriptor - reading it from system property 6165 [RecoveryThread] INFO org.apache.solr.cloud.RecoveryStrategy – Sending prep recovery command to http://10.10.1.33:8080/solr; WaitForState: action=PREPRECOVERY&core=collection1&nodeName=10.10.1.36%3A8080_solr&coreNodeName=core_node4&state=recovering&checkLive=true&onlyIfLeader=true&onlyIfLeaderActive=true 6180 [zkCallback-2-thread-1] INFO org.apache.solr.common.cloud.ZkStateReader – A cluster state change: WatchedEvent state:SyncConnected type:NodeDataChanged path:/clusterstate.json, has occurred - updating... (live nodes size: 4) 8299 [RecoveryThread] INFO org.apache.solr.cloud.RecoveryStrategy – Attempting to PeerSync from http://10.10.1.33:8080/solr/collection1/ core=collection1 - recoveringAfterStartup=true 8303 [RecoveryThread] INFO org.apache.solr.update.PeerSync – PeerSync: core=collection1 url=http://10.10.1.36:8080/solr START replicas=[http://10.10.1.33:8080/solr/collection1/] nUpdates=100 8306 [RecoveryThread] WARN org.apache.solr.update.PeerSync – no frame of reference to tell if we've missed updates 8306 [RecoveryThread] INFO org.apache.solr.cloud.RecoveryStrategy – PeerSync Recovery was not successful - trying replication. core=collection1 8306 [RecoveryThread] INFO org.apache.solr.cloud.RecoveryStrategy – Starting Replication Recovery. core=collection1 8306 [RecoveryThread] INFO org.apache.solr.cloud.RecoveryStrategy – Begin buffering updates. core=collection1 8307 [RecoveryThread] INFO org.apache.solr.update.UpdateLog – Starting to buffer updates. FSUpdateLog{state=ACTIVE, tlog=null} 8307 [RecoveryThread] INFO org.apache.solr.cloud.RecoveryStrategy – Attempting to replicate from http://10.10.1.33:8080/solr/collection1/. core=collection1 8325 [RecoveryThread] INFO org.apache.solr.handler.SnapPuller – No value set for 'pollInterval'. Timer Task not started. 8332 [RecoveryThread] INFO org.apache.solr.cloud.RecoveryStrategy – No replay needed. core=collection1 8332 [RecoveryThread] INFO org.apache.solr.cloud.RecoveryStrategy – Replication Recovery was successful - registering as Active. core=collection1 8332 [RecoveryThread] INFO org.apache.solr.cloud.ZkController – publishing core=collection1 state=active collection=collection1 8333 [RecoveryThread] INFO org.apache.solr.cloud.ZkController – numShards not found on descriptor - reading it from system property 8348 [RecoveryThread] INFO org.apache.solr.cloud.RecoveryStrategy – Finished recovery process. core=collection1 8379 [zkCallback-2-thread-1] INFO org.apache.solr.common.cloud.ZkStateReader – A cluster state change: WatchedEvent state:SyncConnected type:NodeDataChanged path:/clusterstate.json, has occurred - updating... (live nodes size: 4)
查看web页面,成功添加第四个节点
可以看到collection1有一个分片shard1,shard1有四个副本,其中黑点ip为33的是主副本
#2 集群管理 ##2.1 创建collection 创建一个有2个分片的collection,并且每个分片有2个副本
$ curl "http://172.16.13.180:8080/solr/admin/collections?action=CREATE&name=collection2&numShards=2&replicationFactor=2&wt=json&indent=true"
另外也可以直接在web页面打开“”里的链接,两种方式结果一样:
#2.2 删除collection
$ curl "http://172.16.13.180:8080/solr/admin/collections?action=DELETE&name=collection2&wt=json&indent=true"
##2.3 配置IK中文分词器 ###2.3.1 单机版配置
1.下载ik软件包
http://code.google.com/p/ik-analyzer/downloads/list
下载IK Analyzer 2012FF_hf1.zip
2.解压上传至服务器
3.拷贝jar包
cp IKAnalyzer2012FF_u1.jar /opt/solr/apache-tomcat-7.0.47/webapps/solr/WEB-INF/lib/
4.拷贝配置文件及分词器停词字典
 cp IKAnalyzer.cfg.xml /opt/solr/solrhome/contrib/analysis-extras/lib/
 cp stopword.dic /opt/solr/solrhome/contrib/analysis-extras/lib/
5.定义fieldType,使用中文分词器
cd /opt/solr/solrhome/solr/collection1/conf
vi schema.xml
<!-- IKAnalyzer-->
   <fieldType name="text_ik" class="solr.TextField">
     <analyzer class="org.wltea.analyzer.lucene.IKAnalyzer"/>
   </fieldType>
<!--IKAnalyzer Field-->
  <field name="title_ik" type="text_ik" indexed="true" stored="true" />
  <field name="content_ik" type="text_ik" indexed="true" stored="false" multiValued="true"/>
6.重启tomcat
cd /opt/solr/apache-tomcat-7.0.47/
./bin/shutdown.sh
./bin/startup.sh
7.web页面进行测试
可以在Analyse Fieldname / FieldType处找到Fields下面的title_ik或者content_ik以及Types下面的text-ik,点击Analyse Values进行分析
###2.3.2 集群版配置 1.拷贝jar包和配置文件以及分词器停词字典到各个节点的对应位置
cp IKAnalyzer2012FF_u1.jar /opt/beh/core/tomcat/webapps/solr/WEB-INF/lib/
cp IKAnalyzer.cfg.xml stopword.dic /opt/beh/core/solr/contrib/analysis-extras/lib/
2.修改schema.xml配置文件定义fieldType,使用中文分词器
参考单机版配置
3.上传配置文件至zookeeper
cd /opt/solr-4.10.3/example/scripts/cloud-scripts
./zkcli.sh -zkhost 10.10.1.32:2181,10.10.1.33:2181,10.10.1.34:2181 -cmd upconfig -confdir /opt/beh/core/solr/collection1/conf -confname solrcloud
4.重启所有节点的tomcat
5.打开任意节点的web页面可以看到IK分词器成功配置
#3 集成HDFS ##3.1 修改配置 Solr集成hdfs,主要是让index存储在hdfs上,调整配置文件solrconfig.xml
cd /opt/beh/core/solr/collection1/conf
vi solrconfig.xml
1、将<directoryFactory>部分的默认配置修改成如下配置:
<directoryFactory name="DirectoryFactory" class="solr.HdfsDirectoryFactory">
<str name="solr.hdfs.home">hdfs://beh/solr</str>
<bool name="solr.hdfs.blockcache.enabled">true</bool>
<int name="solr.hdfs.blockcache.slab.count">1</int>
<bool name="solr.hdfs.blockcache.direct.memory.allocation">true</bool>
<int name="solr.hdfs.blockcache.blocksperbank">16384</int>
<bool name="solr.hdfs.blockcache.read.enabled">true</bool>
<bool name="solr.hdfs.blockcache.write.enabled">true</bool>
<bool name="solr.hdfs.nrtcachingdirectory.enable">true</bool>
<int name="solr.hdfs.nrtcachingdirectory.maxmergesizemb">16</int>
<int name="solr.hdfs.nrtcachingdirectory.maxcachedmb">192</int>
<str name="solr.hdfs.confdir">/opt/beh/core/hadoop/etc/hadoop</str>

2、修改solr.lock.type
将<lockType>${solr.lock.type:native}</lockType>修改为 <lockType>${solr.lock.type:hdfs}</lockType>
##3.3 上传配置文件到zookeeper
cd /opt/solr-4.10.3/example/scripts/cloud-scripts
./zkcli.sh -zkhost 10.10.1.32:2181,10.10.1.33:2181,10.10.1.34:2181 -cmd upconfig -confdir /opt/beh/core/solr/collection1/conf -confname solrcloud
##3.4 重启tomcat
cd /opt/solr/apache-tomcat-7.0.47/
./bin/shutdown.sh
./bin/startup.sh
3.5 检查
查看hdfs目录
$ hadoop fs -ls /solr
Found 2 items
drwxr-xr-x   - hadoop hadoop          0 2016-12-06 15:31 /solr/collection1
$ hadoop fs -ls /solr/collection1
Found 4 items
drwxr-xr-x   - hadoop hadoop          0 2016-12-06 15:31 /solr/collection1/core_node1
drwxr-xr-x   - hadoop hadoop          0 2016-12-06 15:31 /solr/collection1/core_node2
drwxr-xr-x   - hadoop hadoop          0 2016-12-06 15:31 /solr/collection1/core_node3
drwxr-xr-x   - hadoop hadoop          0 2016-12-06 15:31 /solr/collection1/core_node4
$ hadoop fs -ls /solr/collection1/core_node1
Found 1 items
drwxr-xr-x   - hadoop hadoop          0 2016-12-06 15:31 /solr/collection1/core_node1/data
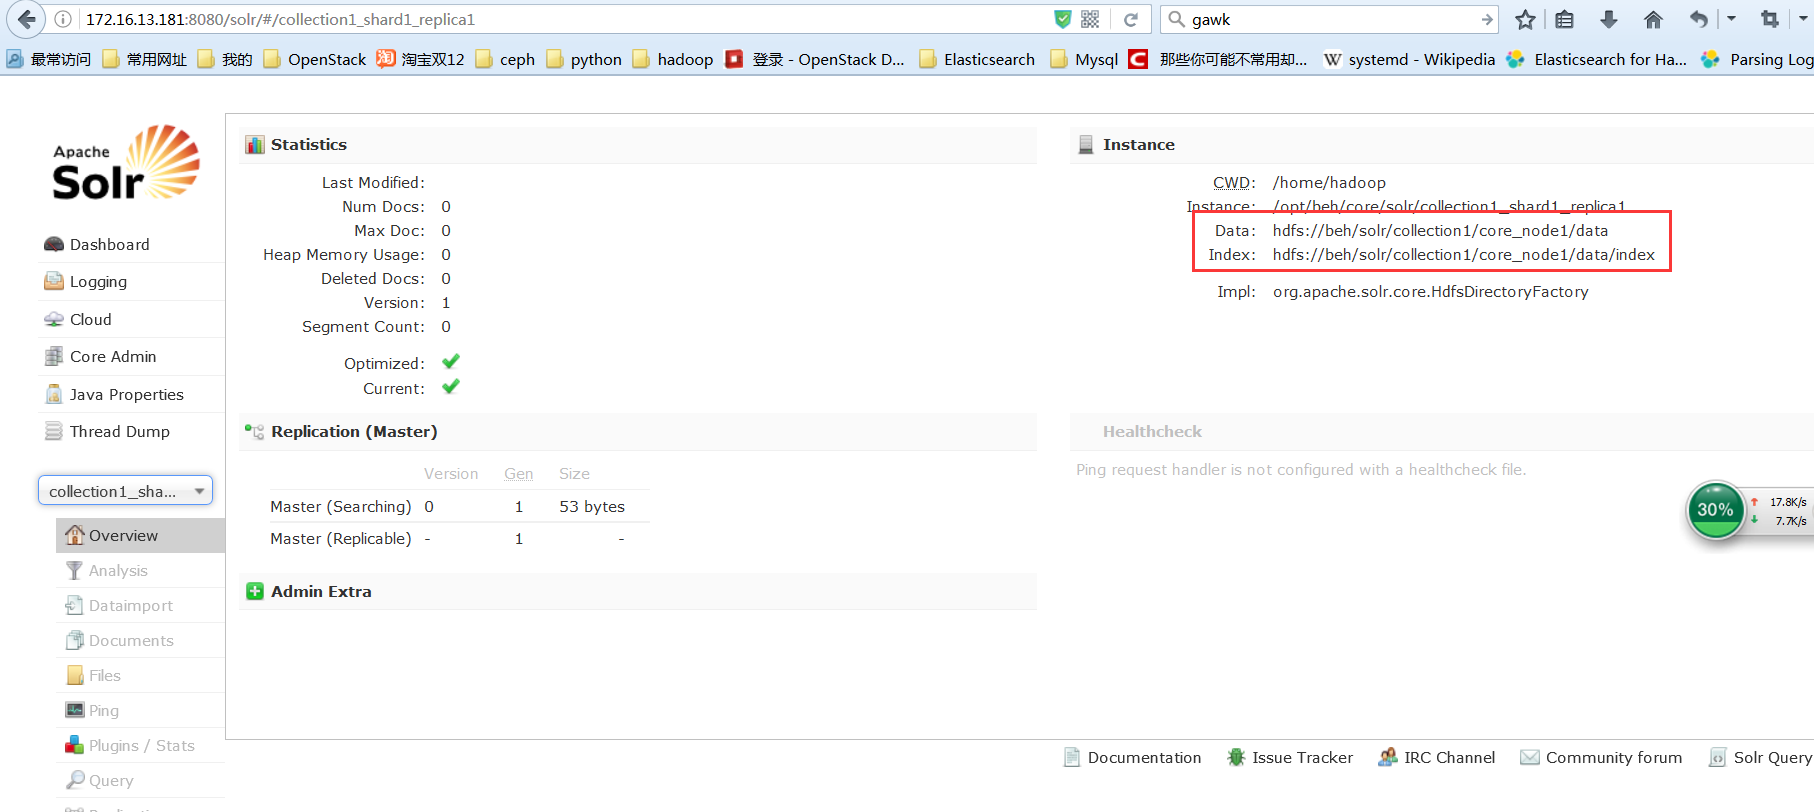
页面查看,可以看到collection1的data路径已经指定到了对应hdfs目录


