If you have any experience with electronics at all, and have not yet heard about National Instruments or any of their software or hardware solutions like Multisim, LabVIEW, myDAQ, myRIO, or ELVIS, well then I just feel sorry for you.
Well, no, not really. You're all amazing people, I'm sure. It took me a while to learn about them as well. But now that I have, I'm passing on the knowledge to you.
Specifically, I want to talk about Multisim Live today, the newly announced browser-based circuit simulator based on NI's phenomenal Multisim standalone software. I love the desktop version of Multisim, so when I heard about Multisim Live, I was... well let's just say very excited.

Add TipAsk QuestionCommentDownload
Step 1: What Is a Circuit Simulator?
If you're not yet familiar with Multisim, or any other circuit simulation software for that matter, let me give you a brief introduction. Physical circuits built with real components can be fickle and difficult at best. Each component has it's own parameters, even if you get two of the same part. And sometimes you are just fiddling around, playing with a new design and nothing is set in stone yet. You don't know exactly what parts will work, so you want to do some swapping and testing. Maybe you don't even have the parts, and all you have is a great idea in your head that you don't want to lose. Or you actually know exactly what you're doing, but the complexity and cost of the system under development just requires that it be tested virtually before it gets to a certain point in production.
This is where simulators are so useful. You can design and build in a virtual environment, adjust and edit virtual component parameters to match real tested components, swap and change parts as needed, or just simply let your imagination go crazy and see what it takes to break it.
Multisim is the most complete and robust circuit design and simulation suite available. It's format and layout are simple and easy to use. The component library is EXTENSIVE and easy to navigate. You have access to numerous virtual versions of bench top test equipment like an oscilloscope, function generator, spectrum analyzer, network analyzer, logic analyzer, etc. Once you're done designing and testing, you can export your design to Ultiboard, which is a PCB design software and included with Multisim. The parts auto populate, you just have to do the layout. You can also view, edit, and print the SPICE netlist directly if you want. I could keep going, there are so many features.
You can do something as simple as an LED driver circuit:
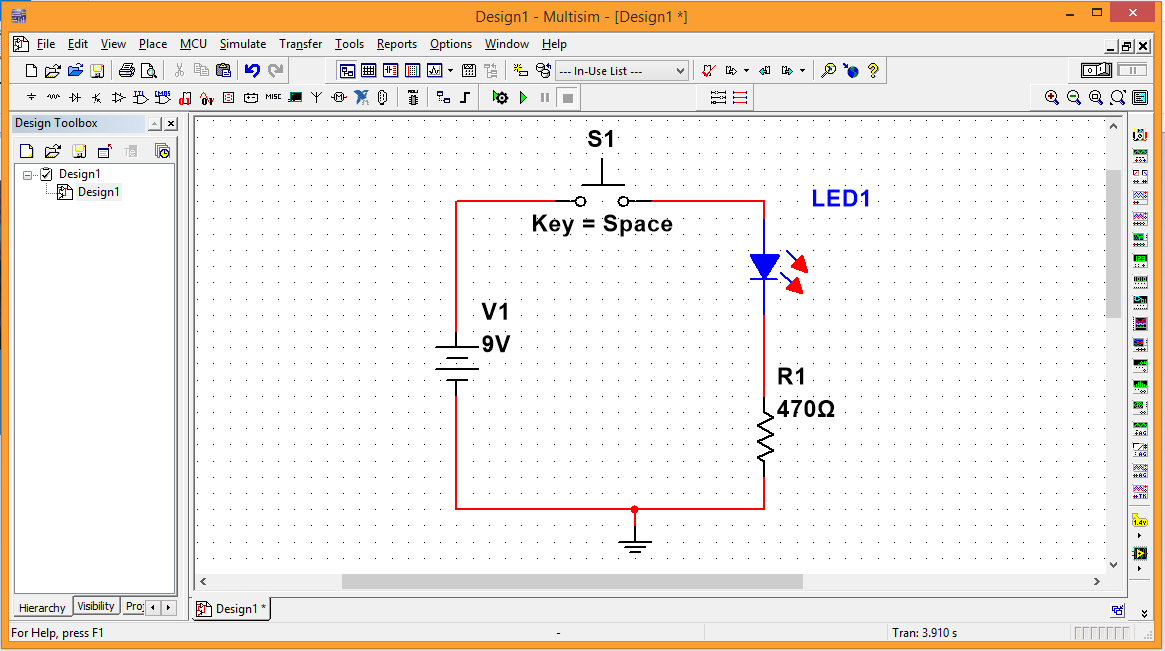
Or something more complex like the quiz show trigger system example project:

If interested, for professionals and educators there's a bulk buy option. For students, there's a very reasonably priced student version available for download here.
But as great as Multisim is, and I highly encourage everybody to get their own copy, I'm here to talk about Multisim Live. So let's get to that.
Add TipAsk QuestionCommentDownload
Step 2: Getting Started With Multisim Live
As mentioned, Multisim Live is a browser-based version of Multisim. As should be expected, it is not as large or complete as the standalone version, but it is very well designed and very robust for what is intended. But why use a browser-based version when the desktop version is so reasonably priced? Well, as good as the desktop version is, you can't access it from your mobile device, which is a key selling point for Live. Since it is browser-based, it works across all platforms, including mobile platforms.
Note - I've done a cursory check on several different browsers, both desktop (Windows 8 w/ Chrome, Firefox, and IE) and mobile (Samsung Galaxy Note 4 running Android 6.0.1 Marshmallow w/ Chrome and Firefox) and I had no noticeable issues. Apple iOS devices, both mobile and laptop, were checked as well with no issues. To be fair, I personally prefer Chrome, so I didn't investigate the others too much. This I'ble will be done entirely with the desktop version of Chrome, except for the last step which will focus on mobile.
To start, go to https://beta.multisim.com. You'll be greeted by the welcome screen

There are several circuits that are available for review by the public which you can check out. Or you can take a look at the Get Started page. I encourage you to look it over, but I personally feel the Get Started page is lacking in clarity and interactivity, which is why I'm doing this I'ble.
Click on the Sign Up button to register a new NI user account. If you already have one, you should be able to login with that.
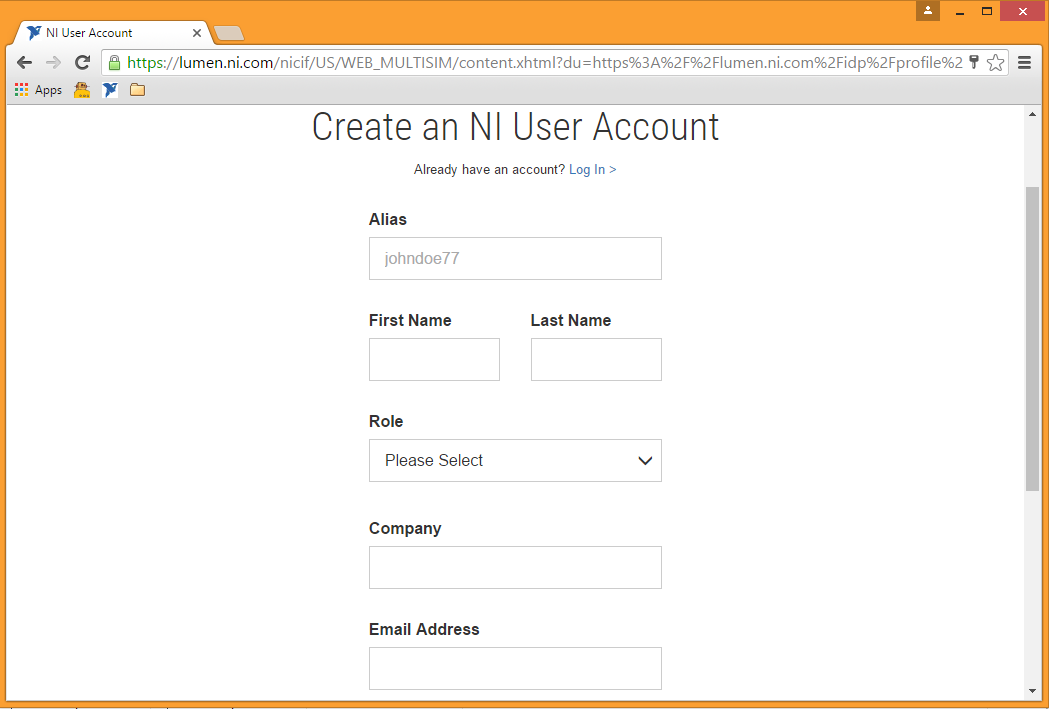
You have to fill in all of the fields in order to register a new account, so do your best to find a profession option that fits you. You can later edit your profile if you need to. I had some serious frustration with this part, but I eventually got it worked out. Once you are registered you have some options from your profile page.
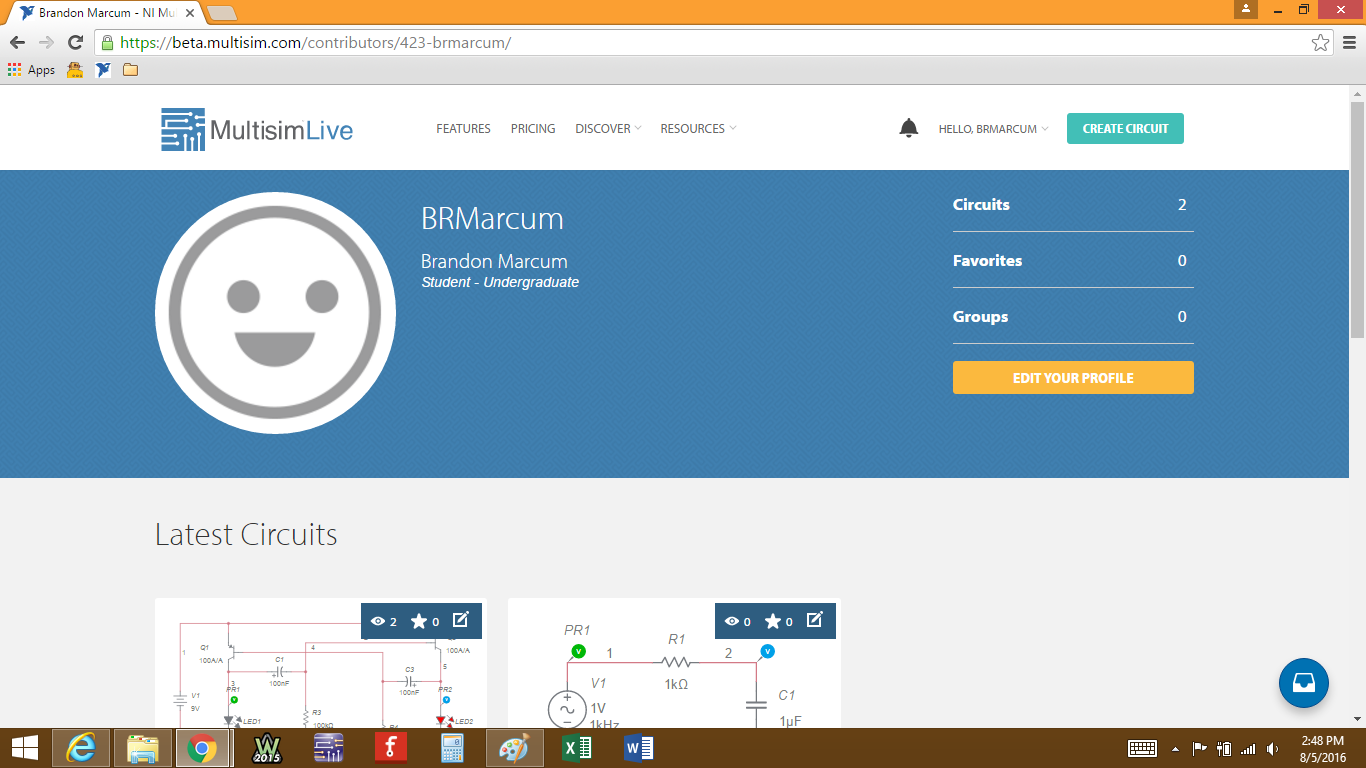
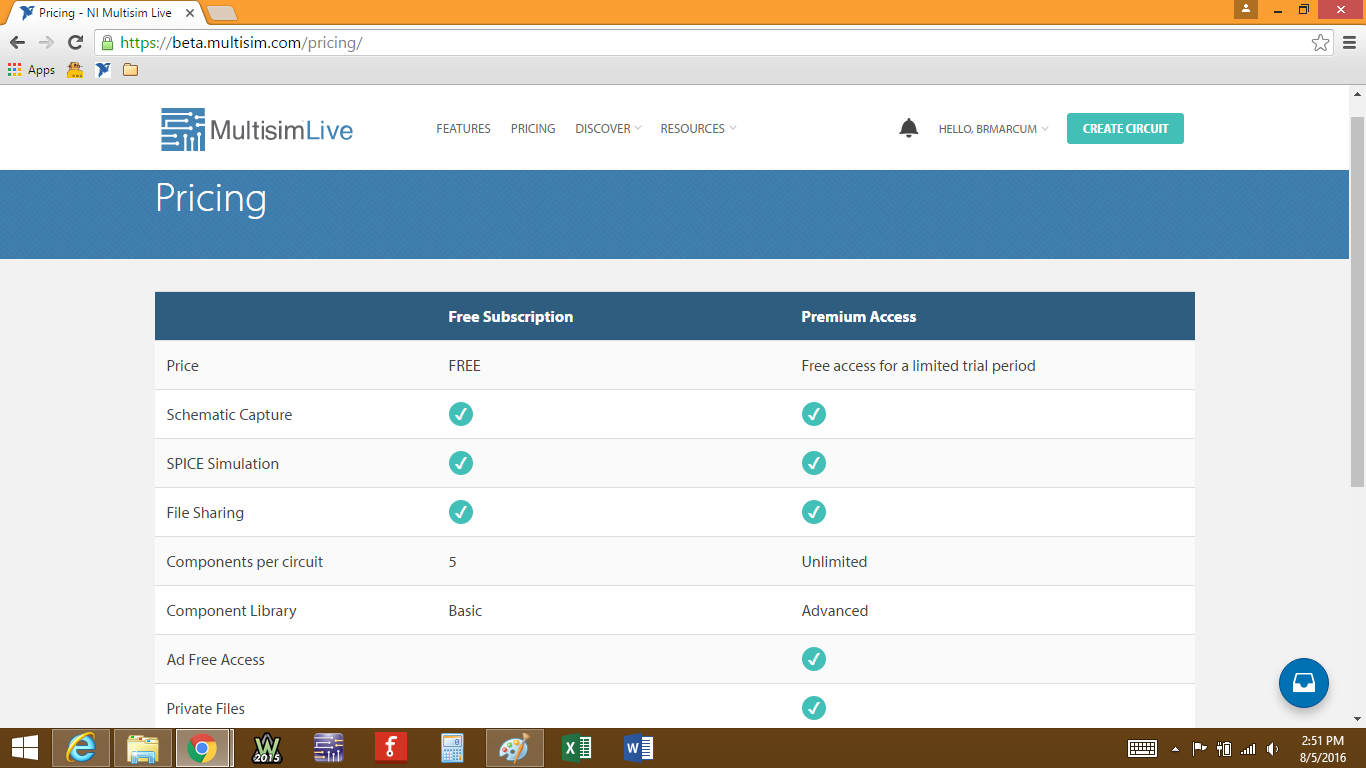
At the top you'll see the Pricing tab. Multisim Live is a subscription service, but for a limited time you can upgrade to the Premium version for free. I have no idea how long the promotion period is or what the price will be once it's over, so take advantage of it while you can.
Now that we have all of that figured out, let's get building.
Add TipAsk QuestionCommentDownload
Step 3: Building Your First Circuit.
Once you've got your subscription squared away, click on  at the top of the window to get started. You better be prepared, because awesome is about to happen!

Once everything loads, you'll see the design work space.
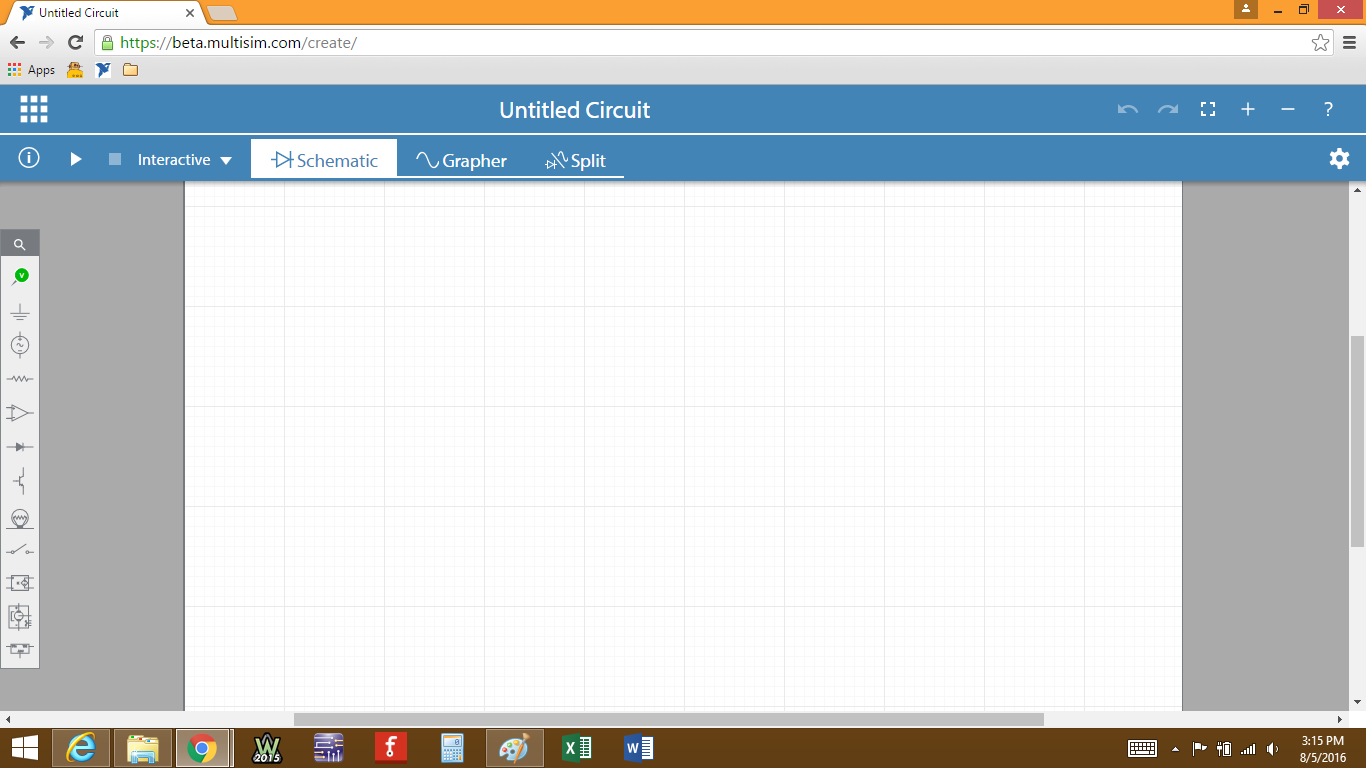
There are a lot of things that you can do from here, but let's take each thing one at a time, starting with the component list on the left.
Let's start with a simple passive hi pass RC filter circuit. We'll need a resistor, so click on  to open the passive components box.
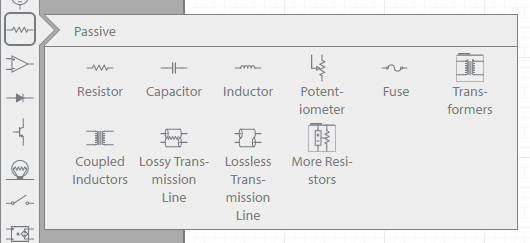
There are several options here. Select the resistor  and place it in the work space. From the components list you will also need a capacitor
  , an AC power source
  , a GND reference
  , and at least one probe
  . Get all of your components into the work space. If you need to rotate one, just click on it and some option buttons become visible.
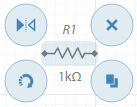
You can delete  , copy
  , rotate
  , or flip
  pretty much any component.
If you click on the value label  of any of your components, a small window will pop up that will allow you to edit that parameter. Values can be edited at any time, even while a simulation is running. Note that some components have more than one adjustable value, like the AC voltage source. These values can all be edited at any time.
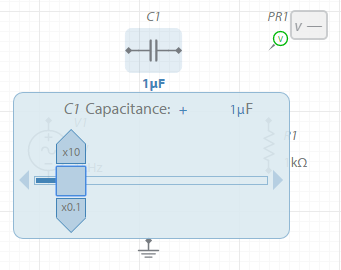
You can use the slider or the small arrows on the left and right to adjust the value from 0 to the larger magnitude shown above the slider. You can easily jump a whole order of magnitude up or down by clicking on the multiplier buttons above and below the slider. You can also directly edit the value by clicking on the number and typing in any value you want. This is especially useful if you are trying to model real components that you have measured. I tested the value out to 20 decimal places and the program didn't round the value, so you can get as precise as you need.
You can also edit parameters by clicking on the  icon at the top of the browser window. The configuration pane will open on the right side. Let's set the value of our capacitor to 10μF. Type in "10μ" and the "u" will convert to "μ" automatically.
If you look at the symbol for the capacitor, the default image shows a non-polarized component. I'm sure they exist, but I've never seen a non-polarized capacitor rated at 10μF. If you go back to the configuration panel and click on  , a small menu drops down to allow you to select an electrolytic capacitor.
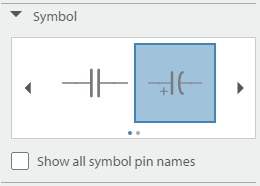
Let's also adjust the resistor value to be 100Ω.
Once you have all of your components selected, placed, and edited, hover your mouse pointer over one end of a component and you will see the wire spool  pop up. Click and then connect the wire to wherever you need it. The wire will auto-route around other components and junctions, but you can add your own bends to the wire route simply by clicking on a blank place on the work space. Once the wire is laid, you can click anywhere on the wire to either delete that wire net, or you can add a junction
  that you can then route to any other valid connection. Once you're done, it should look like this.
![]()
If you need a larger work space, make sure no components are selected, click on ![]() and scroll to the bottom of the configuration window. There are two boxes used to determine the size of your work space, so edit as needed.
and scroll to the bottom of the configuration window. There are two boxes used to determine the size of your work space, so edit as needed.
![]()
Now that we have a circuit built, edited, and connected, let's get to simulating.
Add TipAsk QuestionCommentDownload
Step 4: Simulating Your Circuit.
There are several different options you can use to simulate your circuit design. Click on ![]() at the top of the window to choose a simulation type. You can also click on
at the top of the window to choose a simulation type. You can also click on ![]() at the top right and then make sure the
at the top right and then make sure the ![]() tab is selected.
tab is selected.
There are numerous options available that you can edit, but for this circuit, let's choose AC Sweep as our type, then set the start frequency to 1 Hz and the stop frequency to 10 kHz. Scroll down a little bit and set the vertical axis to display in Decibels. The configuration pane should look like this once you're done.
![]()
To start the simulation, click on  at the top of the window, or click on
  from the configuration pane. The Grapher window will automatically pop open.
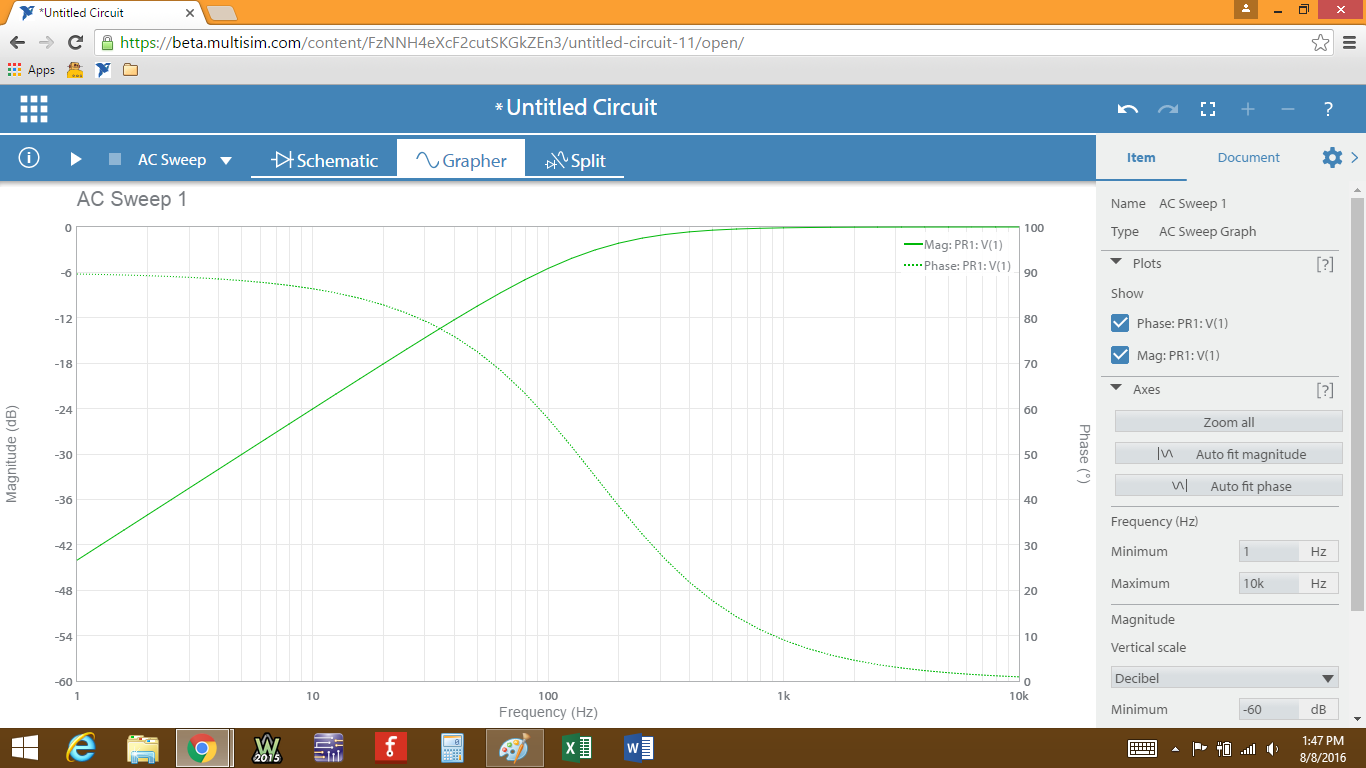
Without going too much into what the circuit is doing, we can see both the magnitude and phase for our voltage as measured at our probe, PR1. In the configuration pane there are several options for adjusting the vertical and horizontal axes. At the present time there is no way to check either magnitude or phase values at a frequency of your choosing, which is a valuable feature that Multisim has using cursors. For now, you just have to hope that the resolution lets you get close enough. Adjust the window as needed.
Since this is a hi-pass filter, one point that we are really interested in is the cutoff frequency, also known as the -3 dB point. It's also the frequency where our output will be 45° out of phase with our input, which just means that without some changes to the circuit, at lower frequencies we will be wasting A LOT of power trying to get more out of it. By placing my mouse cursor over the trace, I get data displayed at 158.49 Hz, which corresponds to -3.0285 dB and 45.120°. I know that the cutoff frequency of a filter is given by the equation fc = 1/(R * C * 2π). For this circuit, that is 1/(100Ω * 10μF * 2π) = 159.155 Hz, so we can see that the simulation, while not perfect, gave us the answer we were looking for.
If you want to run the simulation again, simply click on the  tab, adjust your settings if needed, and start the simulation again.
You may have seen the  button in the configuration pane. If the software can't get the simulation to converge, it will throw an error that will show up in the information pane on the left. Some help options will open, which will walk you through adjusting the simulator options. If no error occurs, the simulation was able to converge and there is no need to make any adjustments here.
You can switch between the schematic and graph views, or even a split view of both, simply by clicking one of the tabs at the top.

We have a circuit designed, built, and tested. Now let's take a look at some other functions we have with MultisimLive.
Add TipAsk QuestionCommentDownload
Step 5: Saving, Editing, and Deleting Circuits.
In the top left corner you'll see  , which opens the information pane. Clicking on
  will allow you to view and edit the document details, like the name of your circuit, public/private access, circuit description, and the tags used by search engines to generate results. You can edit these at any time, but nothing will permanently save from this window.
If you click on  , you'll be able to see the SPICE netlist.
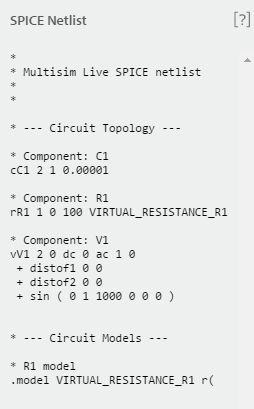
You can copy the netlist text by clicking and dragging to select it, but there is no way to edit the netlist directly except by changing the circuit schematic.
Clicking  will open the error/ warning window. If the simulation can't converge after you start the simulation, the error window will open automatically. Some simulations take some massaging in order for the software to properly simulate, but unless this window opens because it can't converge, you shouldn't ever see anything here.
Also in the top left corner, but a little higher, you'll see  . Click on it to open the File tab. From here you have several options.
Click on "Save" and a small box will open up.
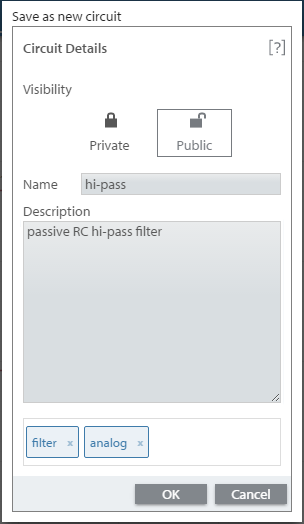
You can edit the document details here as well, like the name of your circuit, mark it as public/private, and give it a description, and tags. Here, I've added the tags "filter" and "analog". Just type whatever string of words you want, and then separate tags with commas. Anything you type before typing a comma will be one tag, but shorter, simpler strings tend to give better results. Changes made here will save permanently when you save the file.
The "Save as..." button will open the same window as "Save", but now when you click "OK", the original file will be left untouched and any changes made will be saved as a new circuit, which you can now give a different name, description, etc. Both circuits will appear in your circuit list.
"New file" will open a new work space to create a new circuit from scratch. It will not open a new browser window, so if you want two circuits open at the same time, you will need to open two browser windows on your own.
"Download" allows you to download the circuit document to your computer. All of the details, like name, description, simulation settings, etc. will be saved to that file, not just the circuit schematic.
If you have downloaded a file to your computer, you can click on "Upload" to load that file into the browser, where it will open with all of the parameters intact.
Click on  again and this time click on My Circuits. You'll be taken to... well, your circuits. Logical.
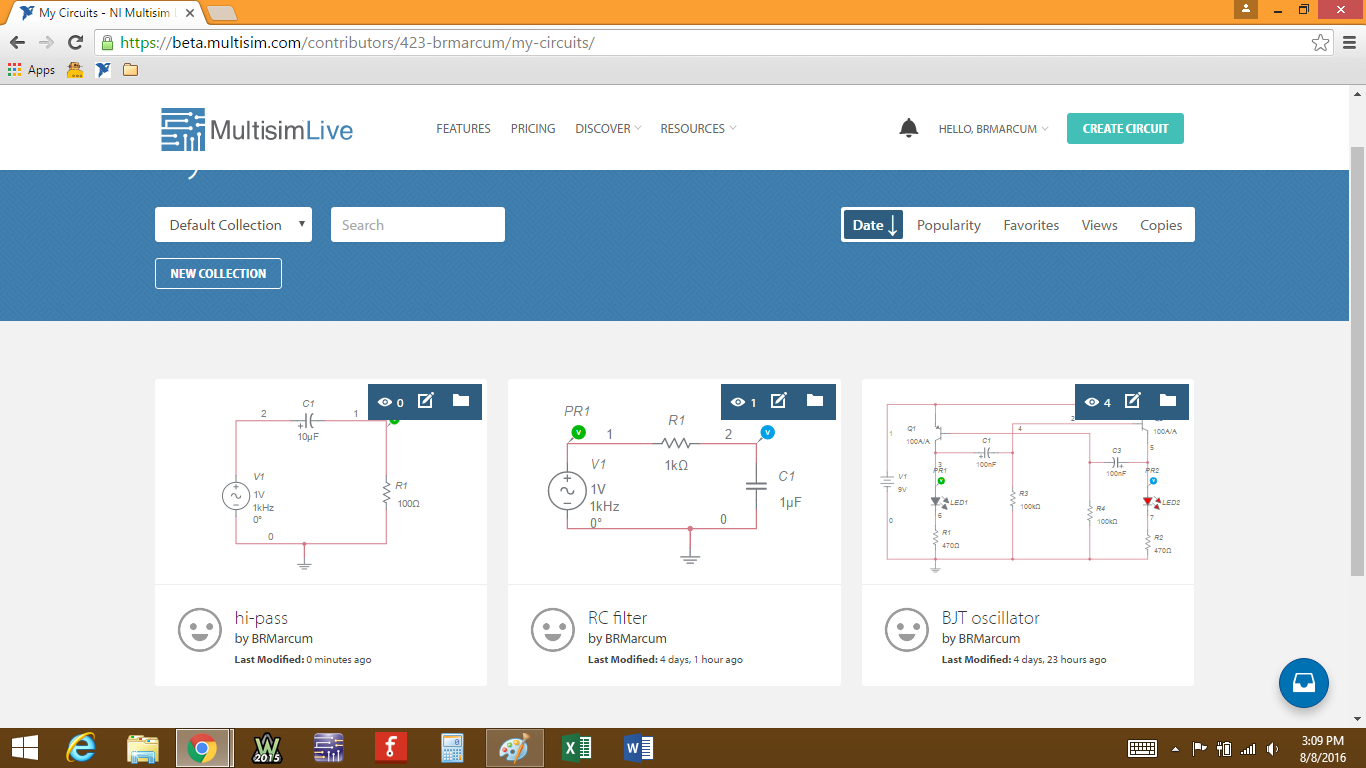
Clicking on  will take you right back to the circuit editor.
The  button will allow you to copy the selected circuit to a different collection. Near the top, on the left side of the window you'll see a couple of buttons. One lets you choose which collection your are currently viewing. The other,
  , let's you start a new collection and move circuits around as you wish.
If you click directly on the circuit image, you'll be taken to the page for that circuit.
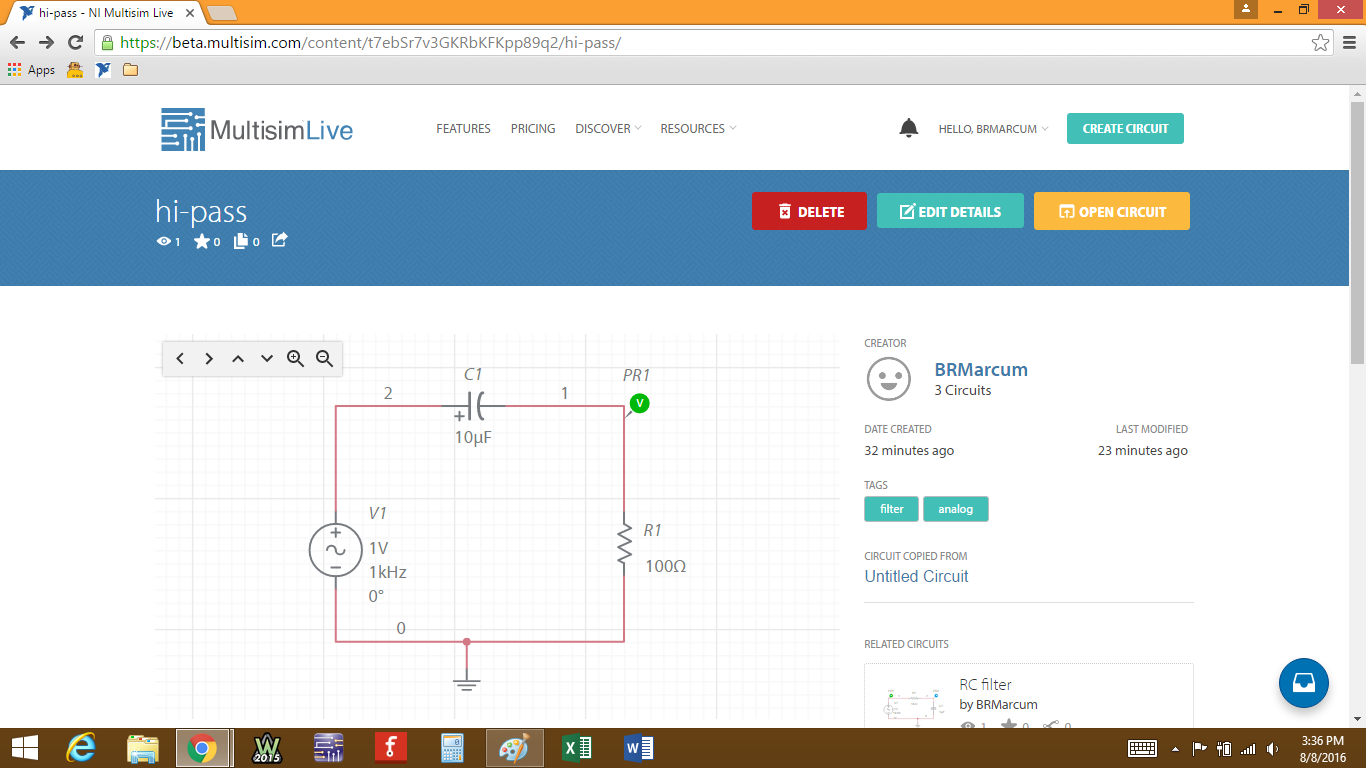
At the top, you can delete your circuit, edit details like the name or tags, or open the editor. Below the circuit image is a small image of the graph, if you ran a simulation, which you can open and view. Below all of that is a space for comments for others to comment on your circuits.

That's pretty much it for the desktop version. For a quick mobile platform view, continue on to the next step. Otherwise, you can get off the train here! Thanks for reading!
Add TipAsk QuestionCommentDownload
Step 6: MultisimLive on Mobile.
As I mentioned before, MultisimLive is designed to work in any browser, and most browsers allow for multiple platform viewing. Website coding has also evolved to allow for this evolution in web design, which makes it easy for us to switch between platforms with the same circuit design.
Here is a quick video I made using my Android phone. It goes through creating a circuit from scratch, editing components, and viewing the simulation graph. All of the functionality is the same, the only difference between the two platforms being the actual placement of the buttons and such.
https://www.youtube.com/watch?v=ngjtFF8rHto&feature=emb_title
That's all there is to it. Thanks for reading!
If you have any questions, please ask in the comments so everybody can get the answer. Also, be sure to check out the Digilent Blog, where I contribute from time to time!


