本文介绍mac上搭建Flutter环境
1、Flutter官方提供中国地区镜像地址:https://github.com/flutter/flutter/wiki/Using-Flutter-in-China
2、下载Flutter源码 (官方建议下载beta分支)
git clone -b beta https://github.com/flutter/flutter.git
3、环境配置
进入home目录 cd ~ , open -e .bash_profile(没有``bash_profile文件,就创建一个touch .bash_profile``)
export PUB_HOSTED_URL=https://pub.flutter-io.cn
export FLUTTER_STORAGE_BASE_URL=https://storage.flutter-io.cn
export PATH="/Users/MacBook/flutter/bin:$PATH"
注:
1、Run source $HOME/.bash_profile to refresh the current window.
2、__其中/Users/MacBook/flutter/bin就是刚刚下载的Flutter的bin目录__
4、使用flutter doctor 命令进行安装
cd ./flutter
flutter doctor稍等片刻就会出现如下界面就会安装成功
Downloading Dart SDK from Flutter engine e3687f70c7ece72000b32ee1b3c02755ba5361ac...
% Total % Received % Xferd Average Speed Time Time Time Current
Dload Upload Total Spent Left Speed
100 87.9M 100 87.9M 0 0 4247k 0 0:00:21 0:00:21 --:--:-- 4945k
Building flutter tool...
╔════════════════════════════════════════════════════════════════════════════╗
║ Welcome to Flutter! - https://flutter.io ║
║ ║
║ The Flutter tool anonymously reports feature usage statistics and crash ║
║ reports to Google in order to help Google contribute improvements to ║
║ Flutter over time. ║
║ ║
║ Read about data we send with crash reports: ║
║ https://github.com/flutter/flutter/wiki/Flutter-CLI-crash-reporting ║
║ ║
║ See Google's privacy policy: ║
║ https://www.google.com/intl/en/policies/privacy/ ║
║ ║
║ Use "flutter config --no-analytics" to disable analytics and crash ║
║ reporting. ║
╚════════════════════════════════════════════════════════════════════════════╝
Flutter assets will be downloaded from https://storage.flutter-io.cn. Make sure you trust this source!
Downloading Material fonts... 0.6s
Downloading package sky_engine... 0.3s
Downloading common tools... 0.8s
Downloading darwin-x64 tools... 3.4s
Downloading android-arm-profile/darwin-x64 tools... 0.6s
Downloading android-arm-release/darwin-x64 tools... 0.7s
Downloading android-arm64-profile/darwin-x64 tools... 0.6s
Downloading android-arm64-release/darwin-x64 tools... 0.6s
Downloading android-x86 tools... 1.9s
Downloading android-x64 tools... 2.4s
Downloading android-arm tools... 1.2s
Downloading android-arm-profile tools... 0.9s
Downloading android-arm-release tools... 0.7s
Downloading android-arm64 tools... 1.1s
Downloading android-arm64-profile tools... 1.0s
Downloading android-arm64-release tools... 0.8s
Downloading ios tools... 4.3s
Downloading ios-profile tools... 3.7s
Downloading ios-release tools... 3.2s
Downloading Gradle Wrapper... 0.1s
Doctor summary (to see all details, run flutter doctor -v):
[✓] Flutter (Channel beta, v0.6.0, on Mac OS X 10.12.6 16G1510, locale zh-Hans-CN)
[!] Android toolchain - develop for Android devices (Android SDK 27.0.3)
! Some Android licenses not accepted. To resolve this, run: flutter doctor --android-licenses
[✗] iOS toolchain - develop for iOS devices
✗ Xcode installation is incomplete; a full installation is necessary for iOS development.
Download at: https://developer.apple.com/xcode/download/
Or install Xcode via the App Store.
Once installed, run:
sudo xcode-select --switch /Applications/Xcode.app/Contents/Developer
✗ Brew not installed; use this to install tools for iOS device development.
Download brew at https://brew.sh/.
[✓] Android Studio (version 3.0)
✗ Flutter plugin not installed; this adds Flutter specific functionality.
✗ Dart plugin not installed; this adds Dart specific functionality.
[!] Connected devices
! No devices available
! Doctor found issues in 3 categories.
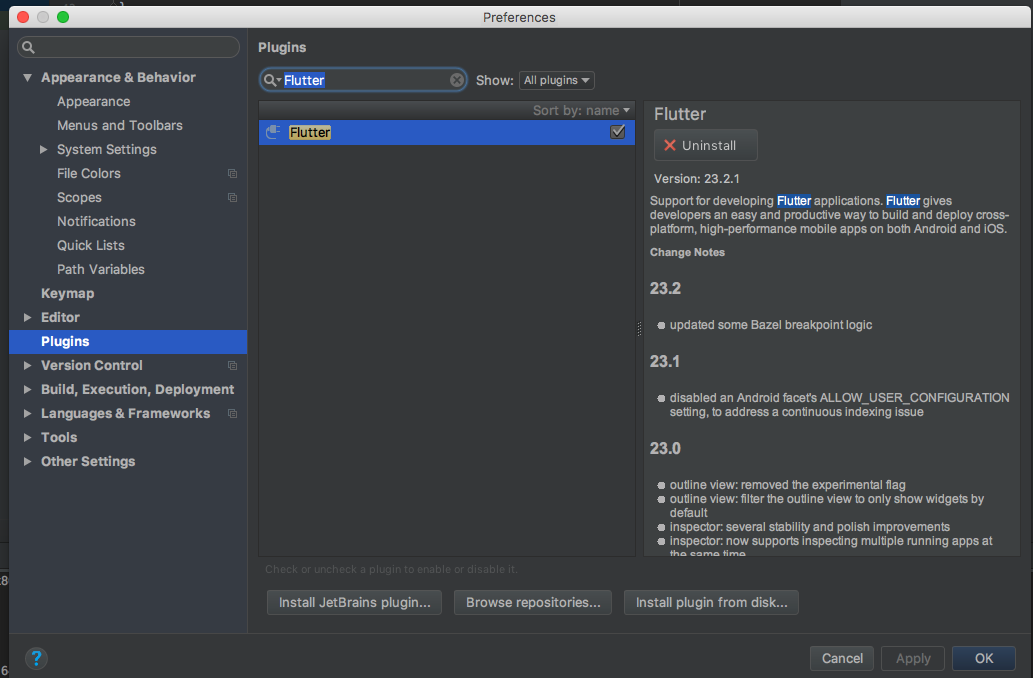
5、安装androidsudio的Flutter插件
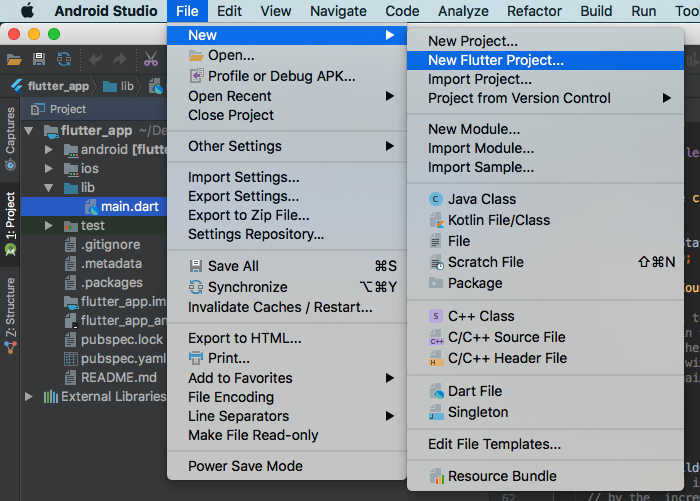
6、使用androidsudio建立Flutter项目
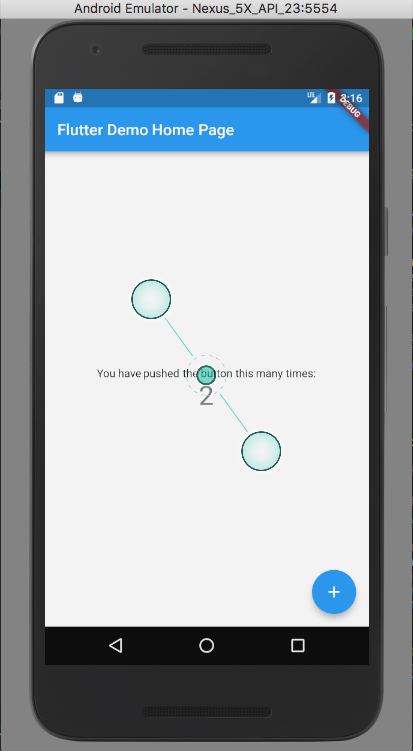
到此Futtler环境就搭建好了,希望能够帮助到您!附上成功的效果图
