MongoDB 已经到了第三篇,同时也是搭建的最后一篇文章了。
MongoDB 的分片搭建。
为什么使用分片?
我们为什么要使用分片呢? 因为现在的数据量越来越大了,为了扩大DB 的性能 以及吞吐量。
MongoDB 分片构架
A MongoDB sharded cluster consists of the following components:
- shard: Each shard contains a subset of the sharded data. Each shard can be deployed as a replica set.
- mongos: The
mongosacts as a query router, providing an interface between client applications and the sharded cluster. - config servers: Config servers store metadata and configuration settings for the cluster. As of MongoDB 3.4, config servers must be deployed as a replica set (CSRS).
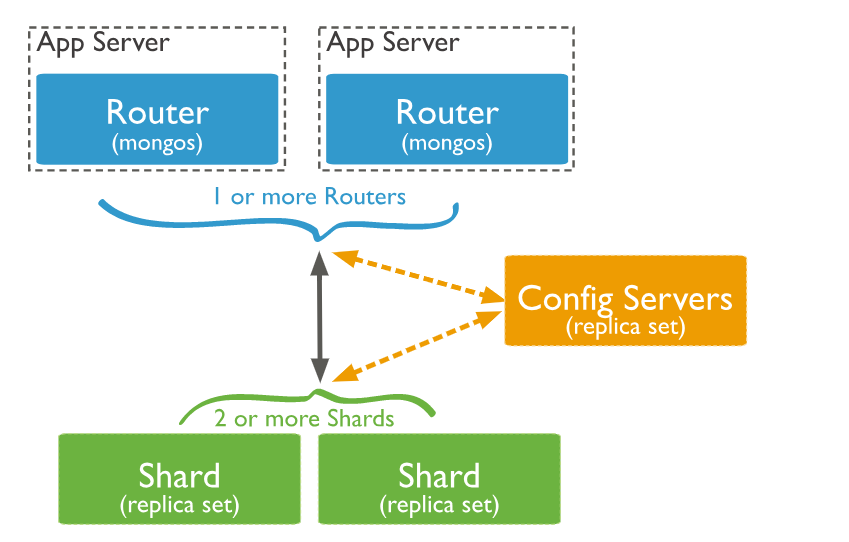
从官网可以看到Mongo DB 分片集群 包括3个部分:
分片节点:真正存储数据的节点
mongos:用处仅仅是用来做路由的,进行客户端和数据库端的连接
config servers:存储一些元数据和配置的信息。从3.4 开始Config 必须是集群的。
下面是配置图:

概念
Shard Keys:
就是分片的key,把相同规则的key 放到同样的分片中,这样在查找数据的时候可以快速的找到。
Chunks
每个分片的大小限制,当一个分片满的时候,会自动向下一个分片进入书写,默认64M。
分片搭建
好了开始我们的搭建之旅吧。
1)配置并启动config节点。
注意Configsvr 这个配置
# 节点1 config1-27037.conf
dbpath=/data/mongodb/config1
port=27037
fork=true
logpath=/data/mongodb/config1/config1.log
replSet=configCluster
configsvr=true

# 节点2 config2-27038.conf
dbpath=/data/mongodb/config2
port=27038
fork=true
logpath=/data/mongodb/config2/config2.log
replSet=configCluster
configsvr=true
启动 并放入集群中。
进入客户端:
./bin/mongo -port 27037
写入配置文件。
var cfg ={"_id":"configCluster", "protocolVersion" : 1, "members":[ {"_id":0,"host":"127.0.0.1:27037"}, {"_id":1,"host":"127.0.0.1:27038"} ] }
初始化配置rs.initiate(cfg)
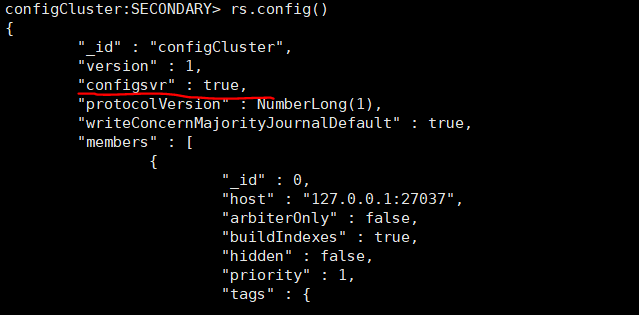
配置成功可以看到configsvr = true

2) 分片节点
shardsvr
# 节点1 shard1-27047.conf
dbpath=/data/mongodb/shard1
port=27047
fork=true
logpath=/data/mongodb/shard1/shard1.log
shardsvr=true

# 节点2 shard2-27048.conf
dbpath=/data/mongodb/shard2
port=27048
fork=true
logpath=/data/mongodb/shard2/shard2.log
shardsvr=true

# 节点3 shard3-27049.conf
dbpath=/data/mongodb/shard3
port=27049
fork=true
logpath=/data/mongodb/shard3/shard3.log
shardsvr=true
添加分片信息。
因为在运行addShard的时候必须要连接到路由节点了,所以我们先开启路由节点
3.开启路由配置路由节点
发现没? 路由节点少了dbpath 证明路由节点不会进行存储数据。
但是多了一个信息,是configdb,是存储config 节点的信息
配置 路由节点 mongos ==============
# 节点 route-27040.conf
port=27040
bind_ip=0.0.0.0
fork=true
logpath=/data/mongodb/route/route.log
configdb=configCluster/127.0.0.1:27037,127.0.0.1:27038
启动
./bin/mongos -f conf/mongo-27040.cfg 注意这里要用mongos。
// 添加分片节点
登录Mongos 节点
sh.status()
sh.addShard("127.0.0.1:27047");
sh.addShard("127.0.0.1:27048");
sh.addShard("127.0.0.1:27049");

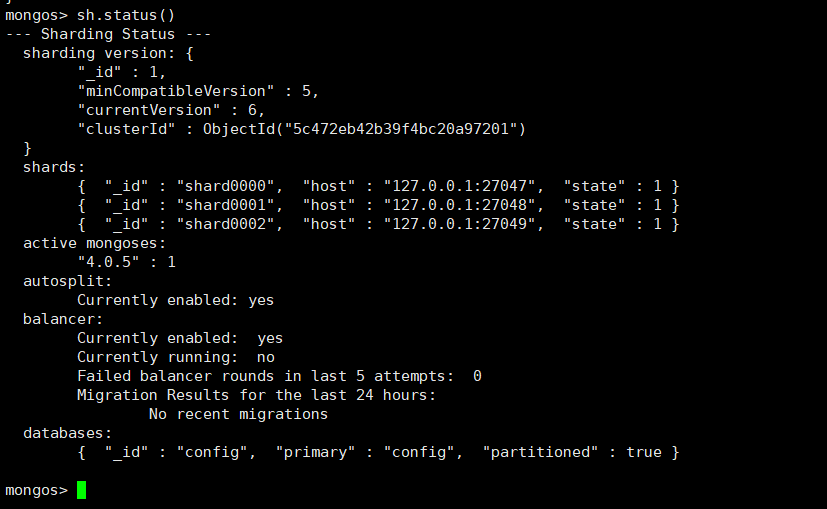
这个时候就可以看到三个分片啦。
为数据库开启分片功能
sh.enableSharding("myth")
为指定集合开启分片功能
sh.shardCollection("myth.emp",{"_id":1})
插入数据 测试:
为了方便,我们把chunk 改小,为了快速的分片。
use config
db.settings.find()
db.settings.save({_id:"chunksize",value:1})
这个时候我们循环插入10万条数据,看下有没有分片。
use myth
for(var i=1;i<=100000;i++){

     db.emp.insert({"_id":i,"name":"copy"+i});

}
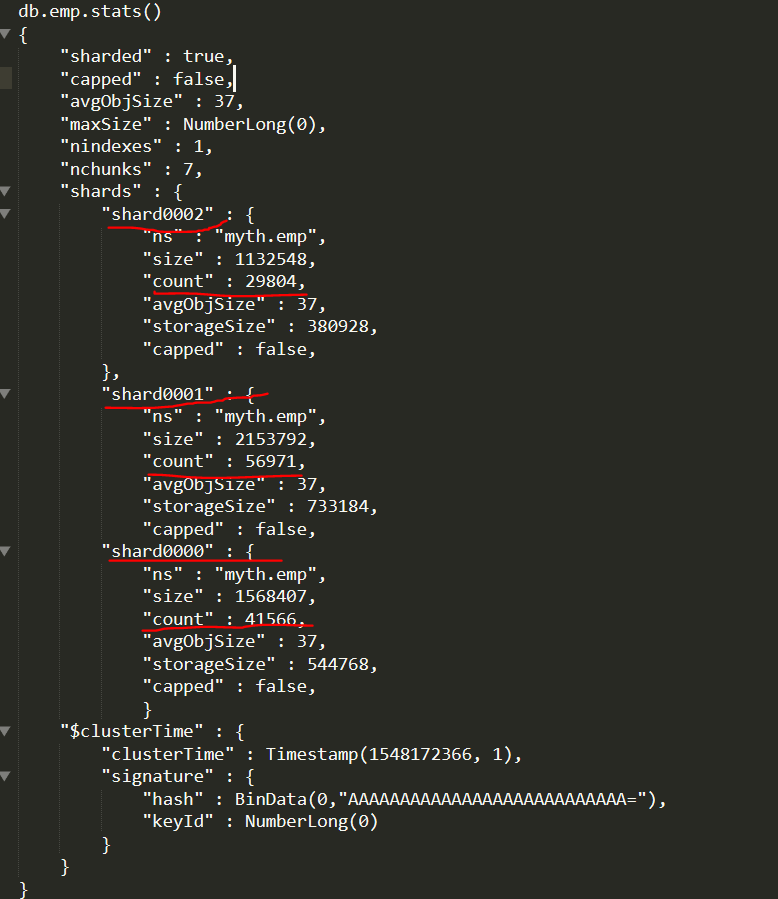
查看结果
可以看到分片的结果。

启动关闭
mongodb的启动顺序是,先启动配置服务器,在启动分片,最后启动mongos.
关闭时,直接killall杀掉所有进程
killall mongod
killall mongos


