官方文档
移动支付:
https://doc.open.alipay.com/doc2/detail?treeId=59&articleId=103563&docType=1
app支付
服务端,app支付demo中还没有,所以参考移动支付。

app支付是移动支付的升级版,配置方面也有一点点区别,我刚使用,所以就摈弃掉老版本了,如果各位看官有兴趣可以自己去捣鼓一下。
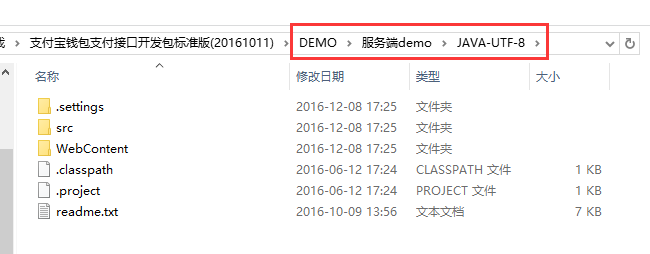
解压“WS_MOBILE_PAY_SDK_BASE_1.0.zip”,进入Java 服务器目录。

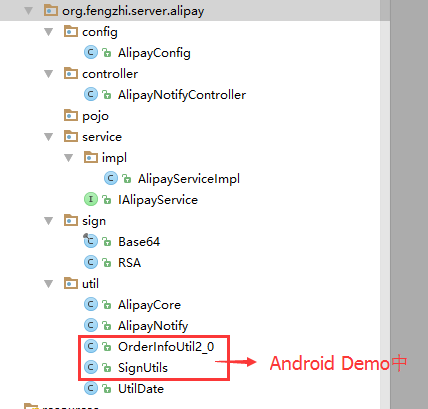
你可以用eclipse直接导入项目,也可以复制相关文件到自己已经创建好的项目中。(我是将文件复制到已经存在的项目中)

然后需要修改alipayconfig类中的参数,支付宝里面使用到的一些不会变化的参数也可以添加到这个类里面来。
package org.fengzhi.server.alipay.config;

/* *
 *类名:AlipayConfig
 *功能:基础配置类
 *详细:设置帐户有关信息及返回路径
 *版本:1.0
 *日期:2016-06-06
 *说明:
 *以下代码只是为了方便商户测试而提供的样例代码,商户可以根据自己网站的需要,按照技术文档编写,并非一定要使用该代码。
 *该代码仅供学习和研究支付宝接口使用,只是提供一个参考。
 */

public class AlipayConfig {
//↓↓↓↓↓↓↓↓↓↓请在这里配置您的基本信息↓↓↓↓↓↓↓↓↓↓↓↓↓↓↓

    //合作身份者ID,签约账号,以2088开头由16位纯数字组成的字符串,查看地址:https://openhome.alipay.com/platform/keyManage.htm?keyType=partner
    public static String partner = "2088******704";

    //商户的私钥,需要PKCS8格式,RSA公私钥生成:https://doc.open.alipay.com/doc2/detail.htm?spm=a219a.7629140.0.0.nBDxfy&treeId=58&articleId=103242&docType=1
    public static String private_key = "QcXe**********************************nKlU1OEbG3L";

    //支付宝的公钥,查看地址:https://openhome.alipay.com/platform/keyManage.htm?keyType=partner
    public static String alipay_public_key = "MIGfMA0****************i3eof7TcZ32oWpwIDAQAB";

    // 签名方式
    public static String sign_type = "RSA";
    // 调试用,创建TXT日志文件夹路径,见AlipayCore.java类中的logResult(String sWord)打印方法。
    public static String log_path = "d://alipay//";
    // 字符编码格式 目前支持 gbk 或 utf-8
    public static String input_charset = "utf-8";
    // 接收通知的接口名
    public static String service = "http://www.alipay.com/pay/verifySign.html";
    public static String app_id = "2016********71";
    // 商家唯一标识,自己随意填写。
    public static String target_id = "alipay************";

//↑↑↑↑↑↑↑↑↑↑请在这里配置您的基本信息↑↑↑↑↑↑↑↑↑↑↑↑↑↑↑
}
客户端获取签名数据和支付宝异步通知
import com.alipay.api.internal.util.AlipaySignature;
import org.fengzhi.server.alipay.config.AlipayConfig;
import org.fengzhi.server.alipay.service.IAlipayService;
import org.fengzhi.server.alipay.util.AlipayNotify;
import org.fengzhi.server.alipay.util.OrderInfoUtil2_0;
import org.springframework.beans.factory.annotation.Autowired;
import org.springframework.stereotype.Controller;
import org.springframework.web.bind.annotation.RequestMapping;
import org.springframework.web.bind.annotation.RequestMethod;
import org.springframework.web.bind.annotation.ResponseBody;

import javax.servlet.http.HttpServletRequest;
import javax.servlet.http.HttpServletResponse;
import java.io.PrintWriter;
import java.util.HashMap;
import java.util.Iterator;
import java.util.Map;
import java.util.logging.Logger;

@Controller
@RequestMapping(value = "/pay", produces = "text/html, charset=utf-8")
public class AlipayNotifyController {

    public Logger log = Logger.getLogger(getClass().getName());

    @Autowired
    public IAlipayService alipayService;


    @ResponseBody
    @RequestMapping(value = "/getOrderInfo", method = RequestMethod.GET)
    public String getOrderInfo(String body, String subject, String outTradeNo, String totalAmount) throws Exception {
        // 请求参数拼接
        Map<String, String> publicData = OrderInfoUtil2_0.buildOrderParamMap(body, subject, outTradeNo, totalAmount);
        // 对参数进行签名
        String sign = OrderInfoUtil2_0.getSign(publicData, AlipayConfig.private_key);
        //
        String orderParam = OrderInfoUtil2_0.buildOrderParam(publicData);
        final String orderInfo = orderParam + "&" + sign;

        return orderInfo;
    }


    @RequestMapping(value = "/verifySign", method = RequestMethod.POST)
    public void verifySign(HttpServletRequest request, HttpServletResponse response) throws Exception {
        PrintWriter out = response.getWriter();

        //获取支付宝POST过来反馈信息
        Map<String, String> params = new HashMap<String, String>();
        Map requestParams = request.getParameterMap();
        for (Iterator iter = requestParams.keySet().iterator(); iter.hasNext(); ) {
            String name = (String) iter.next();
            String[] values = (String[]) requestParams.get(name);
            String valueStr = "";
            for (int i = 0; i < values.length; i++) {
                valueStr = (i == values.length - 1) ? valueStr + values[i]
                        : valueStr + values[i] + ",";
            }
            //乱码解决,这段代码在出现乱码时使用。如果mysign和sign不相等也可以使用这段代码转化
            //valueStr = new String(valueStr.getBytes("ISO-8859-1"), "UTF-8");
            params.put(name, valueStr);
        }

        //异步通知ID
        String notify_id = request.getParameter("notify_id");

        //判断接受的post通知中有无notify_id,如果有则是异步通知。
        if (notify_id != null && notify_id != "") {
            //判断成功之后使用getResponse方法判断是否是支付宝发来的异步通知。
            if (AlipayNotify.verifyResponse(notify_id).equals("true")) {

                // 调用sdk验证签名
                boolean signVerified = AlipaySignature.rsaCheckV1(params, AlipayConfig.alipay_public_key, AlipayConfig.input_charset);

                if (signVerified) {
                    log.info("验签成功!");

                    //商户订单号
                    String outTradeo = new String(request.getParameter("out_trade_no").getBytes("ISO-8859-1"), "UTF-8");
                    // 总金额
                    double totalAmount = new Double(new String(request.getParameter("total_amount").getBytes("ISO-8859-1"), "UTF-8"));
                    // 商家id
                    String sellerId = new String(request.getParameter("seller_id").getBytes("ISO-8859-1"), "UTF-8");
                    // 应用id
                    String appId = new String(request.getParameter("app_id").getBytes("ISO-8859-1"), "UTF-8");

                    //验证业务内容是否正确
                    boolean businessVerified = alipayService.verifyBusinessData(outTradeo, totalAmount, sellerId, appId);

                    if (businessVerified) {
                        //交易状态
                        String tradeStatus = new String(request.getParameter("trade_status").getBytes("ISO-8859-1"), "UTF-8");

                        if (tradeStatus.equals("TRADE_SUCCESS")) {
                            // 支付成功处理方式

                            // 更新商户系统中用户交易订单信息等等。。。

                            out.print("success");
                        } else {
                            // 支付失败处理方式

                            out.print("failure");
                        }
                    }
                }
            } else {
                log.info("验证是否来自支付宝的通知失败!");
            }
        }

    }
}


