点击上方“Python爬虫与数据挖掘”,进行关注
回复“书籍”即可获赠Python从入门到进阶共10本电子书
今
日
鸡
汤
借问酒家何处有,牧童遥指杏花村。
0
前言
前几天给大家分别分享了(入门篇)简析Python web框架FastAPI——一个比Flask和Tornada更高性能的API 框架和(进阶篇)Python web框架FastAPI——一个比Flask和Tornada更高性能的API 框架。今天欢迎大家来到 FastAPI 系列分享的完结篇,本文主要是对于前面文章的补充和扩展。
当然这些功能在实际开发中也扮演者极其重要的角色。

1
中间件的使用
Flask 有 钩子函数,可以对某些方法进行装饰,在某些全局或者非全局的情况下,增添特定的功能。
同样在 FastAPI 中也存在着像钩子函数的东西,也就是中间件 Middleware了。
计算回调时间
# -*- coding: UTF-8 -*-import timefrom fastapi import FastAPIfrom starlette.requests import Requestapp = FastAPI()@app.middleware("http")async def add_process_time_header(request: Request, call_next): start_time = time.time() response = await call_next(request) process_time = time.time() - start_time response.headers["X-Process-Time"] = str(process_time) print(response.headers) return response@app.get("/")async def main(): return {"message": "Hello World"}if __name__ == '__main__': import uvicorn uvicorn.run(app, host="127.0.0.1", port=8000)
请求重定向中间件
from fastapi import FastAPIfrom starlette.middleware.httpsredirect import HTTPSRedirectMiddlewareapp = FastAPI()app.add_middleware(HTTPSRedirectMiddleware)# 被重定向到 301@app.get("/")async def main(): return {"message": "Hello World"}
授权允许 Host 访问列表(支持通配符匹配)
from fastapi import FastAPIfrom starlette.middleware.trustedhost import TrustedHostMiddlewareapp = FastAPI()app.add_middleware( TrustedHostMiddleware, allowed_hosts=["example.com", "*.example.com"])@app.get("/")async def main(): return {"message": "Hello World"}
跨域资源共享
from fastapi import FastAPIfrom starlette.middleware.cors import CORSMiddlewareapp = FastAPI()#允许跨域请求的域名列表(不一致的端口也会被视为不同的域名)origins = [ "https://gzky.live", "https://google.com", "http://localhost:5000", "http://localhost:8000",]# 通配符匹配,允许域名和方法app.add_middleware( CORSMiddleware, allow_origins=origins, allow_credentials=True, allow_methods=["*"], allow_headers=["*"], )
在前端 ajax 请求,出现了外部链接的时候就要考虑到跨域的问题,如果不设置允许跨域,浏览器就会自动报错,跨域资源 的安全问题。
所以,中间件的应用场景还是比较广的,比如爬虫,有时候在做全站爬取时抓到的 Url 请求结果为 301,302, 之类的重定向状态码,那就有可能是网站管理员设置了该域名(二级域名) 不在 Host 访问列表 中而做出的重定向处理,当然如果你也是网站的管理员,也能根据中间件做些反爬的措施。
更多中间件参考 https://fastapi.tiangolo.com/advanced/middleware
2
BackgroundTasks
创建异步任务函数,使用 async 或者普通 def 函数来对后端函数进行调用。
发送消息
# -*- coding: UTF-8 -*-from fastapi import BackgroundTasks, Depends, FastAPIapp = FastAPI()def write_log(message: str): with open("log.txt", mode="a") as log: log.write(message)def get_query(background_tasks: BackgroundTasks, q: str = None): if q: message = f"found query: {q}\n" background_tasks.add_task(write_log, message) return q@app.post("/send-notification/{email}")async def send_notification( email: str, background_tasks: BackgroundTasks, q: str = Depends(get_query)): message = f"message to {email}\n" background_tasks.add_task(write_log, message) return {"message": "Message sent"}
使用方法极其的简单,也就不多废话了,write_log 当成 task 方法被调用,先方法名,后传参。
3
自定义 Response 状态码
在一些特殊场景我们需要自己定义返回的状态码
from fastapi import FastAPIfrom starlette import statusapp = FastAPI()# 201@app.get("/201/", status_code=status.HTTP_201_CREATED)async def item201(): return {"httpStatus": 201}# 302@app.get("/302/", status_code=status.HTTP_302_FOUND)async def items302(): return {"httpStatus": 302}# 404@app.get("/404/", status_code=status.HTTP_404_NOT_FOUND)async def items404(): return {"httpStatus": 404}# 500@app.get("/500/", status_code=status.HTTP_500_INTERNAL_SERVER_ERROR)async def items500(): return {"httpStatus": 500}if __name__ == '__main__': import uvicorn uvicorn.run(app, host="127.0.0.1", port=8000)
这么一来就有趣了,设想有个人写了这么一段代码
async def getHtml(self, url, session): try: async with session.get(url, headers=self.headers, timeout=60, verify_ssl=False) as resp: if resp.status in [200, 201]: data = await resp.text() return data except Exception as e: print(e) pass
那么就有趣了,这段获取 Html 源码的函数根据 Http状态码 来判断是否正常的返回。那如果根据上面的写法,我直接返回一个 404 或者 304 的状态码,但是响应数据却正常,那么这个爬虫岂不是什么都爬不到了么。所以,嘿嘿你懂的!!
4
关于部署
部署 FastAPI 应用程序相对容易
Uvicorn
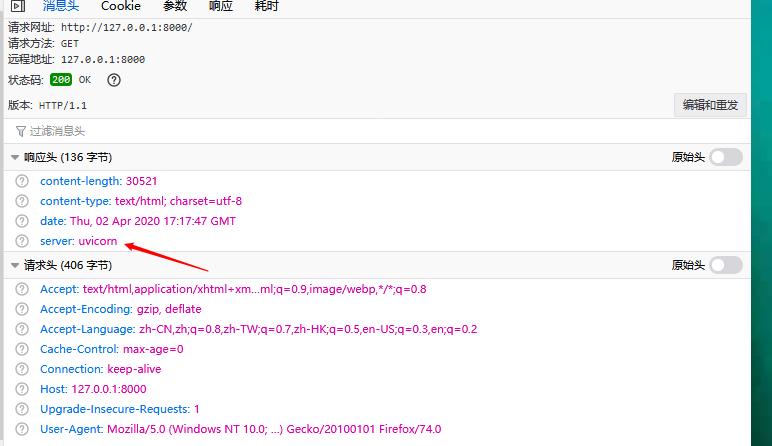
FastAPI 文档推荐使用 Uvicorn 来部署应用( 其次是 hypercorn),Uvicorn 是一个基于 asyncio 开发的一个轻量级高效的 Web 服务器框架(仅支持 python 3.5.3 以上版本)
安装
pip install uvicorn
启动方式
uvicorn main:app --reload --host 0.0.0.0 --port 8000
Gunicorn
如果你仍然喜欢用 Gunicorn 在部署项目的话,请看下面
安装
pip install gunicorn
启动方式
gunicorn -w 4 -b 0.0.0.0:5000 manage:app -D

Docker部署
采用 Docker 部署应用的好处就是不用搭建特定的运行环境(实际上就是 docker 在帮你拉取),通过 Dockerfile 构建 FastAPI 镜像,启动 Docker 容器,通过端口映射可以很轻松访问到你部署的应用。
Nginx
在 Uvicorn/Gunicorn + FastAPI 的基础上挂上一层 Nginx 服务,一个网站就可以上线了,事实上直接使用 Uvicorm 或 Gunicorn 也是没有问题的,但 Nginx 能让你的网站看起来更像网站。
撒花 !!!
**********---**--****-------------- End **********---**--****--------------
往期精彩文章推荐:

欢迎大家点赞,留言,转发,转载,****感谢大家的相伴与支持
想加入Python学习群请在后台回复【入群】
万水千山总是情,点个【在看】行不行
/今日留言主题/
说一两个你知道的Python框架吧~
本文分享自微信公众号 - Python爬虫与数据挖掘(crawler_python)。
如有侵权,请联系 support@oschina.cn 删除。
本文参与“OSC源创计划”,欢迎正在阅读的你也加入,一起分享。


