22.13 搭建git服务器
**前言:**github毕竟是公开的,而私有仓库又得花钱买。所以我们可以想办法搭建一个私有的,只自己公司使用的。Gitlab是个不错的选择。在介绍它之前,先讲述一下命令行的git服务器
找一台服务器,首先要安装git;
yum install -y git
添加git用户,并且设置shell为/usr/bin/git-shell,目的是为了不让git用户远程登陆
useradd -s /usr/bin/git-shell git
cd /home/git
创建authorized_keys文件,并更改属主、属组和权限,用来存客户端机器上的公钥
mkdir .ssh
touch .ssh/authorized_keys
chown -R git.git .ssh
chmod 600 .ssh/authorized_keys
定好存储git仓库的目录,比如 /data/gitroot
mkdir /data/gitroot
cd /data/gitroot
git init --bare sample.git // 会创建一个裸仓库,裸仓库没有工作区,因为服务器上的Git仓库纯粹是为了共享,所以不让用户直接登录到服务器上去改工作区,并且服务器上的Git仓库通常都以.git结尾
chown -R git.git sample.git
以上操作是在git服务器上做的,平时git服务器是不需要开发人员登录修改代码的,它仅仅是充当着一个服务器的角色,就像github一样,平时操作都是在我们自己的pc上做的
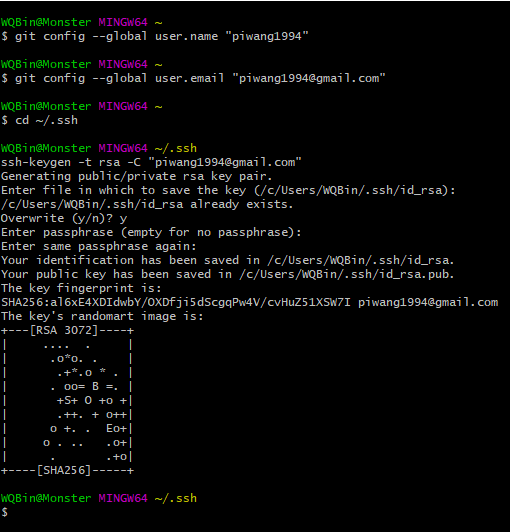
首先要把客户端上的公钥放到git服务器上/home/git/.ssh/authorized_keys文件里
在客户端上(自己pc)克隆远程仓库
git clone git@ip:/data/gitroot/sample.git
此时就可以在当前目录下生成一个sample的目录,这个就是我们克隆的远程仓库了。进入到这里面,可以开发一些代码,然后push到远程。
[root@3clone ~]# rpm -qa |grep git net-tools-2.0-0.17.20131004git.el7.x86_64 linux-firmware-20160830-49.git7534e19.el7.noarch crontabs-1.11-6.20121102git.el7.noarch [root@3clone ~]# yum install -y git ##安装git; Complete! [root@3clone ~]# useradd -s /usr/bin/git-shell git ##创建用户git,并-s指定其登录脚本为git-shell 不允许其登录; [root@3clone ~]# tail -n1 /etc/passwd git:x:1000:1000::/home/git:/usr/bin/git-shell [root@3clone ~]# cd /home/git/ ##进入到git用户家目录下,创建密钥文件; [root@3clone git]# mkdir .ssh [root@3clone git]# touch .ssh/authorized_keys [root@3clone git]# chown -R git:git .ssh/ [root@3clone git]# chmod 600 .ssh/authorized_keys [root@3clone git]# vim .ssh/authorized_keys ##将客户端的公钥写入到里面;和github是类似的。 [root@3clone git]# mkdir /data/gitroot ##创建仓库文件夹,并修改所属组和所属主;然后初始化仓库! [root@3clone git]# cd /data/gitroot [root@3clone gitroot]# git init --bare sample.git Initialized empty Git repository in /data/gitroot/sample.git/ [root@3clone gitroot]# chown -R git:git sample.git/
客户端60.11进行测试:
[root@Dasoncheng tmp]# git clone git@192.168.60.13:/data/gitroot/sample.git  ##克隆仓库,注意路径正确;
Cloning into 'sample'...
warning: You appear to have cloned an empty repository.
[root@Dasoncheng tmp]# cd sample/  ##进入仓库里面;
[root@Dasoncheng sample]# git branch   ##注意到这里了没有,并没有显示分支信息
[root@Dasoncheng sample]# cp /etc/fstab .
[root@Dasoncheng sample]# git add .
[root@Dasoncheng sample]# git commit -m "add a new repository"  ##尝试提交一个文件;
[master (root-commit) 633c863] add a new repository
 1 file changed, 11 insertions(+)
 create mode 100644 fstab
[root@Dasoncheng sample]# git push
warning: push.default is unset; its implicit value is changing in
Git 2.0 from 'matching' to 'simple'. To squelch this message
and maintain the current behavior after the default changes, use:

  git config --global push.default matching

To squelch this message and adopt the new behavior now, use:

  git config --global push.default simple

See 'git help config' and search for 'push.default' for further information.
(the 'simple' mode was introduced in Git 1.7.11. Use the similar mode
'current' instead of 'simple' if you sometimes use older versions of Git)

No refs in common and none specified; doing nothing.
Perhaps you should specify a branch such as 'master'.
fatal: The remote end hung up unexpectedly
error: failed to push some refs to 'git@192.168.60.13:/data/gitroot/sample.git'
##这里被警告了:主要是没有上传的确认分支!
[root@Dasoncheng sample]# git push origin master  ##这里指定分支master;
Counting objects: 3, done.
Delta compression using up to 2 threads.
Compressing objects: 100% (2/2), done.
Writing objects: 100% (3/3), 504 bytes | 0 bytes/s, done.
Total 3 (delta 0), reused 0 (delta 0)
To git@192.168.60.13:/data/gitroot/sample.git
 * [new branch]      master -> master
[root@Dasoncheng sample]# echo aaa >a.txt  ##试一试再次推送更新;
[root@Dasoncheng sample]# git add a.txt
[root@Dasoncheng sample]# git commit -m "add a.txt"
[master 457cc84] add a.txt
 1 file changed, 1 insertion(+)
 create mode 100644 a.txt
[root@Dasoncheng sample]# git push
……
To git@192.168.60.13:/data/gitroot/sample.git
   633c863..457cc84  master -> master
##这里就上传成功了,不需要再次指定分支了;
测试完成之后,接下来呢 就可以在自己pc上面克隆repository然后共同编辑了哦!


